# Challenge 3: Integrate Azure AD into the SCM Contacts API
# Here is what you will learn 🎯
- Create Azure AD's client and server applications to integrate Azure AD into the SCM Contacts API
- Configure and deploy the SCM Contacts API to Azure with Azure AD integration
In the previous challenges you have learned some basics about the OpenID Connect and OAuth2 flows. You have seen how you can sign in users and how to acquire an access token for an Azure AD's protected resource. In this challenge we will integrate Azure AD into the SCM Contacts API step by step. Of course we will use Azure Pipelines to build and deploy the SCM Contacts API to Azure.
# Table Of Contents
- Create the Azure AD Client and Server Application
- Validate the Applications in Azure AD
- Protect SCM Contacts API with Azure AD
- Validate the SCM Contacts API
- Pull Request
- Wrap-Up
# Create the Azure AD Client and Server Application
In Challenge 2 you have already seen how to create an Azure AD client application to sign in users and how to create an API application that exposes OAuth2 permissions. We have to do the same for the sample application.
There is already a script available in the repository to create both applications for you. It is located here you will need to run it in a bash/Shell environment): day5/apps/infrastructure/scripts/aad-integration.sh.
The script creates the server application first and then the client application for the sample application. It also uses a oauth2-permissions.json file where all needed OAuth2 permission are defined.
# Run the script
Open a shell, use Azure CLI to connect to the Azure AD Tenant where you want to create the applications (you can also use the Azure Cloud Shell). If you have created a new Azure AD that is not linked to an Azure subscription, add the additional option --allow-no-subscription:
az login --allow-no-subscription
You must run the script twice:
- once for creating the applications for the
Developmentstage - once for creating the applications for the
Testingstage
Use the following parameters to run the script for the Development stage:
| Parameter | Value |
|---|---|
| API-APP-NAME | scmapi-dev |
| API-APP-URI | http://scmapi-dev (opens new window) |
| UI-APP-NAME | scmfe-dev |
| UI-APP-REPLY-URL | the url of your SCM Frontend deployment of stage Development (This is the Url to the static website e.g. https://scmfedev.z20.web.core.windows.net) |
Use the following parameter for the Testing stage:
| Parameter | Value |
|---|---|
| API-APP-NAME | scmapi-test |
| API-APP-URI | http://scmapi-test (opens new window) |
| UI-APP-NAME | scmfe-test |
| UI-APP-REPLY-URL | the url of your SCM Frontend deployment of stage Testing(This is the Url to the static website e.g. https://scmfetest.z20.web.core.windows.net) |
Navigate to the directory day5/apps/infrastructure/scripts which contains the script and the oauth2-permissions.json configuration file.
Run the script twice:
- once for the
Development - once for the
Testingstage.
TIP
📝 Note down the UI AppId and API AppId from the output after each run!
/scripts> ./aad-integration.sh <API-APP-NAME> <API-APP-URI> <UI-APP-NAME> <UI-APP-REPLY-URL>
The output:
...
...
UI AppId: <please note down>
API AppId <please note down>
# Validate the Applications in Azure AD
After you have run the script twice, navigate to your Azure AD and inspect the previously created applications. You should see four new applications.
# Protect SCM Contacts API with Azure AD
TIP
📝 If you started with the checkpoint please continue here.
Now that we have created the needed applications in Azure AD, it's time to deploy the SCM Contacts API to Azure with Azure AD integration to protect the API. After the deployment the API can only be accessed with a valid access token issued by Azure AD.
Yesterday we have created CI/CD builds for all services. Today we want to continue with Azure Pipelines to deploy all services with Azure AD integration.
- Create and checkout a new branch named features/scmcontactsaad in your Azure Repo.
TIP
📝Make sure that you create the branch in the Azure Repo where you imported the Azure Developer College's sources yesterday.
Open the build file
scm-contacts-ci.yamlunderday4/apps/pipelinesand change everything fromday4today5Save the definition, commit the changes and push the branch to your remote repository
Navigate to your Azure DevOps Project and run the pipleine
SCM-Contacts-CItargeting the branchfeatures/scmcontactsaadGo to Releases and edit
SCM-Contacts-CDAdd the following variables and map it to the ARM Template's parameters:
Name Value ARM Template Parameter Stage AadInstance https://login.microsoftonline.com (opens new window) aadInstance Development AadClientId API AppId, the value that you received from the output when you created the Azure AD application aadClientId Development AadTenantId The id of your Azure AD Tenant aadTenantId Development AadDomain The domain name of your Azure AD e.g. azuredevcollege.onmicrosoft.com aadDomain Development AadClientIdUri http://scmapi-dev (opens new window) aadClientIdUri Development Name Value ARM Template Parameter Stage AadInstance https://login.microsoftonline.com (opens new window) aadInstance Testing AadClientId API AppId, the value that you received from the output when you created the Azure AD application for stage Testing aadClientId Testing AadTenantId The id of your Azure AD Tenant aadTenantId Testing AadDomain The domain name of your Azure AD e.g. azuredevcollege.onmicrosoft.com aadDomain Testing AadClientIdUri http://scmapi-test (opens new window) aadClientIdUri Testing ARM Template override template parameters:
-sku $(AppServicePlanSKU) -webAppName $(ApiAppName) -use32bitworker $(Use32BitWorker) -alwaysOn $(AlwaysOn) -applicationInsightsName $(ApplicationInsightsName) -sqlServerName $(SqlServerName) -sqlUserName $(SqlAdminUserName) -sqlPassword $(SqlAdminPassword) -sqlDatabaseName $(SqlDatabaseName) -serviceBusNamespaceName $(ServiceBusNamespaceName) -aadInstance $(AadInstance) -aadClientId $(AadClientId) -aadTenantId $(AadTenantId) -aadDomain $(AadDomain) -aadClientIdUri $(AadClientIdUri)Run the release build
# Validate the SCM Contacts API
Now that you have deployed the SCM Contacts API to your environment on Azure it's time to browse the Swagger UI of the API on your Development stage. Open the Azure portal, go to the API App and browse to the Swagger UI. Try to execute a GET request. You will notice that you get back an HTTP response code 401:
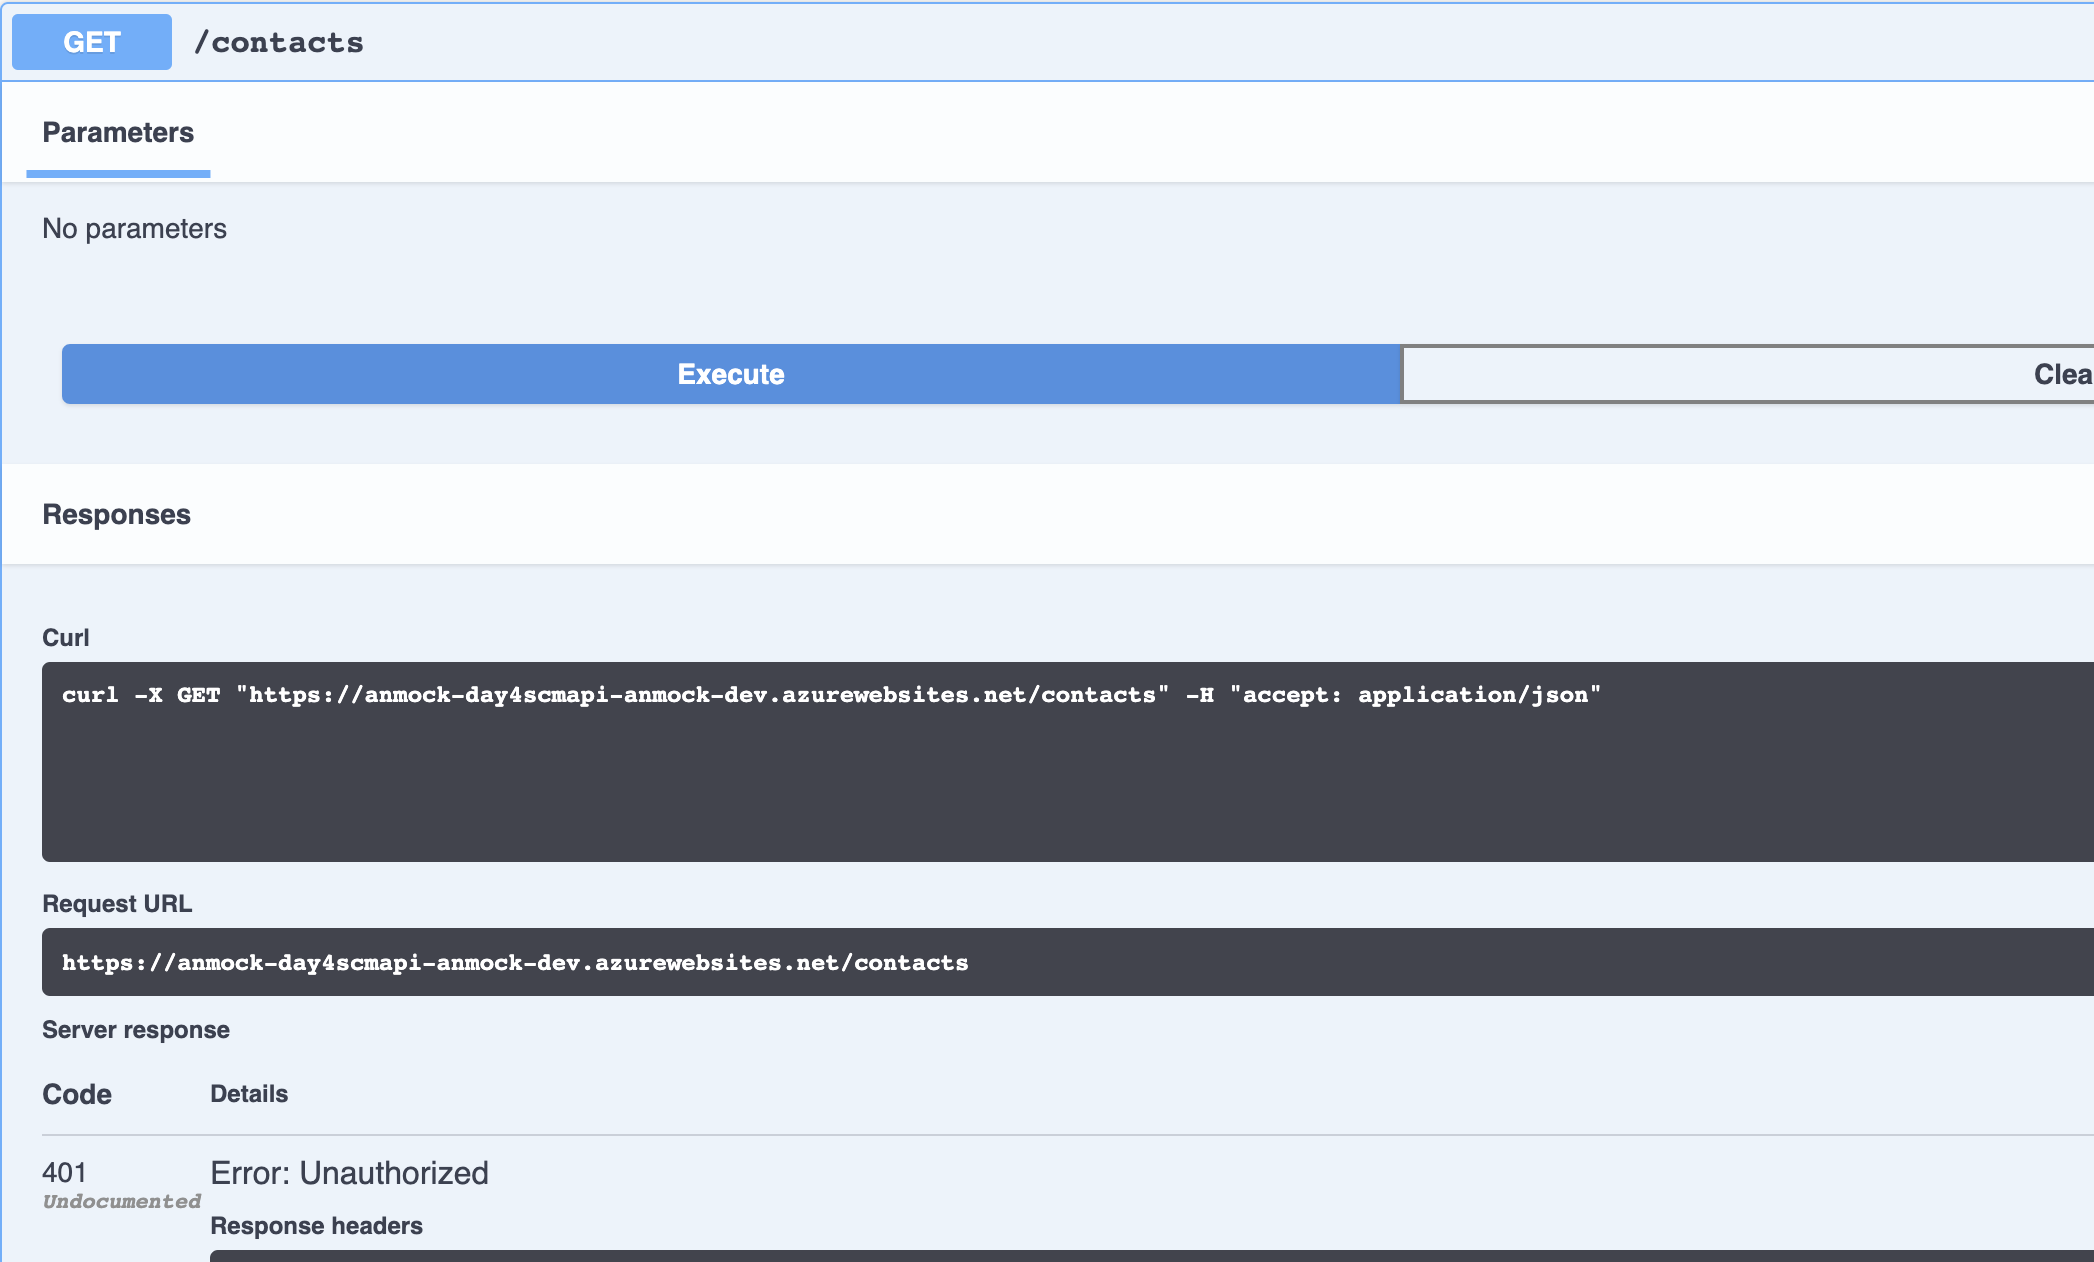
That is what we expected! Your SCM Contacts API now requires a valid access token. To acquire a valid access token we can create a simple request as we already did in challenge-2.
WARNING
We have enabled the Implicit Flow for the front end application in Azure AD. The flow can sometimes be useful to get a token without writing source code. This should be avoided in productive environments.
We use the Token Echo Server again to request an access token from Azure AD for the SCM Contacts API. The tool is listening on port 5001 on your local machine. Tokens are accepted on the route http://localhost:5001/api/tokenechofragment. Before we can start the token request we have to add the url http://localhost:5001/api/tokenechofragment as a valid reply url to the client Azure AD application. Go to your Azure AD in the Azure portal, open the client application scmfe-devthat you created for the Development stage and add the url. You can add the reply url under Authentication --> Web --> Redirect URIs --> Add URI

Open a shell and run the Token Echo Server from day5/apps/token-echo-server
dotnet run
Replace TENANT_ID with your AAD Tenant Id and APPLICATION_ID with the client application's Id (this is the id UI AppId that you received when you created the first client application). Open a browser and paste the request:
https://login.microsoftonline.com/TENANT_ID/oauth2/v2.0/authorize?
client_id=APPLICATION_ID
&response_type=id_token+token
&redirect_uri=http%3A%2F%2Flocalhost%3A5001%2Fapi%2Ftokenechofragment
&response_mode=fragment
&scope=openid%20profile%20http%3A%2F%2Fscmapi-dev%2FContacts.Read%20http%3A%2F%2Fscmapi-dev%2FContacts.Create%20http%3A%2F%2Fscmapi-dev%2FContacts.Update%20http%3A%2F%2Fscmapi-dev%2FContacts.Delete%20http%3A%2F%2Fscmapi-dev%2FVisitReports.Create%20http%3A%2F%2Fscmapi-dev%2FVisitReports.Update%20http%3A%2F%2Fscmapi-dev%2FVisitReports.Update%20http%3A%2F%2Fscmapi-dev%2FVisitReports.Delete
&nonce=1234
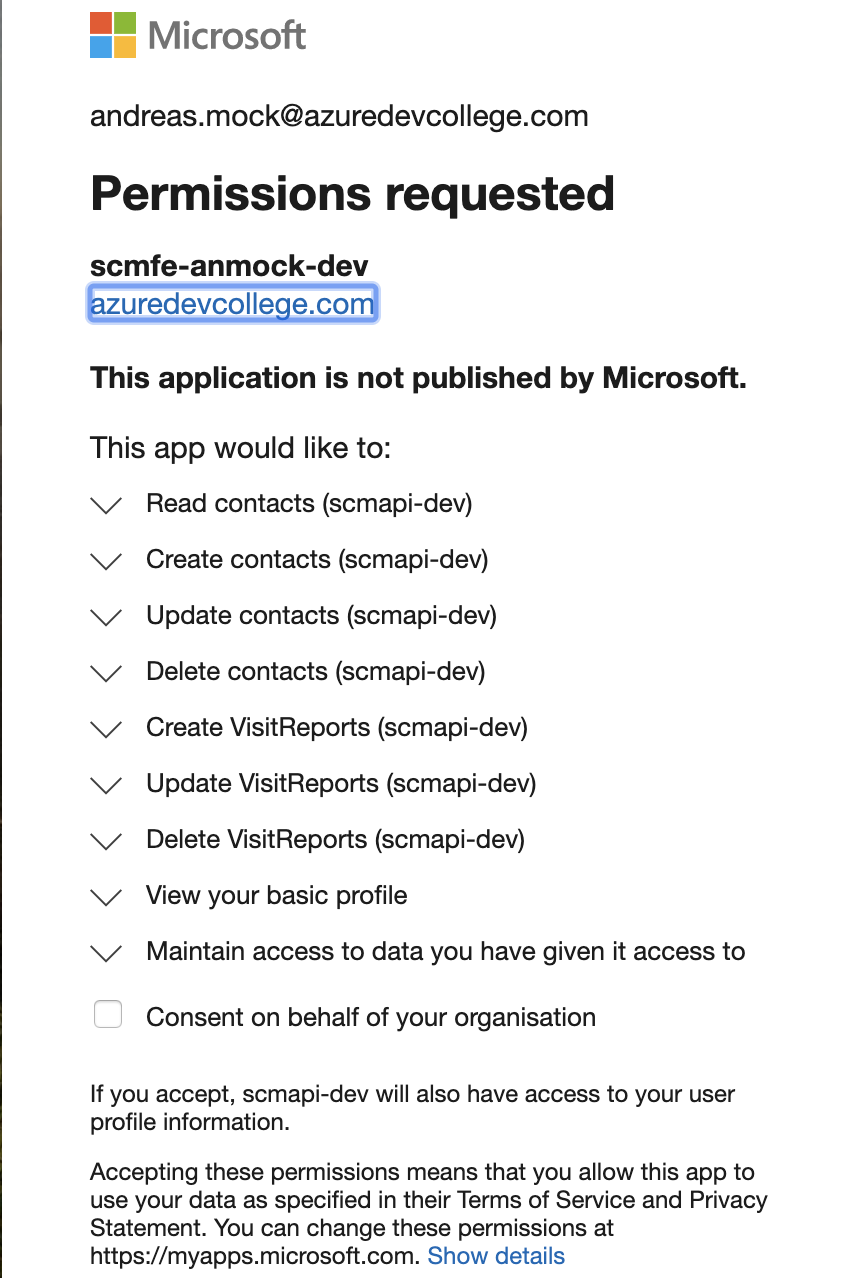
After executing the request and you have signed in, Azure AD shows you a consent page and you have to grant access for the requested API permissions.
After giving consent, have a look at your browser's address bar. The access_token is in the fragment of the url and should look something like this:
http://localhost:5001/api/tokenechofragment#access_token=eyJ0eX...&token_type=Bearer&expires_in=3599&scope=openid+profile+User.Read+email&id_token=eyJ0eXAiOi...&session_state=0f76c823-eac5-4ec0-9d4a-edf40b783583
TIP
📝Make sure to only copy the access_token, not the full remainder of the string!
Go to https://jwt.ms (opens new window), paste the token and have a look at the decoded token.
# Authorize the request
In the Swagger UI of the SCM Contacts API you see an Authorize button. After clicking the button you can set your valid access_tokenthat is added to the authentication header with each API request.
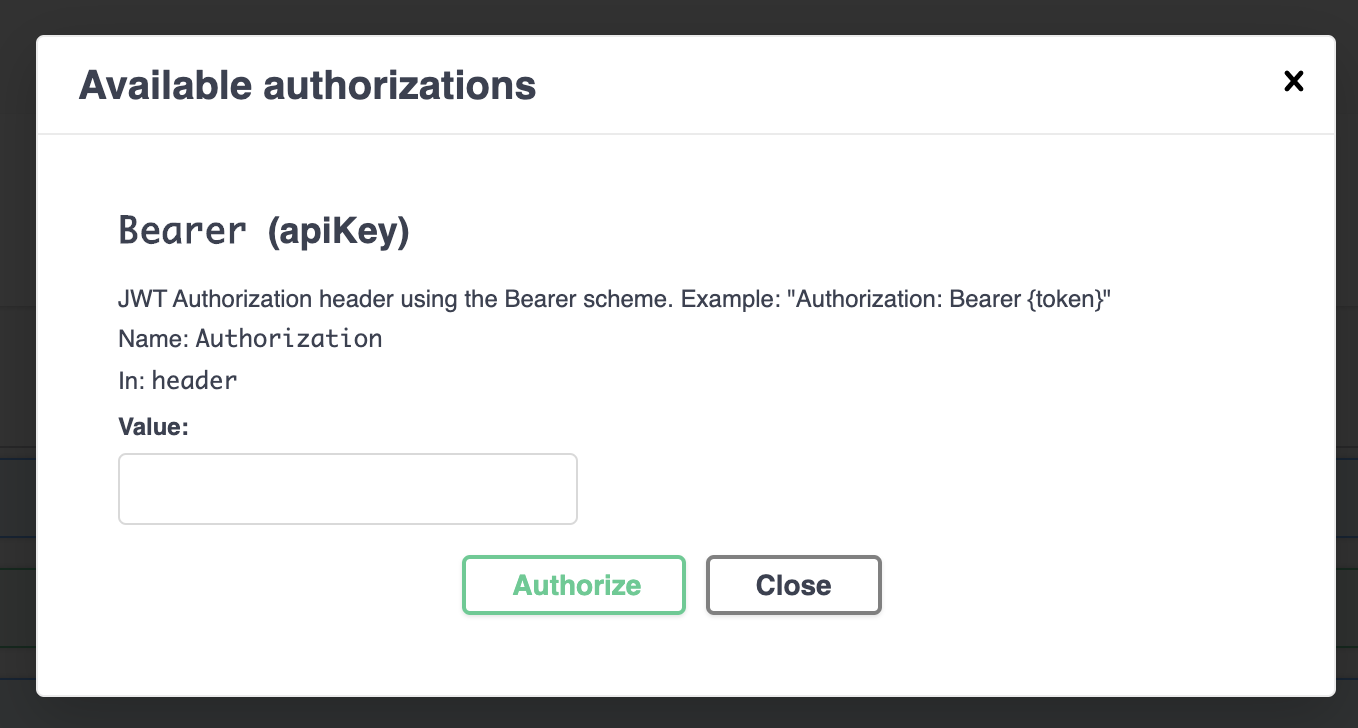
Add your access_token as follows:
Bearer <your access_token>
Authorize the Swagger UI and retry a the GET request. If you want you can now add contacts for the signed in user.
# Pull Request
Create a Pull Request and merge your changes into the master branch.
# Wrap-Up
In this challenge we have adjusted our deployment process to protect the SCM Contacts API with Azure AD. ASP.NET Core comes with an Authentication Middleware that must only be configured to require a JWT Bearer token for each request. Have a look at the code and see how the Middleware is configured.
To map the required OAuth2 permission to an API Route ASP.NET Core provides an attribute where you can specify the required policy.
[Authorize(Policy = AuthorizationScopes.ContactsRead)]