# Challenge 0: Create a GitHub organization
⏲️ Est. time to complete: 30 min. ⏲️
# Here is what you will learn 🎯
In this challenge you will learn how to:
- Create a GitHub organization
- Invite organization members and assign roles
- Create your first repository
- Create a team and assign permissions to a repository
# Table Of Contents
- Create a GitHub organization
- Invite organization members an assign roles
- Create your first repository
- Create a team and assign permission
- Clone the repository to your local machine
- Useful Links
# Create a GitHub organization
A GitHub organization is a shared account where business and open-source projects can collaborate across many projects. Owners and Administrators can manage member access to the organization's data and projects with security and administrative features. In the first part of this challenge we are going to create our own GitHub organization which we use for all challenges today.
TIP
📝 If you don't have a GitHub account, you need to create one. You can create your account here (opens new window).
First we need to login to GitHub (opens new window).
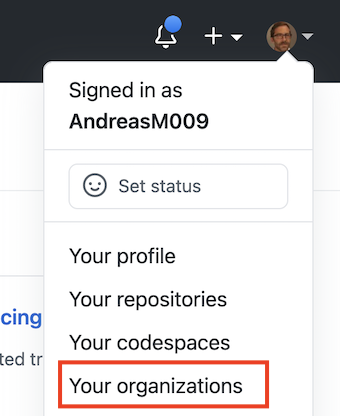
Next, navigate to Your organizations and create a new oragnization.
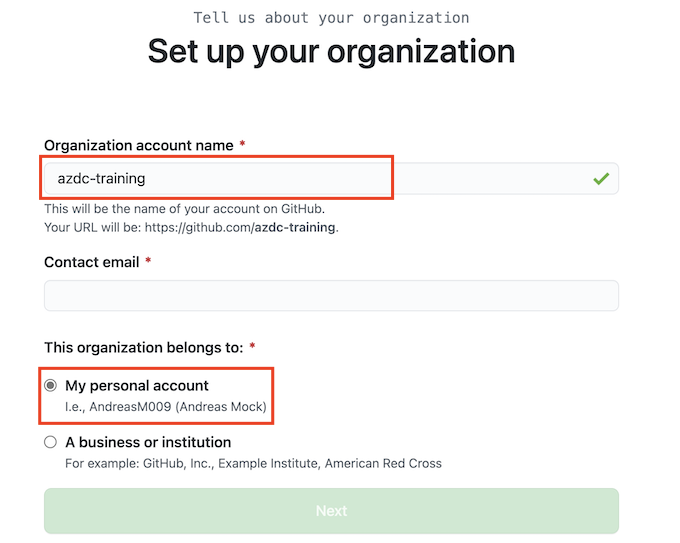
First you have to choose a plan for your organization. For today a free plan is enough. Next, you need to specify a global unique name for your organization an tell GitHub that the organization belongs to your personal account. After you have set all needed values, click Next and complete the setup. We don't need to add organization members now, because we want to do that in the next part of this challenge.
# Invite organization members an assign roles
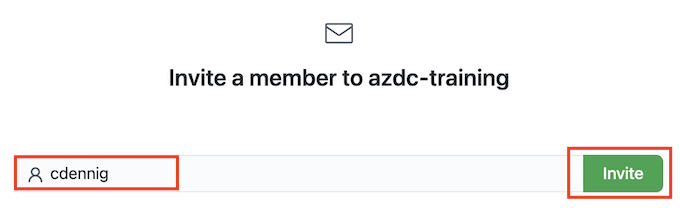
At the moment you are the Owner and the only one who can access the newly created organization. You can check this by navigating to the People section in the GitHub's navigation bar. The members list shows each member and their access level. Owners have full access to teams, repositories and settings of the organization. Of course we want to work with colleagues. We are now looking at how we can add our colleagues to the organization and what access rights we can give them. To add a new member, navigate to the People section, enter the invitee's email or GitHub handle and click Invite Member.
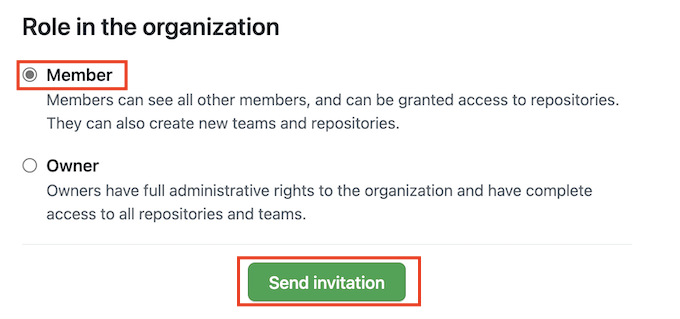
Next, you need to specify the invitee's organization role.
Member: Members can see all other members and can be granted access to repositories. They can create teams and repositories.
Owner Owners have full administrative rights to the organization and have complete access to all repositories and teams.
Actually, at least two people should be assigned to the Owner role. In this training, however, it is enough that there is only one owner. Therefore we assign the role Member to the invited person.
After clicking Send invitation the invitee gets an email where the invitation can be accepted. When we navigate back to the People section, we see that there is one pending invitation. The pending invitation state of the invitee is going to be changed as soon the invitee has accepted the invitation. The status of the invitee's pending invitation will be changed once the invitee has accepted the invitation.
Wait until the invitee has accepted the invitation and verified that they have access to the organization.
TIP
📝 _If you want, the invitee can check if they can create a repository. It is be possible, because the Member role was assigned. But it is not possible to change settings of the organisation. Therefore the Settings section in the GitHub's navigation bar is not displayed. _
# Outside collaborators
When you look at the People section there is an entry named Outside collaborators under the Organization permissions. So, what is an Outside collaborator? An Outside collaborator is a person who isn't explicitly a member of your organization, but who has Read, or Admin permissions to one or more repositories of your organization. This is useful when, for example, we are working with partner companies on a project but don't want partners to have organization-level access. Partners cannot view members of the organization and cannot create repositories. We only give partners access to selected repositories. We will look at how to give Outside collaborators access to repositories later.
# Member privileges
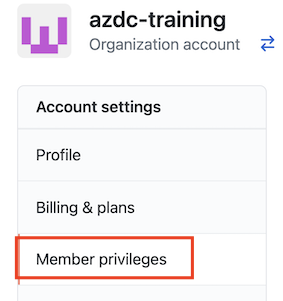
As an organization Owner, we can manage Members' privileges. Navigate to the organization's Settings section in the GitHub's navigation bar and click Manage privileges.
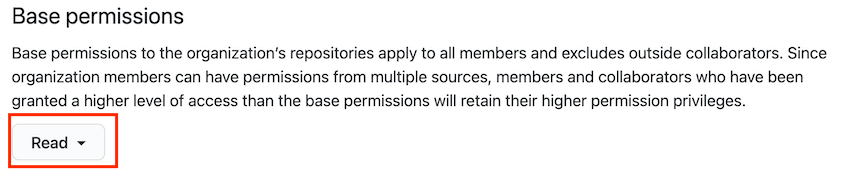
Here you can manage what members of the organization are allowed to do. For example, if you want to control access to repositories for members, we need to look at base permissions. Per default, members can clone and pull all repositories within the organization, regardless if the repositories are public or private. If we want to restrict access to repositories as owner, we can set the value None. With this setting it is only possible to clone and pull public repositories. If members need access to a repository, we need to add them to teams or make them collaborators on individual repositories. But it also works the other way around, members can be assigned more rights. With Write and Admin members will get more access rights to each repository within the organization.
For this challenge we leave it at the default setting.
Take your time and have a look at the other settings and feel free to discuss them within your team mates.
# Create your first repository
Now it is time to create your first repository and clone it to your local machine. Navigate to the Repositories section in the GitHub's navigation bar and click the green New button. Give the repository a name e.g. myfirst-repo (If you want, you can add a description). At this time, we want to make the repository private and choose later who can commit.
TIP
📝 Since we have already invited a colleague as a member of the organization and used the default Read setting as Base permission in the member privileges, the invited colleague can clone and pull the newly created repository.
Please initialize the repository with a README file.
TIP
📝 If you want, you can initialize the repository with a .gitignore file, by selecting a template.
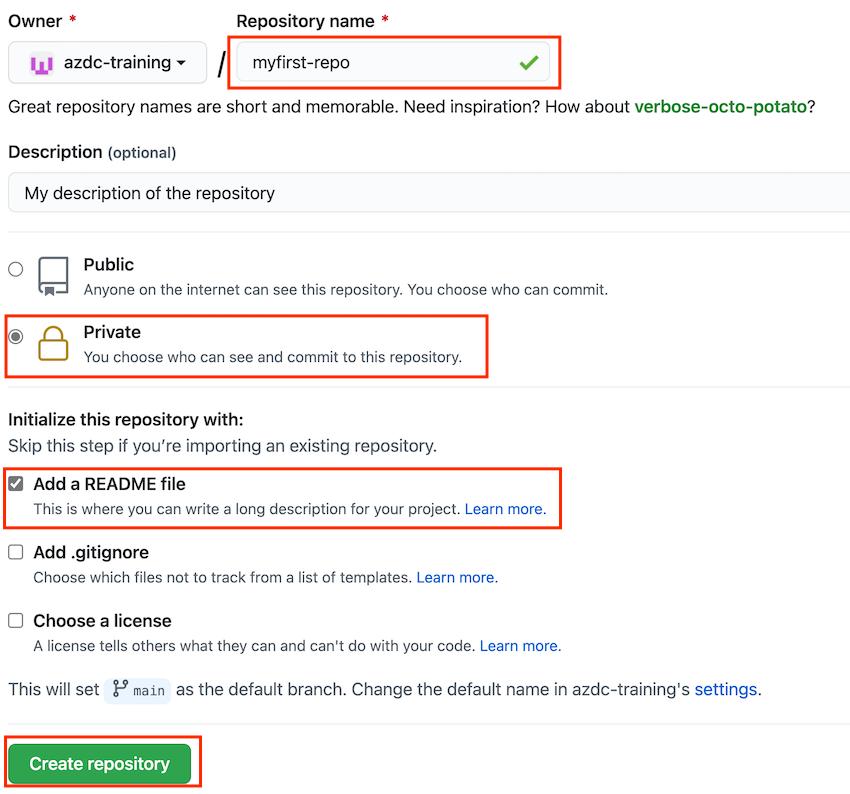
Click the Create repository button to create the repository.
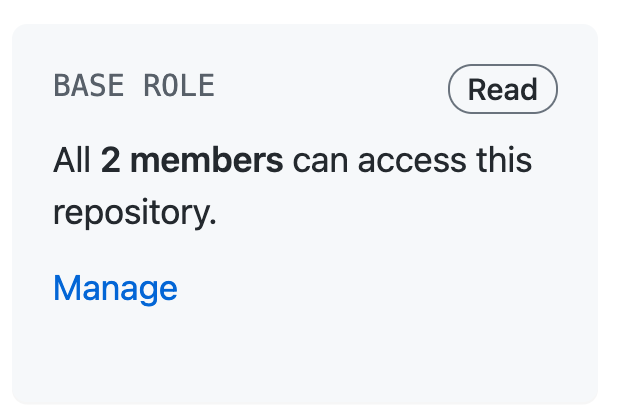
A GitHub repository contains all of your project's files and each file's revision history. Currently, 2 people have access to the repository. You, as owner, have full access and your invited colleague has read access. Of course we want to work together on the repository. That's why we have to give the colleague write permissions. Therefore navigate to the repository's settings section and go to Manage access.
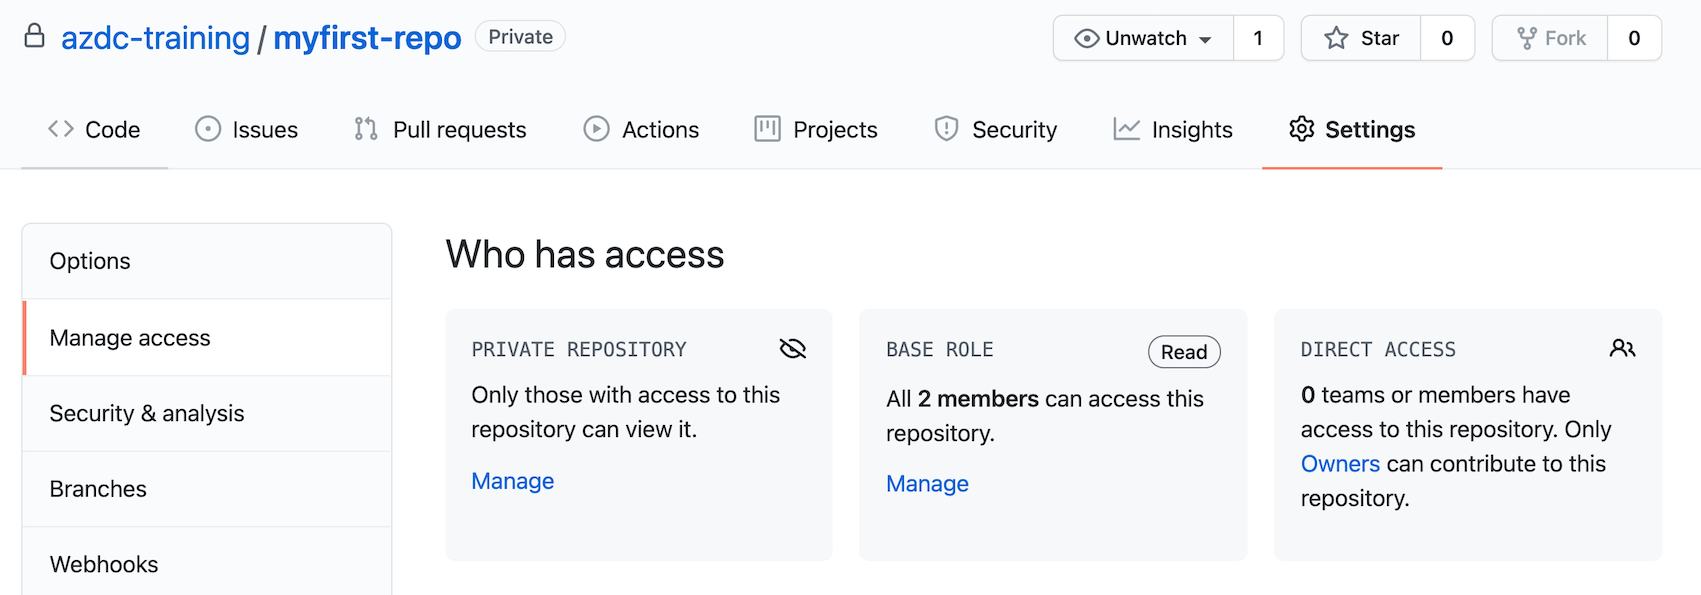
In the Who has access area you can see that the repository is a private one. Two members have Read access to the repository. You are the Owner of the repository and your invited colleague has Read access to it, because we have given members Read access to all repositories in the Manage privileges settings of the organization.
There are two ways to give someone more access than the Base permission allows.
People: Assigning individual people who are either members of the organization, or Outside Collaborators. An Outside collaborator is a person who isn't explicitly a member of your organisation.
Teams: We can organize people into team, and assign rights to the team.
In the next section we will create a Team and give it write access to the repository.
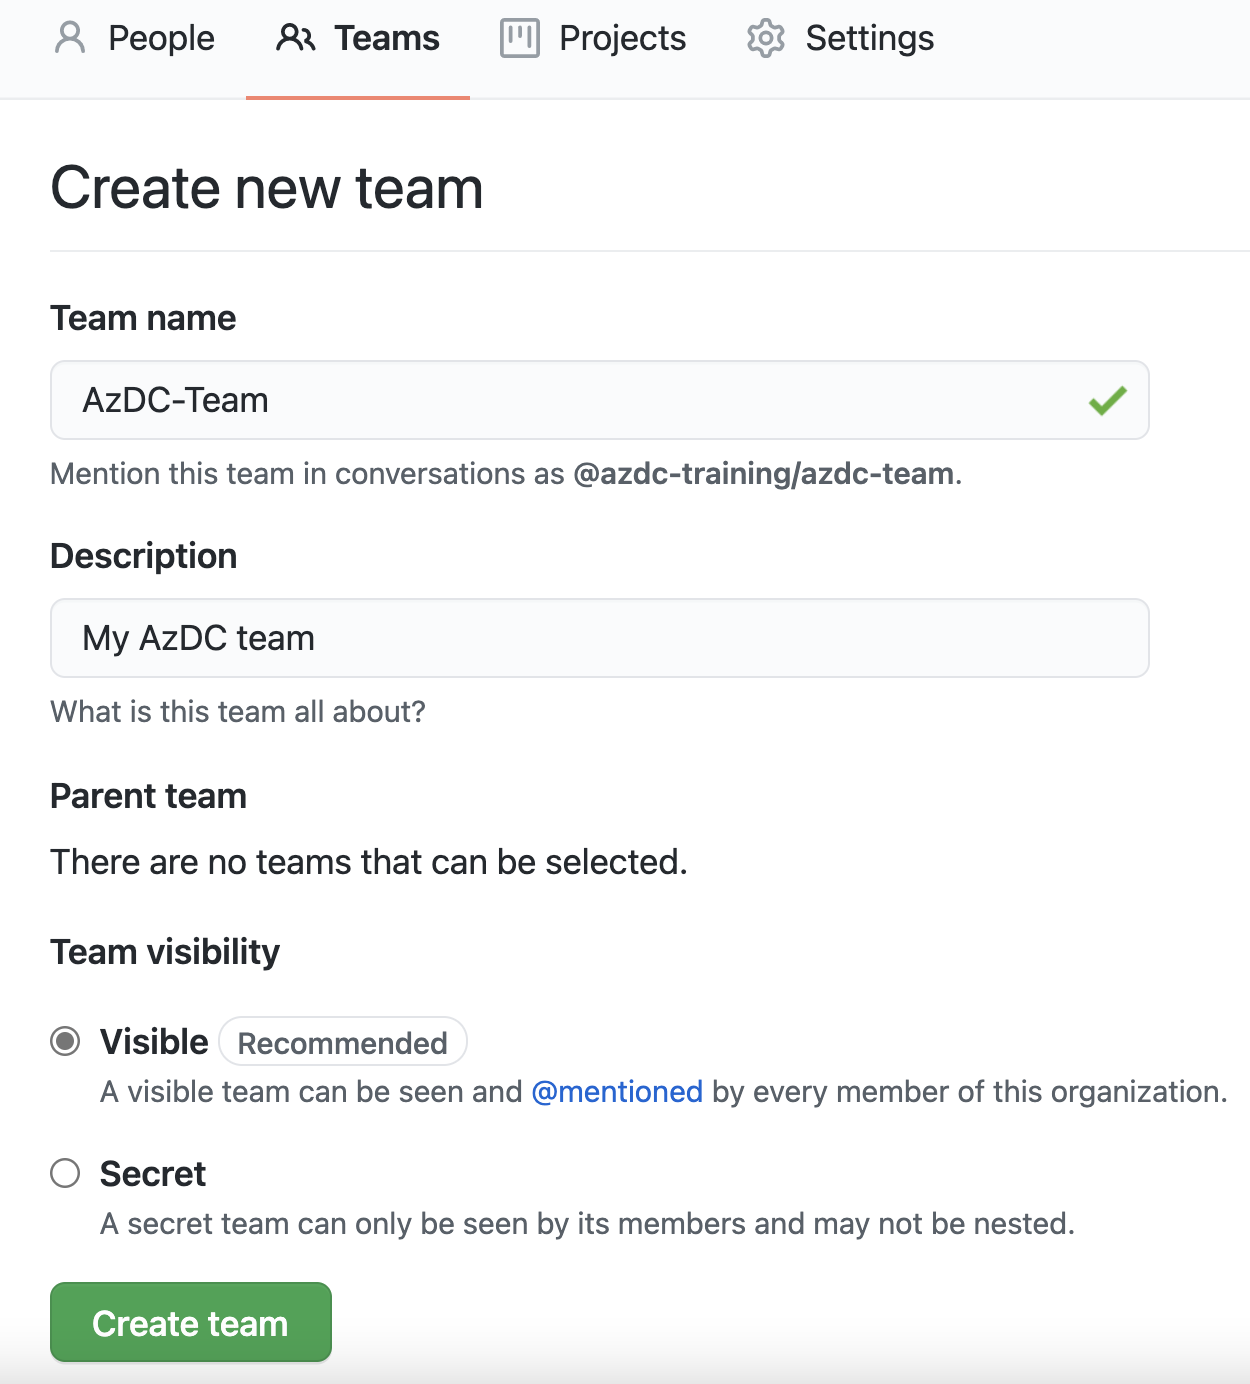
# Create a team and assign permission
Navigate to the Teams section of your organization and click the green New Team button. Name the Team AzDC-Team and give a description. At this time we make the team visible.
After you have created the Team, you can add members in the Members section. Again, we have the option to add both members of the organization or Outside collaborators. Now add the invited colleague to the team. After your colleague was added you can change their role within the Team. You can choose between Member and Maintainer.
Maintainer: Maintainers can add and remove team members and create child teams.
Member: A member has no administrative permissions to the team.
For the moment we leave it at the role Member, which is the default.
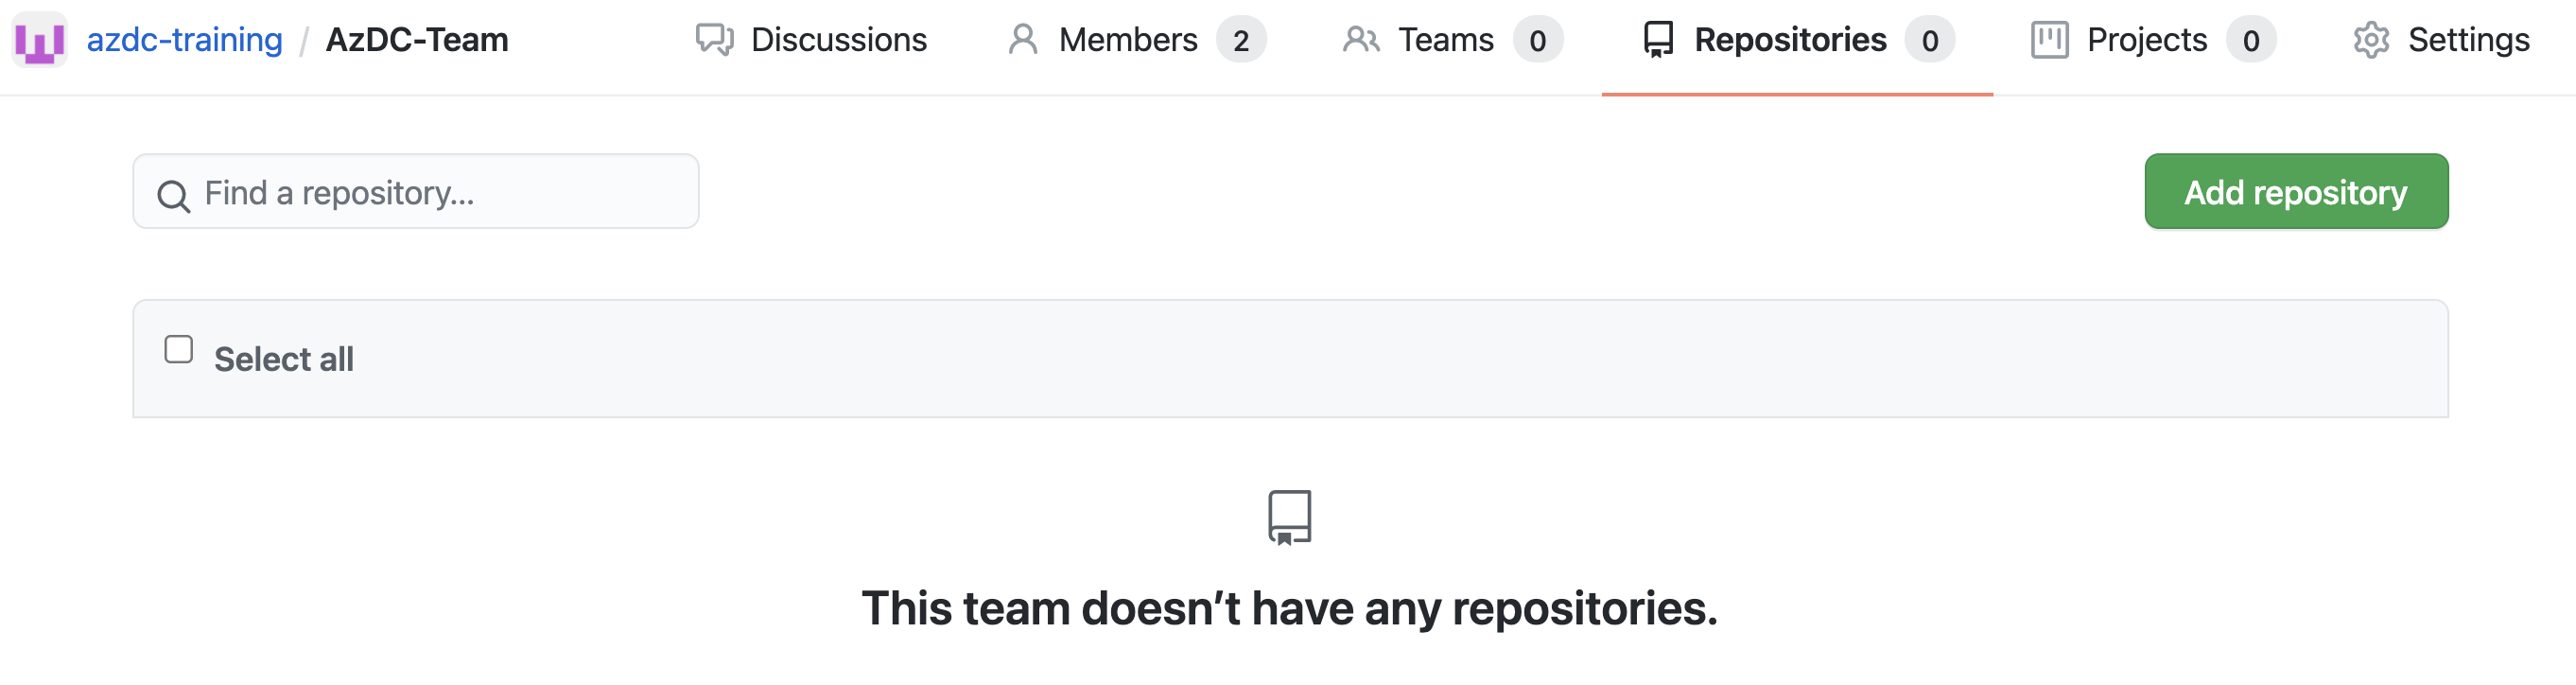
Next, we add the existing repository to the Team and grant write access. Navigate to the Repositories section within your Team and add the repository we created earlier.
After the repository was added, you can change the access level in the dropdown menu.

In the dropdown menu all possible access levels are listed. For our scenario we choose Write, because we want to allow the team to push to the repository and to manage issues and pull requests.
TIP
📝 If you want to validate the access level, add an Outside collaborator and assign Read permission and validate if the added Outside collaborator can edit the created README.md file and push the changes to the repository. The Outside collaborator can use the GitHub UI and does not need to clone the repository. Then validate if your invited colleague (Member of the organization and the AzDC-Team) can edit the file and push the changes to the repository.
TIP
📝 Navigate to the Discussion section within your Team and checkout the Team's page. Each team has its own page within an organization. On a team's page, you can view team members, child teams, and the team's repositories. Organization owners and team maintainers can access team settings and update the team's description and profile picture from the team's page
# Clone the repository to your local machine
Cloning a public repository from GitHub using git commandline tool is very easy, but when it comes to clone a private repository it is a bit tricky. You can either clone the repository with a password, a token or you can clone it using SSH credentials.
# Clone the repository with a password
Navigate to your repository, select the <> Code section, click the green Code botton and copy the HTTPS url.
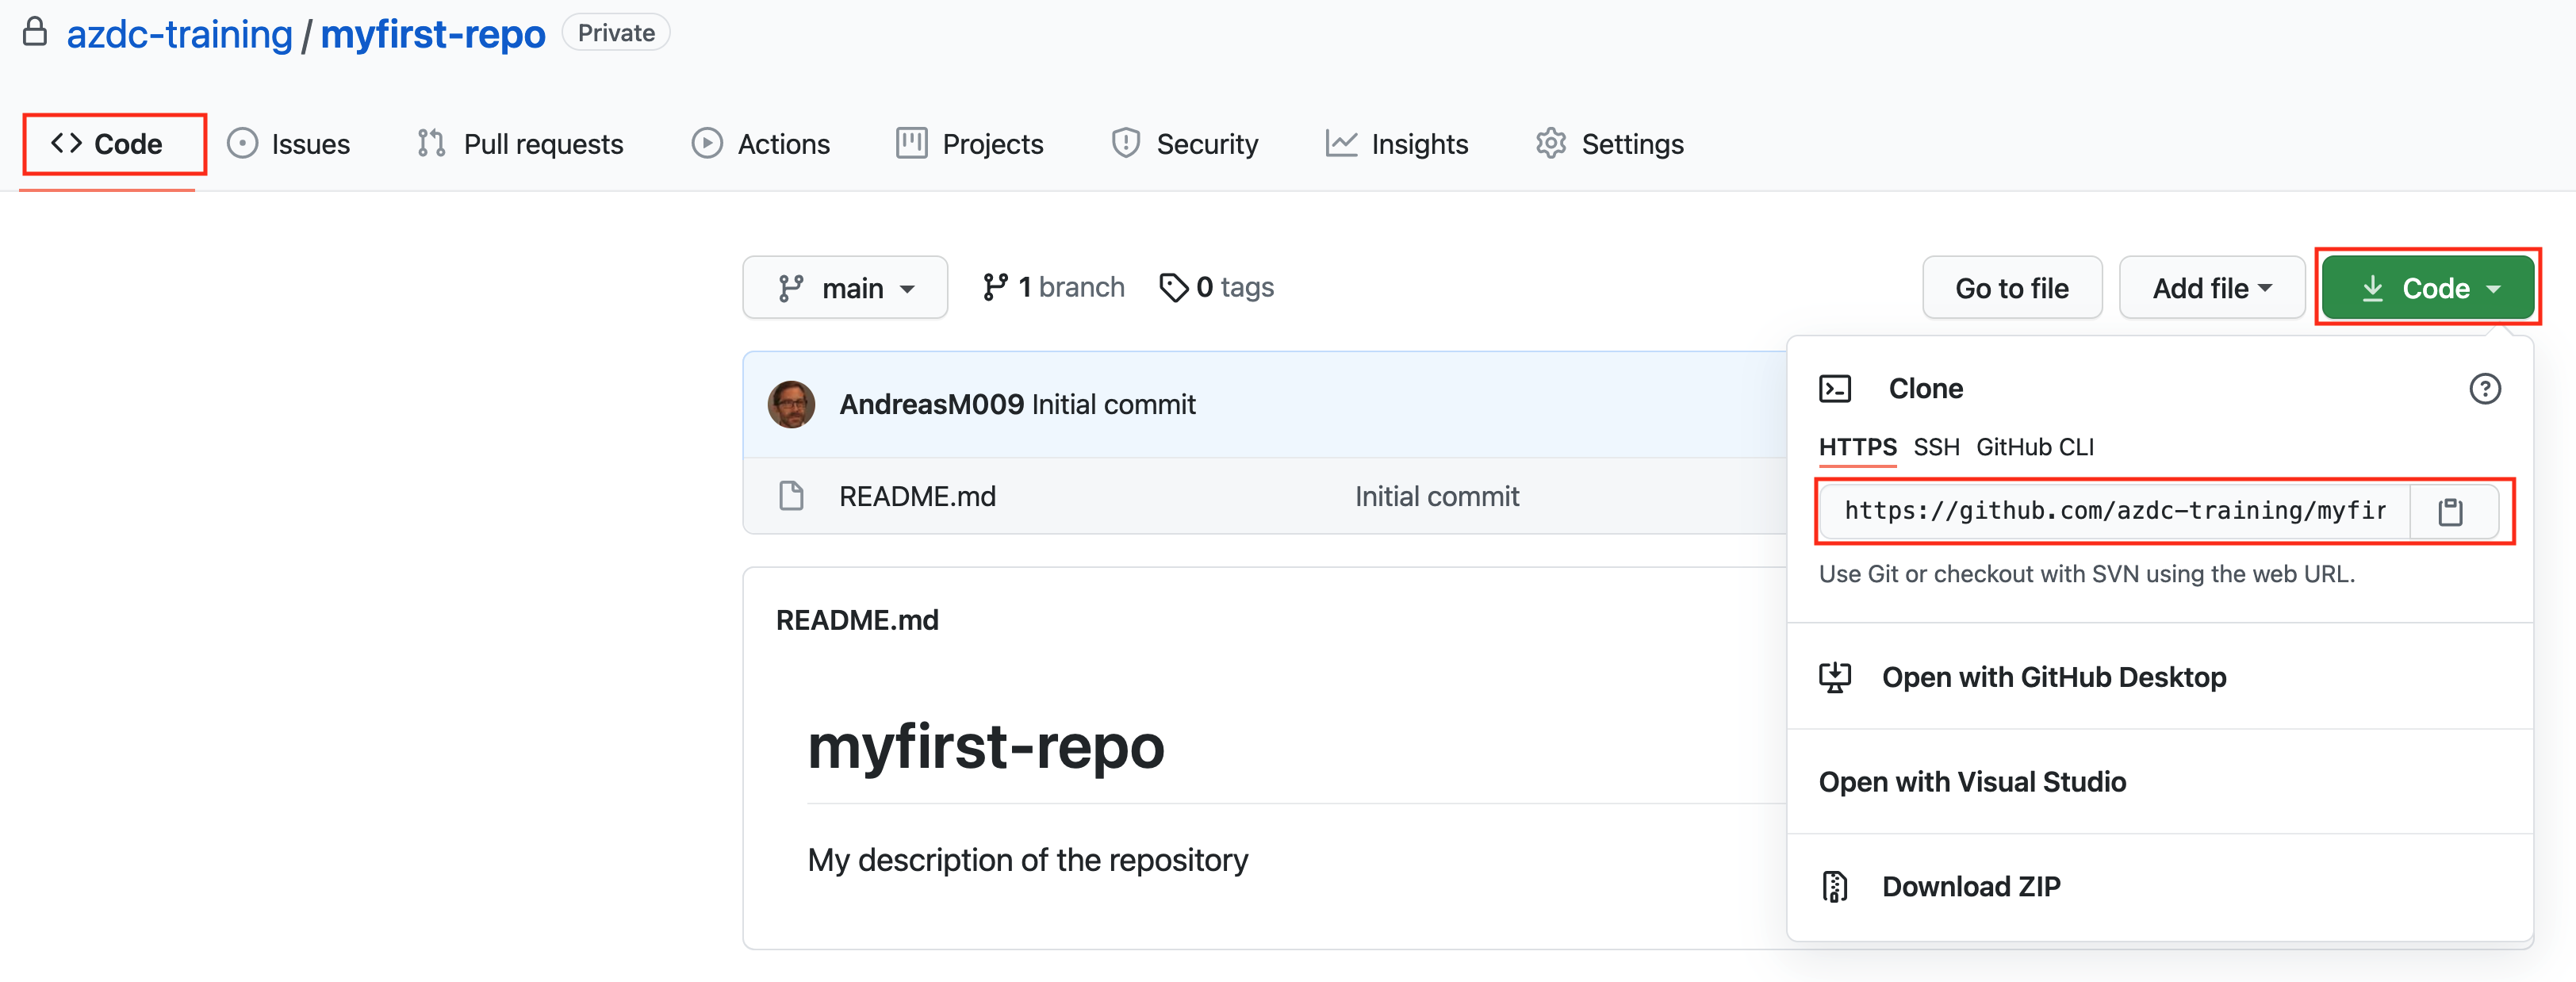
Now, open a terminal and clone the repository to a location of your choice using the git clone command and your GitHub username:
git clone https://your_username@repository_url
After a short time, you will be prompted for a password. Once the git client authenticated, the repository is cloned to your local machine.
TIP
📝 If you have enabled MFA for your account, you need to use SSH credentials to clone the repository.
Using your username and password you have to input your password every time for each operation to the repository. You can permanently store your password in the git configuration, but first you have to enable the credentials helper by running the git config command:
git config --global credential.helper store
Now you only have to enter your password once, when you clone a repository.
# Clone the repository with SSH keys
First, you need to generate an SSH keypair on your local machine and add the public key to your GitHub account. GitHub has a very good documentation: Connectiong to GitHub with SSA (opens new window) After you added your public SSH key to your GitHub account, you can clone the repository using SSH.
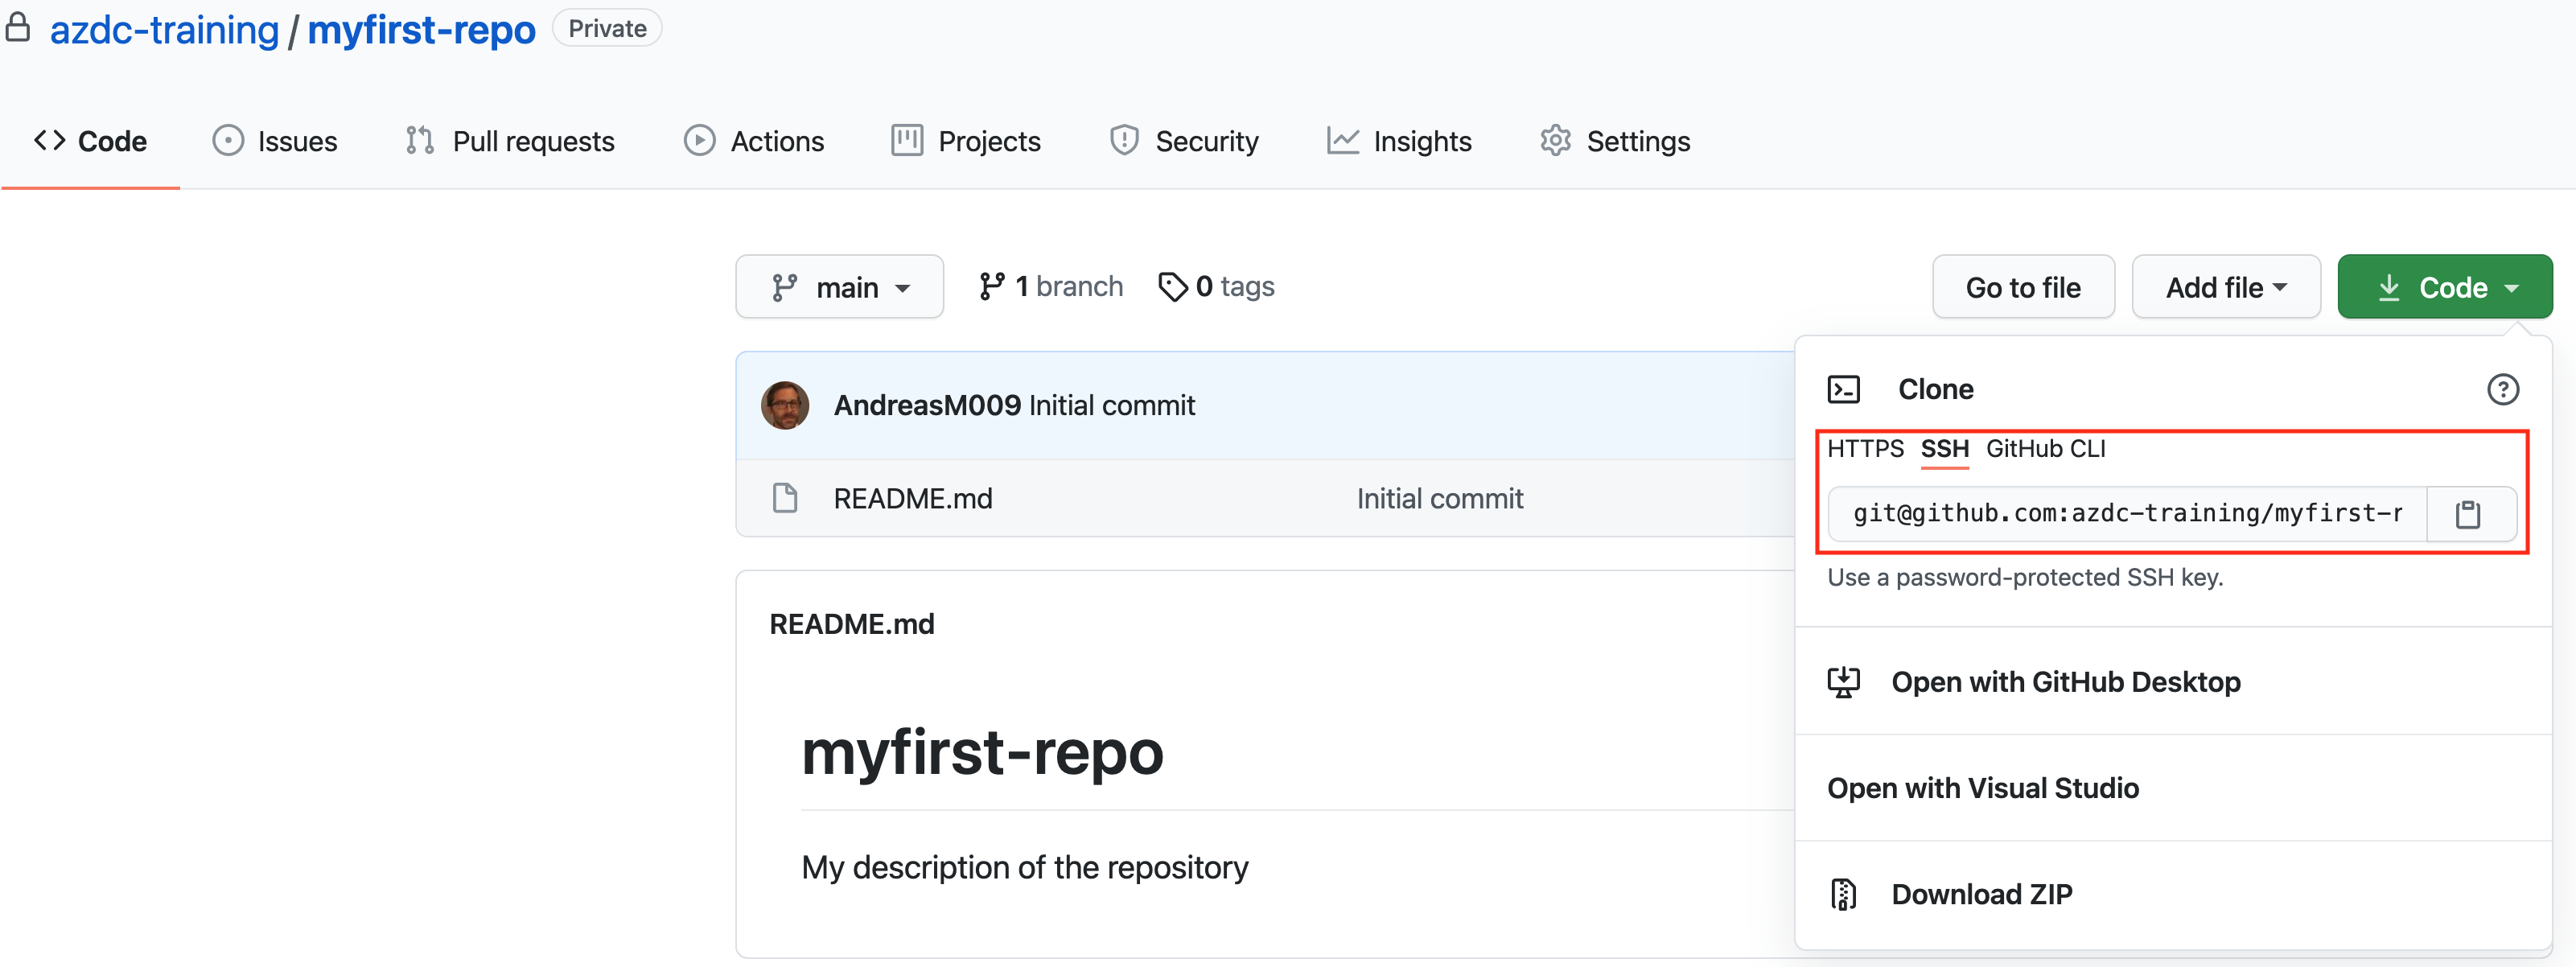
Open a terminal and use the git clone command to clone the repository:
git clone git@github.com:<your-org-name>/<your-repo-name>.git
# Useful Links
About GitHub organisations (opens new window)
About GitHub repositories (opens new window)