# Challenge 5: Azure Container Services
# Here is what you'll learn
- Creating Azure Container Registry Instance
- Pushing images that we have built to ACR
- Creating first AKS cluster and deploying phpapp application
In this challenge, we're gonna create our ACR and AKS instances and deploy a php based webapp that we have containerized at the end of challenge 4.
# Exercises
1: Azure Container Registry
Click to expand!
In this first task, we'll create a new Azure Container Registry (ACR) Instance. Azure Container Registry allows us to build, store, and manage container images and artifacts in a private registry for all types of container deployments. We're gonna store 2 images that we've created at the end of the challenge 4. Let's get started. We'll complete this via portal, so let's jump to https://portal.azure.com
- Click the hamburger icon on the top left of the screen.
- Click Create a resource link.
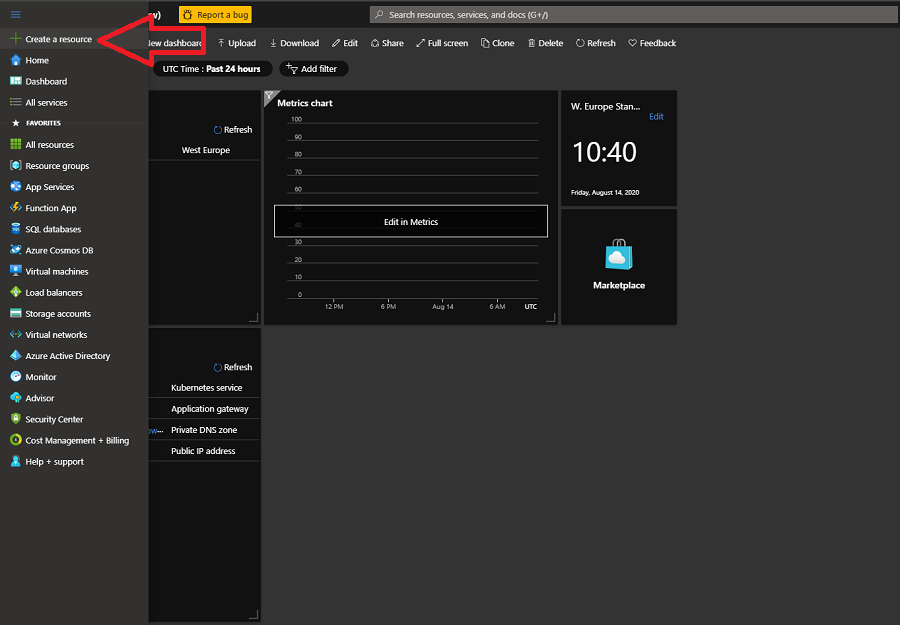
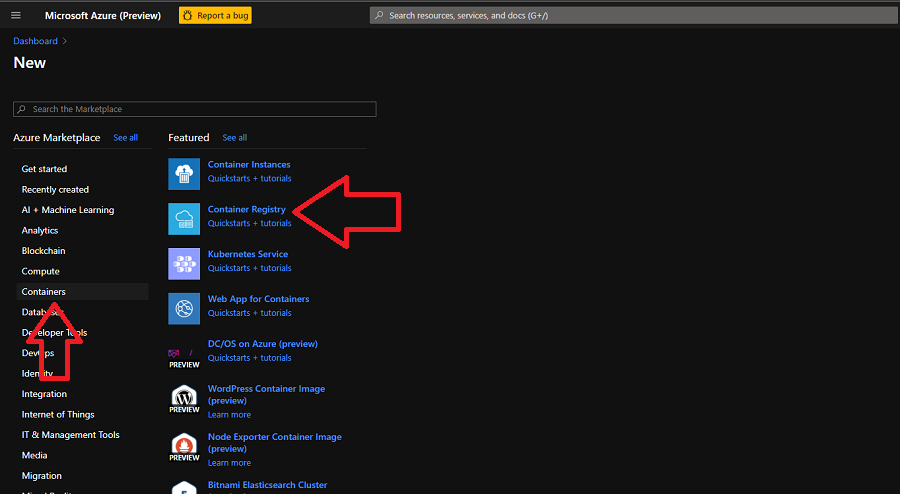
- Click Container on the left menu.
- Continue with Container Registry option
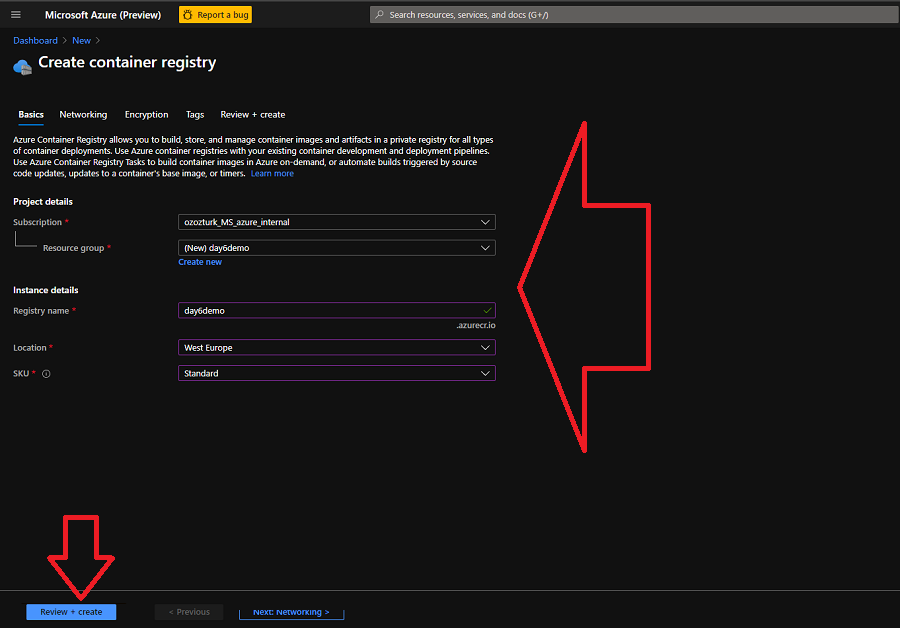
- Now we're on the Create container registry screen.
- Select a subscription. Click Create New button once the Resource Group and create a new resource group.
- Fill the other values.
- Registry Name: Type a unique name.
- Location: Select West Europe.
- SKU: Keep as is. Standard
- Click Review + create.
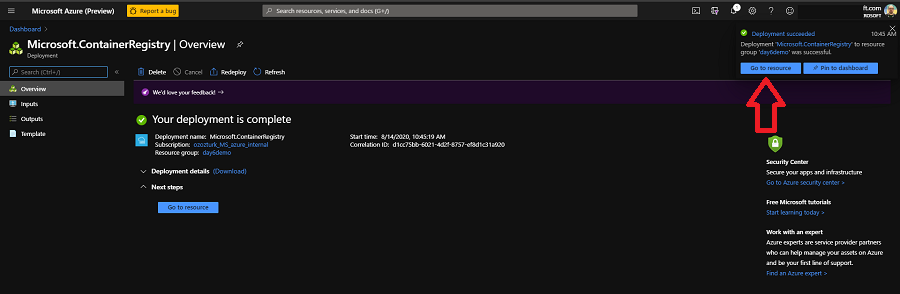
- Click Create and finalize the ACR creation steps.

- When done, click Go to resource button and access newly created ACR instance.
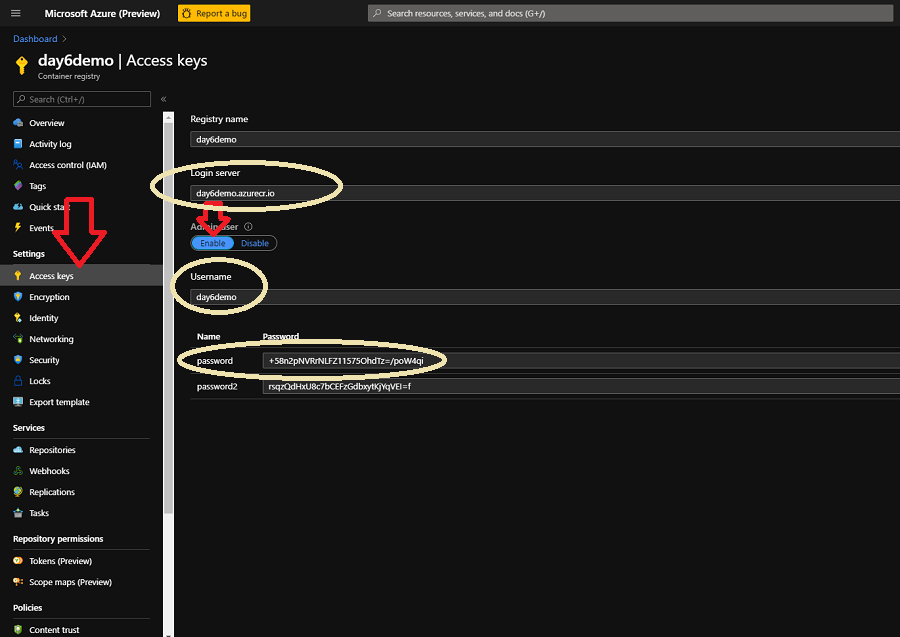
- Now it's time to get connection details of our ACR instance.
- Click Access keys on the left.
- Click Enable under the Adminuser section and enable Adminuser.
- Copy the Login Server, Username and Password values into a text editor. We'll use these later.
- We have created an ACR instance and it's ready to store our images. Let's turn back to Terminal and push images that we have created before.
- First, let's get logged out from current registry. Type:
$ docker logout
Output will be something like:
Removing login credentials for https://index.docker.io/v1/

- It's time log into our newly created ACR instance.
Type:
$ docker login acr_login_url -u Username -p Password
Output will be something like:
WARNING! Using --password via the CLI is insecure. Use --password-stdin.
Login Succeeded

- We could successfully logged in. This means that from now on we can push images to this registry. But to be able to do that, we have to retag the images that we have created at the end of the challenge 4. Simply we have to add new tags to them, in this format
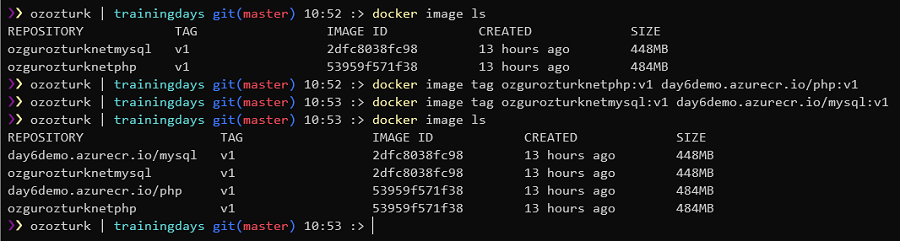
registry_url/repository_name:tag. Let's do that. - First, let's list all the images on the system.
Type:
$ docker image ls
Output will be something like:
REPOSITORY                TAG                 IMAGE ID            CREATED             SIZE
=======
REPOSITORY            TAG                 IMAGE ID            CREATED             SIZE

your_dockerhub_id/mysql   v1                  2dfc8038fc98        13 hours ago        448MB
your_dockerhub_id/php     v1                  53959f571f38        13 hours ago        484MB
- There should be 2 images that we have created at the end of the challenge 4. They were tagged as your_dockerhub_id/mysql:v1 and your_dockerhub_id/php:v1. We're gonna add new tags to these images.
Type:
$ docker image tag your_dockerhub_id/php:v1 acr_login_url/php:v1
$ docker image tag your_dockerhub_id/mysql:v1 acr_login_url/mysql:v1
- Let's list all the images on the system and check these newly added tags. Type:
$ docker image ls
Output will be something like:
REPOSITORY              TAG                 IMAGE ID            CREATED             SIZE
your_dockerhub_id/mysql v1                  2dfc8038fc98        13 hours ago        448MB
your_dockerhub_id/php   v1                  53959f571f38        13 hours ago        484MB
acr_login_url/mysql     v1                  2dfc8038fc98        13 hours ago        448MB
acr_login_url/php       v1                  53959f571f38        13 hours ago        484MB
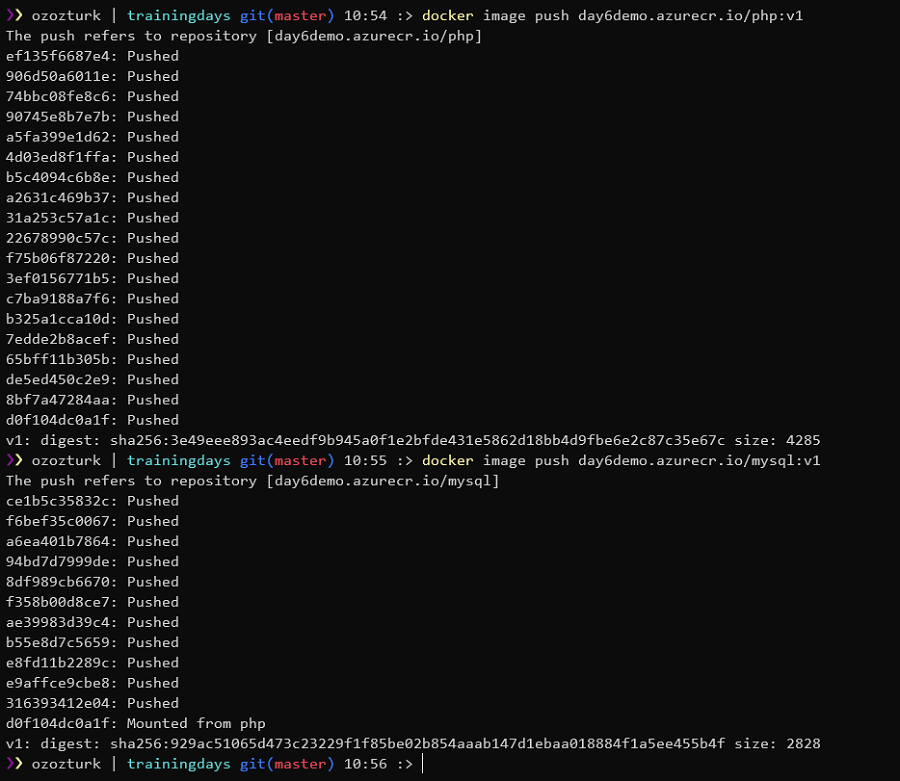
- Now we can push these images to the ACR.
Type:
$ docker image push acr_login_url/php:v1
Output will be something like:
The push refers to repository [acr_login_url/php]
ef135f6687e4: Pushed
906d50a6011e: Pushed
74bbc08fe8c6: Pushed
90745e8b7e7b: Pushed
a5fa399e1d62: Pushed
4d03ed8f1ffa: Pushed
b5c4094c6b8e: Pushed
a2631c469b37: Pushed
31a253c57a1c: Pushed
22678990c57c: Pushed
f75b06f87220: Pushed
3ef0156771b5: Pushed
c7ba9188a7f6: Pushed
b325a1cca10d: Pushed
7edde2b8acef: Pushed
65bff11b305b: Pushed
de5ed450c2e9: Pushed
8bf7a47284aa: Pushed
d0f104dc0a1f: Pushed
v1: digest: sha256:3e49eee893ac4eedf9b945a0f1e2bfde431e5862d18bb4d9fbe6e2c87c35e67c size: 4285
Type:
$ docker image push acr_login_url/mysql:v1
Output will be something like:
The push refers to repository [acr_login_url/mysql]
ce1b5c35832c: Pushed
f6bef35c0067: Pushed
a6ea401b7864: Pushed
94bd7d7999de: Pushed
8df989cb6670: Pushed
f358b00d8ce7: Pushed
ae39983d39c4: Pushed
b55e8d7c5659: Pushed
e8fd11b2289c: Pushed
e9affce9cbe8: Pushed
316393412e04: Pushed
d0f104dc0a1f: Mounted from php
v1: digest: sha256:929ac51065d473c23229f1f85be02b854aaab147d1ebaa018884f1a5ee455b4f size: 2828
- Turn back to portal and confirm that these images were pushed and stored in the ACR.
- We successfully re-tagged our images and pushed them to newly created ACR. Image part has been completed.

2: Azure Kubernetes Service
Click to expand!
It's time to create our first AKS cluster.
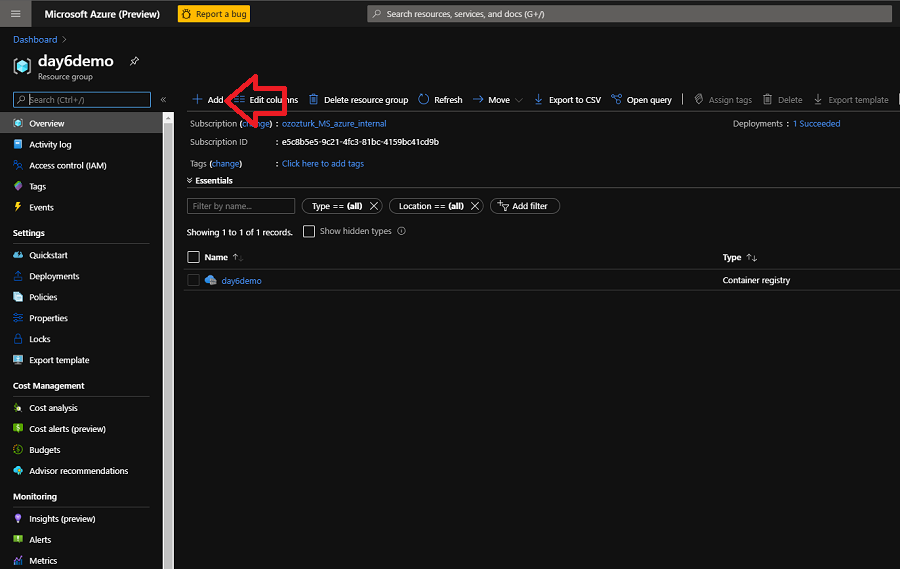
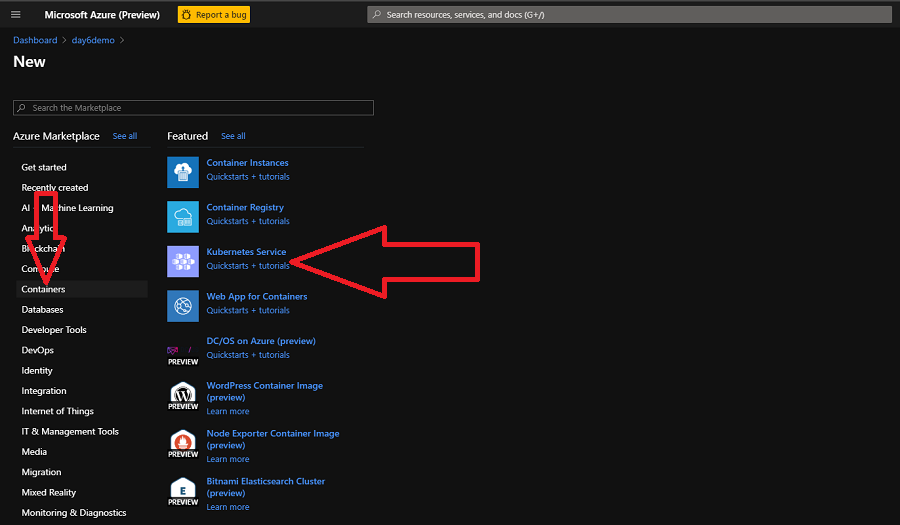
- On the portal, find your Resource Group and on the overview screen click Add.
- Under the the Containers click Kubernetes Service.
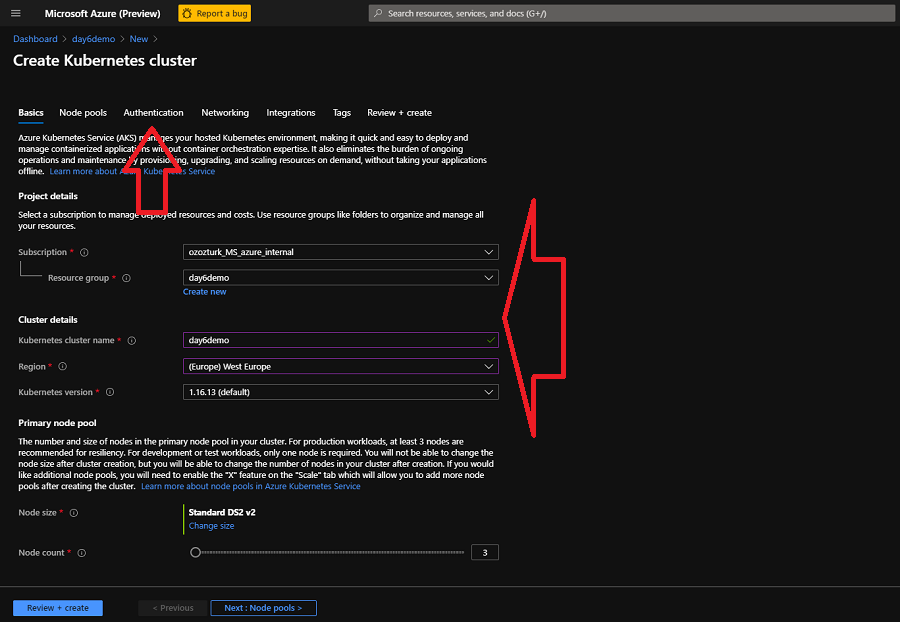
- Select your subscription.
- Fill the other values.
- Kubernetes cluster name: Type a unique name.
- Region: Select West Europe.
- Kubernetes version: Leave as is.
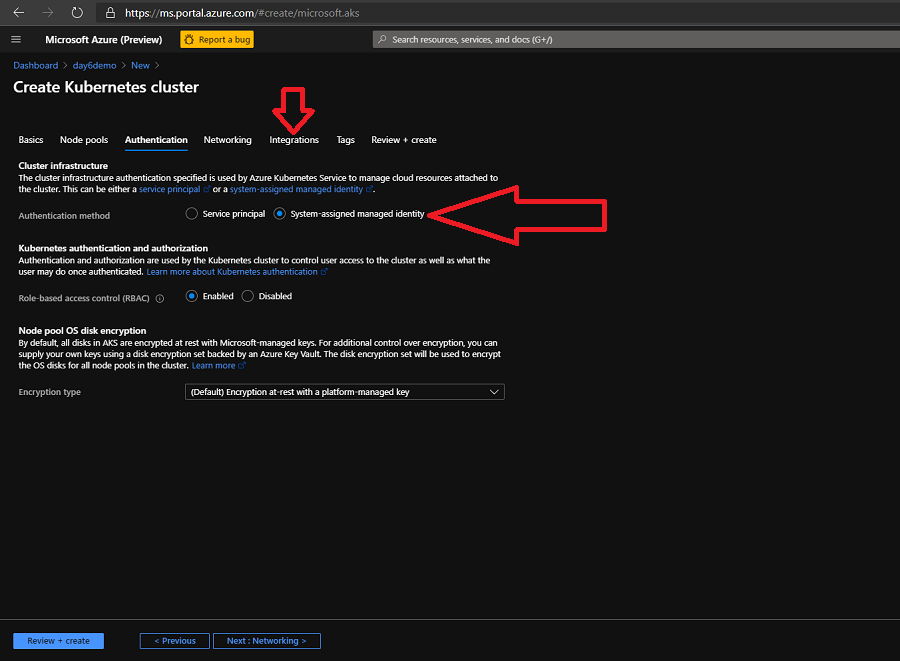
- Click Authentication.
- Select System-assigned managed identity
- Click Integrations.
- Select the ACR instance that we created a few minutes ago.
- Click Review + create.

- Click Create and wait until it has been successfully created.
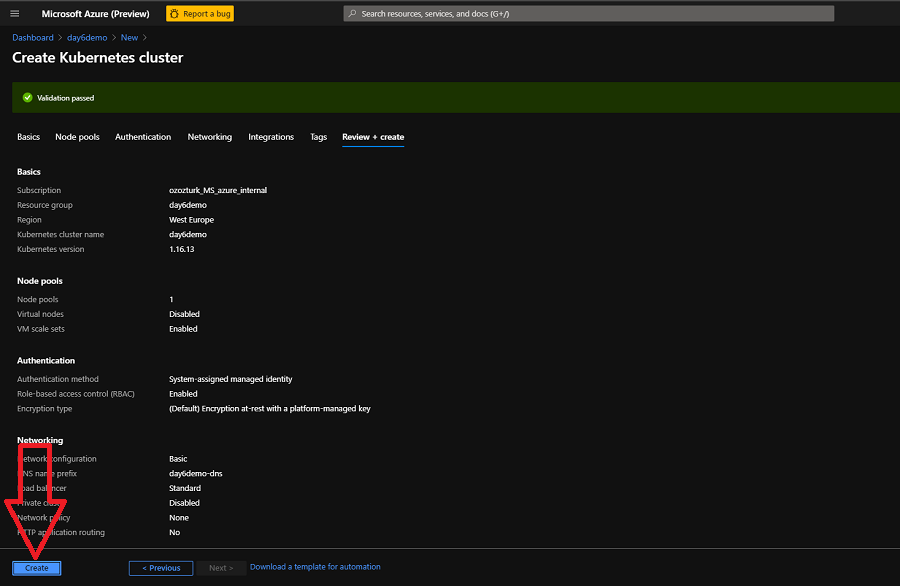
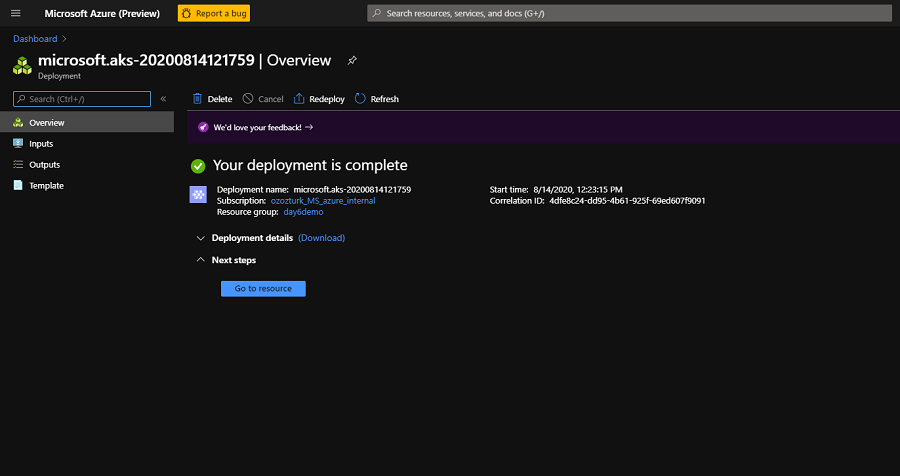
- Congrats. You have successfully built your first AKS cluster.
3: Deploy php app to AKS
Click to expand!
Now it's time to deploy our php app to AKS cluster.
- We're gonna use
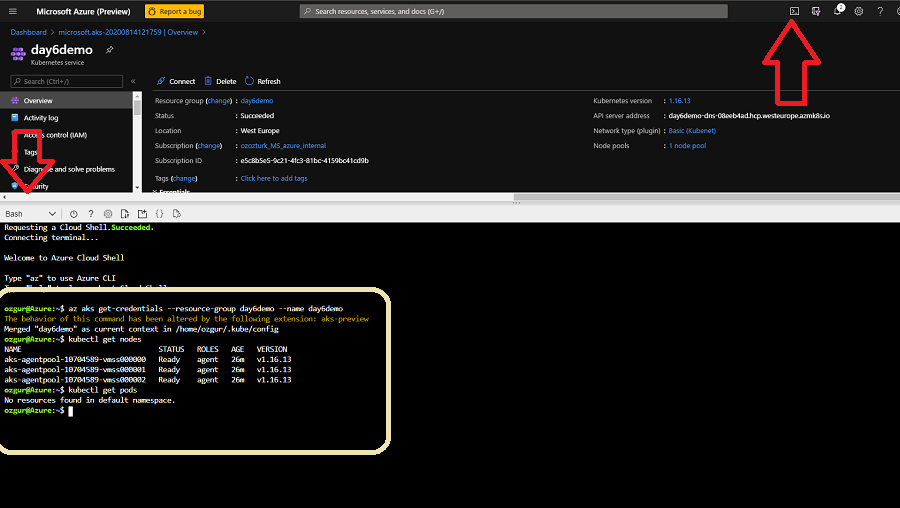
kubectltool to manage Kubernetes cluster. Kubernetes command-line tool, kubectl, allows us to run commands against Kubernetes clusters. We can use kubectl to deploy applications, inspect and manage cluster resources, and view logs. You can either installkubectlin your terminal or you can use Azure Cloud Shell wherekubectlis already installed. - Click Cloud Shell icon on the top left right side of the portal screen and open it.
- If asked, select Bash and open the shell.
- When you interact with an AKS cluster using the kubectl tool, a configuration file is used that defines cluster connection information. This configuration file is typically stored in ~/.kube/config. Multiple clusters can be defined in this kubeconfig file. "az aks get-credentials" command lets you get access to the credentials for an AKS cluster and merges them into the kubeconfig file. Now we use that command and merge the credential into our kubeconfig file. Thus we can manage our Kubernetes cluster.
Type:
$ az aks get-credentials --resource-group resource_group_name --name aks_cluster_name
Output will be something like:
The behavior of this command has been altered by the following extension: aks-preview
Merged "aks_cluster_name" as current context in /home/username/.kube/config
- We have merge the config. It's time to check if kubectl works properly. Let's list all the nodes in the cluster.
Type:
$ kubectl get nodes
Output will be something like:
NAME                                STATUS   ROLES   AGE   VERSION
aks-agentpool-10704589-vmss000000   Ready    agent   26m   v1.16.13
aks-agentpool-10704589-vmss000001   Ready    agent   26m   v1.16.13
aks-agentpool-10704589-vmss000002   Ready    agent   26m   v1.16.13
- It seems that our cluster is ready. Let's deploy our app.
- There are 2 ways to spin up Kubernetes resources. Imperative method, which is basically using command line. But there’s an easier and more useful way to do, declarative method, creating configuration files using YAML. Most of the things you can deploy to a Cluster in Kubernetes can be described as a YAML file. YAML is a human-readable text-based format that let’s us easily specify configuration-type information by using a combination of maps of name-value pairs and lists of items.
- We have created a yaml file to create 2 deployment and 2 service objects. All the config that is needed to create these objects are defined in this yaml file. But what is a deployment, what is a service? These are the object types that you can create on Kubernetes. Simply, deployment object is our application and service object is an end-point that exposes this application to other services or external users. But all of these are Kubernetes related topics and we won't cover them today. We have a full Kubernetes day, Day 7, there you will get all the information related to Kubernetes. Today, we're gonna only deploy this application and that's all.
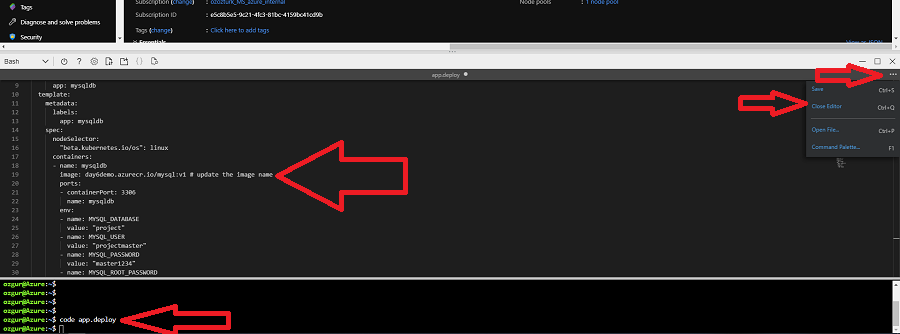
- So first let's open the yaml file. Go to
day6/apps/kubefolder and openapp.yamlon a text editor. - There are 2 lines that you have to update here. Go to line 19 and 66 and update the ACR url with your own.
19-->image: day6demo.azurecr.io/mysql:v1
66-->image: day6demo.azurecr.io/php:v1
After that, copy whole text and turn back to Cloud Shell
- Now type
code app.deployorcode app.yamlto create a file and open built-in text editor. - In the text editor type CTRL-V to paste the text that you copied a few minutes ago.
- Click ... icon on the top right of the Cloud Shell, save and close the file. Now our yaml file is ready.
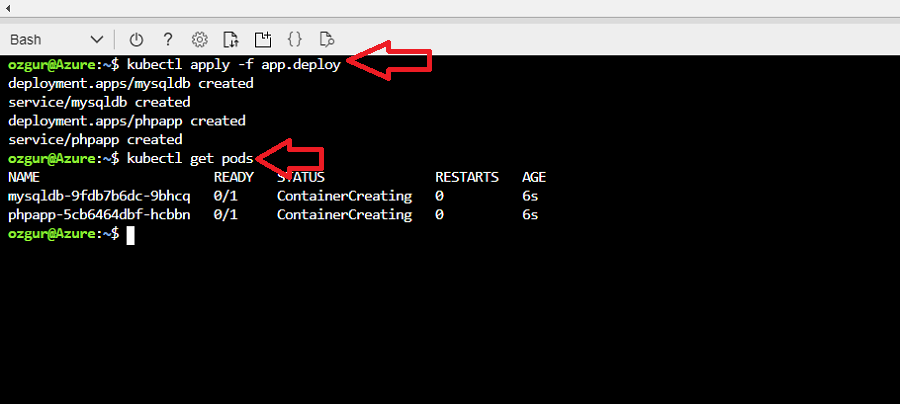
- It's finally time to deploy our application.
Type:
$ kubectl apply -f app.yaml # or app.deploy based on your filename.
Output will be something like:
deployment.apps/mysqldb created
service/mysqldb created
deployment.apps/phpapp created
service/phpapp created
- 2 deployments and 2 services have been created. Let's check if pods are running or not.
Type:
$ kubectl get pods
Output will be something like:
NAME                                                       READY   STATUS    RESTARTS   AGE
mysqldb-df67cc945-ctfqg                            1/1     Running   0                  1m
phpapp-df67cc945-s5z6n                             1/1     Running   0                  1m
- Type couple of times
kubectl get podstill the statuses turnRunning.
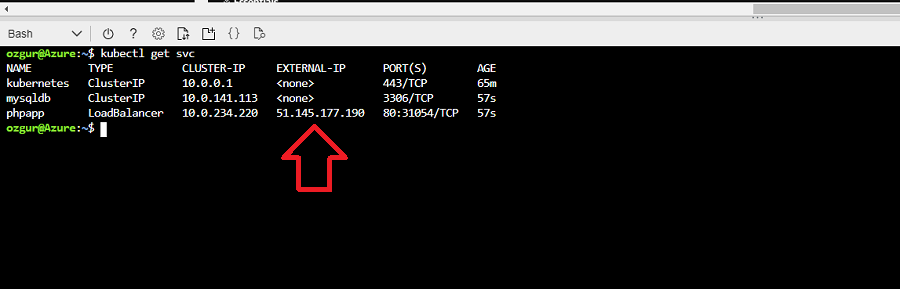
- Congratulations! We could successfully deploy our application to AKS cluster. Let's access it and see if it works properly. To be able to do that we have to get external ip address of the phpapp service.
Type:
$ kubectl get svc
Output will be something like:
NAME                                       TYPE           CLUSTER-IP     EXTERNAL-IP      PORT(S)    AGE
mysqldb                                    ClusterIP      10.0.250.27    <none>           80/TCP     48d
phpapp                                     LoadBalancer   10.0.243.220   51.145.177.190   80/TCP     47d
kubernetes                                 ClusterIP      10.0.0.1       <none>           443/TCP    59d
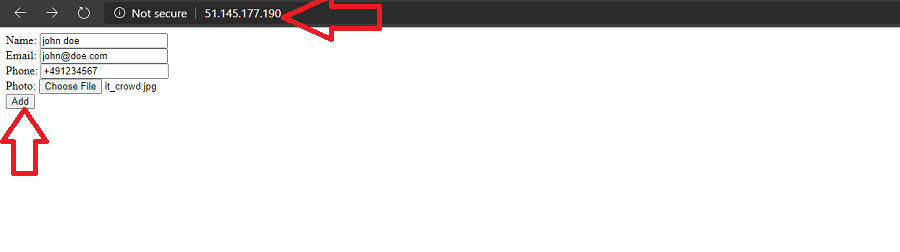
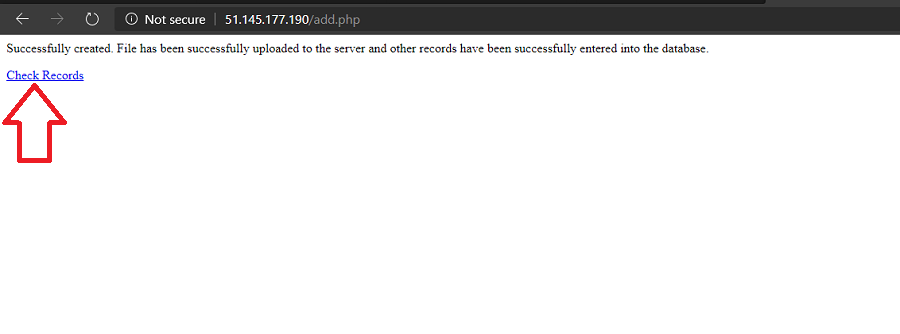
- Copy the external ip address of the phpapp service.
- Open a web browser and visit the site published via the copied ip address.
- Fill the form and add a new record. If you get Successfully created message when you click add, this means that everything works perfectly.
4: Clean-up
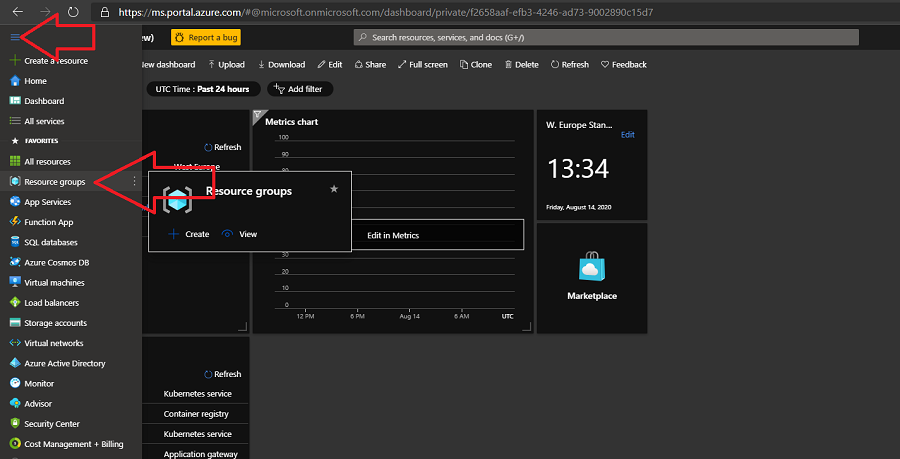
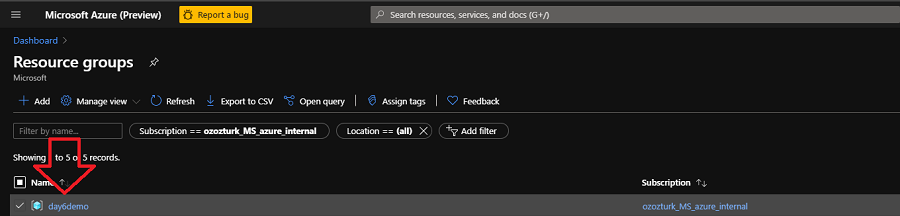
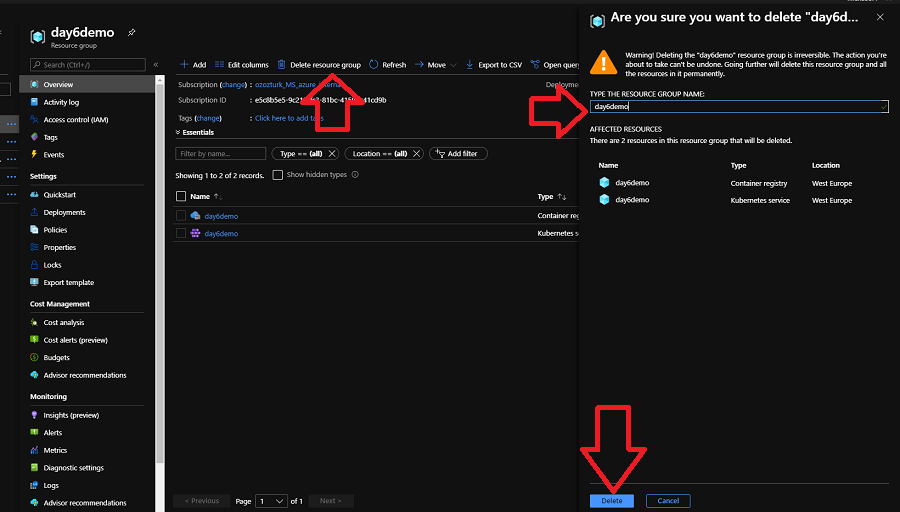
When you complete the challenge, please don't forget to delete the resources that you have created. Via the portal, find the resource group that you have created at the beginning of this challenge and delete it. All the resources ACR, AKS that you have created in this resource group will be automatically deleted too.
# Wrap up
Congratulations you have completed the Azure Container Services challenge. You have created your first ACR instance and AKS cluster and deploy an application.
*** Reference: https://docs.microsoft.com/en-us/azure/aks/ https://docs.microsoft.com/en-us/azure/container-registry/