# Challenge 4: Image and Registry
# Here is what you'll learn
- Tagging
- Image pull and push
- Building your own image
- Image registries and repositories
In this challenge, we're gonna play with Docker Images. A Docker container image is a lightweight, standalone, executable package of software that includes everything needed to run an application: code, runtime, system tools, system libraries and settings.
# Exercises
1: Tagging
Click to expand!
Let's pull an image. The command that we use is docker pull. With that command, we're requesting from Docker that we want to download an image from its registry to the host.
Type:
$ docker pull ubuntu:latest
Output will be something like:
latest: Pulling from library/ubuntu
3ff22d22a855: Pull complete
e7cb79d19722: Pull complete
323d0d660b6a: Pull complete
b7f616834fd0: Pull complete
Digest: sha256:5d1d5407f353843ecf8b16524bc5565aa332e9e6a1297c73a92d3e754b8a636d
Status: Downloaded newer image for ubuntu:latest
docker.io/library/ubuntu:latest
Now it's time to see which images that we have on our system. For this, we're gonna type:
$ docker image ls
Output will be something like:
REPOSITORY          TAG                 IMAGE ID            CREATED             SIZE
ubuntu              latest              1e4467b07108        2 weeks ago         73.9MB
I want you to pay attention to the image id part. Like containers, images also have unique ids. The image ID is a digest, and is a computed SHA256 hash of the image configuration object, which contains the digests of the layers that contribute to the image's filesystem definition. If two different images have the same ids, this means that they're literally the same images with different names. Yes it's possible to tag an image with different tags. Let's do that and add another name to this image.
Type:
$ docker image tag ubuntu:latest your_dockerhub_id/day6:ubuntu
We have added a second name to the image. Let's check and see.
Type:
$ docker image ls
Output will be something like:
REPOSITORY            TAG                 IMAGE ID            CREATED             SIZE
ubuntu                latest              1e4467b07108        2 weeks ago         73.9MB
ozgurozturknet/day6   ubuntu              1e4467b07108        2 weeks ago         73.9MB
We have 2 images that are stored on our host. Image ids are same, so these are literally the same images but with different names.
We have added a new tag-name to ubuntu:latest image. We tagged it with our Docker Hub id. This means that this image is stored "or will be stored" on Docker Hub (Remember, image names also indicate where the image is located). But it isn't at the moment. Let's correct this and push this image to its repository. But before that we have to login and authenticate. This way, Docker Hub knows that we're the right person who can push this image to its respository. Let's login first.
Type:
$ docker login
Output will be something like:
Login with your Docker ID to push and pull images from Docker Hub. If you don't have a Docker ID, head over to https://hub.docker.com to create one.
Username: ozgurozturknet
Password:
Login Succeeded
Now we're ready to push.
Type:
$ docker push your_dockerhub_id/day6:ubuntu
Output will be something like:
The push refers to repository [docker.io/ozgurozturknet/day6]
095624243293: Mounted from library/ubuntu
a37e74863e72: Mounted from library/ubuntu
8eeb4a14bcb4: Mounted from library/ubuntu
ce3011290956: Mounted from library/ubuntu
ubuntu: digest: sha256:60f560e52264ed1cb7829a0d59b1ee7740d7580e0eb293aca2d722136edb1e24 size: 11529MB
That was fast, wasn't it? Please pay attention to the output. Mounted from library/ubuntu. You know that images consist of multiple layers. And each layer has its unique id. When we pull or push any image, if the target (registry or your computer) has the same layer with tha same id stored on it, it doesn't pull or push that layer phyiscally again. Just checks and mounts that. This is the reason why it was fast. We didn't transfer any file to Docker Hub. Docker Hub detected that these 4 layers are already stored on it, so instead of getting it again, Docker hub just mounted these files to our repository. This is also same on our computer. We have 2 images stored on it. But they are literally the same images with different names. Docker doesn't store multiple files for these 2 images. Image files are stored just once but multiple tags are added to the same files.
But what are these layers? Is there any way to see how they are created? Yes and the command that we'll use is docker image history. History sub-command shows us history of the image and it also shows how all these layers were created. Let's check this.
Type:
$ docker image history ubuntu:latest
Output will be something like:
1e4467b07108        2 weeks ago         /bin/sh -c #(nop)  CMD ["/bin/bash"]            0B
<missing>           2 weeks ago         /bin/sh -c mkdir -p /run/systemd && echo 'do…   7B
<missing>           2 weeks ago         /bin/sh -c set -xe   && echo '#!/bin/sh' > /…   811B
<missing>           2 weeks ago         /bin/sh -c [ -z "$(apt-get indextargets)" ]     1.01MB
<missing>           2 weeks ago         /bin/sh -c #(nop) ADD file:65a1cc50a9867c153…   72.9MB
This output shows us which commands have been executed and which layers have been created as a result of these commands. This also gives us some clues about how an image is created.
Docker can build images automatically by reading the instructions from a Dockerfile. A Dockerfile is a text document that contains all the commands a user could call on the command line to assemble an image. Using docker build, users can create an automated build that executes several command-line instructions in succession. Each instruction that changes anything creates a new layer. The Docker daemon runs the instructions in the Dockerfile one-by-one, committing the result of each instruction to a new image if necessary, before finally outputting the ID of your new image. It's now time to create our first image.
2: Building the first image
Click to expand!
First, we should clone this Github repository.
Type:
$ git clone https://github.com/azuredevcollege/trainingdays.git
Output will be something like:
Cloning into 'trainingdays'...
remote: Enumerating objects: 42, done.
remote: Counting objects: 100% (42/42), done.
remote: Compressing objects: 100% (31/31), done.
remote: Total 1899 (delta 26), reused 25 (delta 11), pack-reused 1857 Receiving objects:  97% (1843/1899), 57.20 MiB | 11.92 MiB/s
Receiving objects: 100% (1899/1899), 63.35 MiB | 11.26 MiB/s, done.
Resolving deltas: 100% (747/747), done.
Updating files: 100% (1396/1396), done.
Repo has been cloned. It's time to jump to the
trainingdays/day6/apps/first_docker_image folder. cd to that folder and
list all the files.
Type:
$ cd trainingdays/day6/apps/first_docker_image
$ ls -l
Output will be something like:
total 8
-rw-r--r-- 1 ozozturk ozozturk  90 Jun 12 11:56 Dockerfile
-rw-r--r-- 1 ozozturk ozozturk 211 Jun 12 11:21 index.html
There are 2 files in that folder. index.html is a simple html file that has been created by us. We want to build a web server image with this file has been copied in it. To be able to build an image, we need a Dockerfile. A Dockerfile is a text document that contains all the commands a user could call on the command line to assemble an image. We have one in this folder. Let's check and see what's in it. This is one of the simplest form of a Dockerfile.
Type:
$ cat Dockerfile
Output will be something like:
FROM nginx:latest
COPY index.html /usr/share/nginx/html
CMD ["nginx", "-g", "daemon off;"]
If we cd to a folder which has Dockerfile in it and type docker image build ., Docker starts to run instructions in that Dockerfile in order. A Dockerfile must begin with the "FROM" instruction. "FROM" instruction specifies the Parent Image that you are trying to build this new image on top of. FROM basically means that "hey Docker, download that image and execute the next instructions on top of that". It's the base image that we build our image on top of. In our case, it is nginx:latest. We're building our image on top of ngninx:latest.
The second instruction in that Dockerfile is COPY. The COPY instruction copies new files or directories from "source" to the "destination" inside the container. In our case, we have instructed Docker to copy the index.html file located in the current folder to the /usr/share/nginx/html folder inside the image. /usr/share/nginx/html is the folder where Nginx stores websites that it serves. We copied our index.html to that folder, So nginx daemon will serve our web page.
The third and last instruction in this Dockerfile is CMD. The main purpose of the "CMD" instruction is that providing defaults of an executing container. In short, it defines the command to execute when you run a container from that image. There can be only one CMD instruction in any Dockerfile. If you list more than one CMD then only the last CMD will take effect. In our case, we want Docker to start nginx daemon when we create a container.
Ok, it's time to create our first image. We checked the Dockerfile and see what it includes. Now we can build the first image.
Type:
$ docker image build -t your_dockerhub_id/firstimage:latest . #do not forget the dot
Output will be something like:
Sending build context to Docker daemon  3.072kB
Step 1/3 : FROM nginx:latest
 ---> 08393e824c32
Step 2/3 : COPY index.html /usr/share/nginx/html
 ---> 14fb48dc6eea
Step 3/3 : CMD ["nginx", "-g", "daemon off;"]
 ---> Running in 772fbfd4dba3
Removing intermediate container 772fbfd4dba3
 ---> 560570bf44e5
Successfully built 560570bf44e5
Successfully tagged ozgurozturknet/firstimage:latest
Congrats! We have built our first image. Let's create a container to see if it's working as expect.
Type:
$ docker container run --rm -d -p 80:80 --name test_container your_dockerhub_id/firstimage:latest
Output will be something like:
25e7fe3f3e57dd2eab07bf672501dde69d81eb156347607e0b378757b41d859b
Open a browser and visit http://127.0.0.1 You would see a page like that.
Stop the container and it'll be deleted automatically.
Type:
$ docker container stop test_container
Output will be something like:
test_container
3: Building a node.js image
Click to expand!
This time we're gonna build a node.js app image. cd to the /trainingdays/day6/apps/nodejs folder and list all the files.
Type:
$ cd /trainingdays/day6/apps/nodejs
$ ls -l
Output will be something like:
total 12
-rw-r--r-- 1 ozozturk ozozturk 292 Aug 12 20:27 Dockerfile
-rw-r--r-- 1 ozozturk ozozturk 288 Aug 12 20:14 package.json
-rw-r--r-- 1 ozozturk ozozturk 273 Aug 12 20:15 server.js
This time we have 3 files. First one is package.json. If you work with JavaScript, or you've ever interacted with a JavaScript project, Node.js or a frontend project, you surely met the package.json file. The package.json file is kind of a manifest for your project. It can do a lot of things, but in our case it's specially important because it defines the dependencies that we'll install with npm. Our simple node application is running on top of Express framework and we need that framework to be installed to run our simple Javascript webapp. Server.js is the second file and it's our main Javascript application. It's a simple "Hello World" web app. And the third one is the usual suspect. Dockerfile. Let's take a look at it.
Type:
$ cat Dockerfile
Output will be something like:
# source: https://nodejs.org/en/docs/guides/nodejs-docker-webapp/
FROM node:12

# Create app directory
WORKDIR /usr/src/app

# Copy source files
COPY package.json .
COPY server.js .

# Install app dependencies
RUN npm install

# Exposing the port 8080
EXPOSE 8080

CMD [ "node", "server.js" ]
I want you to pay attention to 2 things. First, as you can see, we can add comments to Dockerfile. Any line starting with # is treated as a comment and not processed. Second, we have 3 new instructions, WORKDIR , RUN and EXPOSE. The default working directory for running binaries within a container is the root directory (/), but you can set a different folder by using "WORKDIR" instruction. It's kind of cd'ing to that folder. Any command that you execute after that insturction will be executed in this folder. If there isn't any folder with that name in the image, Docker creates the folder first but If there is, Docker uses that.
The "RUN" instruction will execute any commands in a new layer on top of the current image and commit the results. The resulting committed image will be used for the next step in the Dockerfile. When we want to execute anything, we use this instruction.
The "EXPOSE" instruction informs Docker that the container listens on the specified network ports at runtime. You can specify whether the port listens on TCP or UDP, and the default is TCP if the protocol is not specified. The EXPOSE instruction does not actually publish the port. It functions as a type of documentation about which ports are intended to be published between the person who builds the image and the person who runs the container. To actually publish any port, we should use the -p flag during container creation.
Now it's time to build the image.
Type:
$ docker image build -t your_dockerhub_id/node:latest .
Output will be something like:
Sending build context to Docker daemon  4.096kB
Step 1/7 : FROM node:12
 ---> cfcf3e70099d
Step 2/7 : WORKDIR /usr/src/app
 ---> Running in 0784285bb528
Removing intermediate container 0784285bb528
 ---> 548e712ed3ef
Step 3/7 : COPY package.json .
 ---> 3f85bf98e435
Step 4/7 : COPY server.js .
 ---> beb25f72bb6a
Step 5/7 : RUN npm install
 ---> Running in e3eed8b0c46d
npm notice created a lockfile as package-lock.json. You should commit this file.
npm WARN docker_web_app@1.0.0 No repository field.
npm WARN docker_web_app@1.0.0 No license field.

added 50 packages from 37 contributors and audited 50 packages in 2.167s
found 0 vulnerabilities

Removing intermediate container e3eed8b0c46d
 ---> 8d3082c10a9e
Step 6/7 : EXPOSE 8080
 ---> Running in 0e6bd014ac73
Removing intermediate container 0e6bd014ac73
 ---> 5143985531f3
Step 7/7 : CMD [ "node", "server.js" ]
 ---> Running in 152317b9eafe
Removing intermediate container 152317b9eafe
 ---> a832145edf14
Successfully built a832145edf14
Successfully tagged ozgurozturknet/node:latest
Image has been built successfully. But I want you to run the same command one more time.
Sending build context to Docker daemon  4.096kB
Step 1/7 : FROM node:12
 ---> cfcf3e70099d
Step 2/7 : WORKDIR /usr/src/app
 ---> Using cache
 ---> 3d04799d4f2a
Step 3/7 : COPY package.json .
 ---> Using cache
 ---> a348cb47ad20
Step 4/7 : COPY server.js .
 ---> Using cache
 ---> 5affbe5fce86
Step 5/7 : RUN npm install
 ---> Using cache
 ---> ad11b36a3604
Step 6/7 : EXPOSE 8080
 ---> Using cache
 ---> 57b485f4eef1
Step 7/7 : CMD [ "node", "server.js" ]
 ---> Using cache
 ---> fb0586534394
Successfully built fb0586534394
Successfully tagged ozgurozturknet/node:latest
Something strange has happened. We built that image a few seconds ago and we didn't change any source file after that. Then we reran the docker image build command second time but we received lots of ---> Using cache messages this time. What does that mean?
When building an image, Docker steps through the instructions in your Dockerfile, executing each in the order specified. As each instruction is examined, Docker looks for an existing layers in its cache that it can reuse, rather than creating a new (duplicate) layer. If you don't change any source file or didn't change anything in the Dockerfile, this means that nothing has changed, so Docker doesn't run the instruction again and again. Instead of that, Docker uses the cached layers. That makes the build process fast. Let's simulate that and see what happens if we change something. Open server.js file with a text editor, go to line 12 and change the Hello World message with another message something like build cache test. Save the file and rerun docker image build -t your_dockerhub_id/node:latest . command one more time.
Sending build context to Docker daemon  4.096kB
Step 1/7 : FROM node:12
 ---> cfcf3e70099d
Step 2/7 : WORKDIR /usr/src/app
 ---> Using cache
 ---> 3d04799d4f2a
Step 3/7 : COPY package.json .
 ---> Using cache
 ---> a348cb47ad20
Step 4/7 : COPY server.js .
 ---> 800aa5cd76d2
Step 5/7 : RUN npm install
 ---> Running in 20f6c9a2c4e0
npm notice created a lockfile as package-lock.json. You should commit this file.
npm WARN docker_web_app@1.0.0 No repository field.
npm WARN docker_web_app@1.0.0 No license field.

added 50 packages from 37 contributors and audited 50 packages in 2.521s
found 0 vulnerabilities

Removing intermediate container 20f6c9a2c4e0
 ---> eac206f9957e
Step 6/7 : EXPOSE 8080
 ---> Running in 3084d34a448f
Removing intermediate container 3084d34a448f
 ---> 1e4c0a700aa6
Step 7/7 : CMD [ "node", "server.js" ]
 ---> Running in b0fae2027731
Removing intermediate container b0fae2027731
 ---> 729b13c3276f
Successfully built 729b13c3276f
Successfully tagged ozgurozturknet/node:latest
Docker started to build an image again. First step, nothing changed, used the cache. Second step, nothing changed, used the cache. Third step, nothing changed, used the cache. But fourth step, we wanted to copy server.js file, which has been changed. Old layer that Docker has created and cached before is invalid now. So Docker started to execute that instruction and created a new layer and didn't use the cached version. And each instruction after that has been executed again and Docker didn't use the cache. Because something has changed and the rest of the layers should be affected too. Therefore, Docker can't use cache for them too. That's kind of important thing to know. Because you can speed up build process by leveraging build cache. But order of Dockerfile instructions is important.
For example, if your Dockerfile contains several instruction, like ours, you can order them from the less frequently changed (to ensure the build cache is reusable) to the more frequently changed. If we move COPY server.js . from 4. step to anywhere after the RUN npm install instruction, this means that, we can change anything in this server.js file and Docker will not rerun npm install each time when we build that image again and use cache for that step.
(Visit https://docs.docker.com/develop/develop-images/dockerfile_best-practices/ for Dockerfile best practices)
It's time to create a container from that image and see if it's working properly.
Type:
$ docker container run --rm -d -p 80:8080 --name node_container your_dockerhub_id/node:latest
Output will be something like:
09a4d1789cdab19a0f3af9c66a4f6e68503e5b8a1f46d6c512e88b10c5e70011
Open a browser and visit http://127.0.0.1 You would see a page with a Hello World! message.
Stop the container and it'll be deleted automatically.
Type:
$ docker container stop node_container
Output will be something like:
node_container
4: Multi-stage build
Click to expand!
Let's imagine that we're java developers and working on a new shiny project called App1 (Do you remember our old friend 😃). Application has been written and it's ready. Now it is time to check the source code. It's located at /trainingdays/day6/apps/java folder. cd to that folder and list all the files.
Type:
$ cd /trainingdays/day6/apps/java
$ ls -l
Output will be something like:
total 8
-rw-r--r-- 1 ozozturk ozozturk 135 Jun 12 22:43 Dockerfile
-rw-r--r-- 1 ozozturk ozozturk 154 Jun 12 22:35 app1.java
-rw-r--r-- 1 ozozturk ozozturk 154 Jun 12 22:35 Dockerfile2
There are 2 files in it (actually 3 but let's forget Dockerfile2 for now). app1.java is the source code of our application. Please pay attention. It is not the application, it is just the source code of this application. It isn't compiled yet. To convert this source code to an application, we have to compile this code. We generally do that on our computers via IDEs. But we can use the power of Docker and compile our application while building the image. The Dockerfile in this folder is a good example of that practice. Let's check the Dockerfile.
Type:
$ cat Dockerfile
Output will be something like:
FROM mcr.microsoft.com/java/jdk:8-zulu-alpine
COPY . /usr/src/myapp/
WORKDIR /usr/src/myapp
RUN javac app1.java
CMD [ "java" , "app1" ]
Again, a simple Dockerfile. We want to build our image on top of the "Java Development Kit" image provided by Microsoft. JDK image has all the tools in it that we need to compile our java code and convert it to a java application. First, we copy that source code to the image and after that we jump into that folder and run javac app1.java command which compiles this source code and generates an application. At the end, we have a CMD instruction that instructs to run this application whenever we create a container from that image. Let's build the image.
Type:
$ docker image build -t your_dockerhub_id/java:latest .
Output will be something like:
Sending build context to Docker daemon  3.072kB
Step 1/5 : FROM mcr.microsoft.com/java/jdk:8-zulu-alpine
8-zulu-alpine: Pulling from java/jdk
df20fa9351a1: Pull complete
1e7717fd7ab1: Pull complete
Digest: sha256:19712872c6dd8ca02a8f727737372477559f2659aa6294c2dcae050096234224
Status: Downloaded newer image for mcr.microsoft.com/java/jdk:8-zulu-alpine
 ---> b7bb6dd0ee76
Step 2/5 : COPY . /usr/src/myapp/
 ---> ed2f0977e390
Step 3/5 : WORKDIR /usr/src/myapp
 ---> Running in d2333b9e9af3
Removing intermediate container d2333b9e9af3
 ---> 55a151ddf81a
Step 4/5 : RUN javac app1.java
 ---> Running in b8697de33caa
Removing intermediate container b8697de33caa
 ---> 3bfd240a44ff
Step 5/5 : CMD [ "java" , "app1" ]
 ---> Running in 00a6a2a448ab
Removing intermediate container 00a6a2a448ab
 ---> ceab35948e29
Successfully built ceab35948e29
Successfully tagged ozgurozturknet/java:latest
Image has been built. Let's test it.
Type:
$ docker container run your_dockerhub_id/java:latest
Output will be something like:
Hello there! I'm App1 Java Console Application
Perfect. It works. App1 has been compiled and it runs. But it seems to me that, something is wrong with that approach. First of all, we built our image on top of the JDK image. It includes lots of tools for development. Like the one that we ran to compile our application. But, should we really send this image to our customers as is? With all of these development tools? Also our source code is copied to that image too. Maybe that is not something we want. We just wanted to compile our source code and get the application. We want our customers to be able to run this application. We don't want them to have all the unnecessary tools and our source code. Also image size is big, because of these unnecessary tools. These tools are needed for development. They are not needed for running java applications. JRE, java runtime is the thing that we need to run java applications. It's just the runtime and much smaller than the jdk.
Instead of sending this image, It would be wise to get this compiled application from that image, copy it to our computer and create another image that includes just this application + runtime, instead of application + source code + development tools. So we need to build another image. To be able to do that, we need to create a second Dockerfile. But eeeh. This is a mess. There should be a simple solution. Yes there is a simple solution to handle this and it's called multi-stage build.
One of the most challenging thing about building images is keeping the image size down. Each instruction in Dockerfile adds a layer to image, and you need to remember to clean up any artifacts you don’t need before moving on to the next layer. To write a really efficient Dockerfile, you have traditionally needed to employ shell tricks and other logic to keep the layers as small as possible and to ensure that each layer has the artifacts it needs from the previous layer and nothing else. It was actually very common to have one Dockerfile to use for development (which contained everything needed to build your application), and a slimmed-down one to use for production, which only contained your application and exactly what was needed to run it. This has been referred to as the “builder pattern”. But maintaining two Dockerfiles is not ideal.
With multi-stage builds, you can use multiple FROM statements in your Dockerfile. Each FROM instruction can use a different base, and each of them begins a new stage of the build. You can selectively copy artifacts from one stage to another, leaving behind everything you don’t want in the final image. Dockerfile2 is a perfect example of this kind of multi-stage build. Let's check it.
Type:
$ cat Dockerfile2
Output will be something like:
FROM mcr.microsoft.com/java/jdk:8-zulu-alpine AS builder
COPY . /usr/src/myapp/
WORKDIR /usr/src/myapp
RUN javac app1.java

FROM  mcr.microsoft.com/java/jre:8-zulu-alpine
WORKDIR /usr/src/myapp
COPY --from=builder /usr/src/myapp .
CMD ["java", "app1"]
As you can see, we have a Dockerfile with 2 "FROM" instructions. Think it like 2 Dockerfiles combined together. First part is similar to the Dockerfile that we have built our application a few minutes ago. There are only 2 differences. First, there is a new section at the end of the "FROM" instruction. "AS builder" or it could be "AS anything", just name it. It indicates that this first section of this Dockerfile is named as "builder". We're gonna use this name later to copy artifacts generated in this stage. Second difference is that "CMD" instruction has been removed, because we don't need it anymore. This "builder" stage is just used for compiling the application from its source code. We're taking our source code, copying it into a jdk image, compiling the application in it and that's it. After that we are building our actual image with a new "FROM" instruction. This second stage will create the actual image that will be tagged at the end. It's based on JRE image, not the JDK.
Please pay attention to line 8. "COPY --from=builder". We're instructing Docker to copy files from stage called builder. First stage is there just to compile our application. Our source code has been compiled and application has been created at this builder stage. And we're copying just this compiled application into final image. In this way, jdk and any intermediate artifacts are left behind and not present in the final image. The end result is this tiny production image that just includes the application. Not the source code and not the development tools. Let's build this image and see what's going on.
(We're gonna use -f option to point this Dockerfile2. If your Dockerfile name is different than Dockerfile -First letter is Uppercase "D" and file doesn't have any extension like .txt- or Dockerfile is in another folder, you should use -f option and point that file)
Type:
$ docker image build -f Dockerfile2 -t your_dockerhub_id/finaljava:latest .
Output will be something like:
Sending build context to Docker daemon  4.096kB
Step 1/8 : FROM mcr.microsoft.com/java/jdk:8-zulu-alpine AS builder
 ---> b7bb6dd0ee76
Step 2/8 : COPY . /usr/src/myapp/
 ---> 786a33a37acb
Step 3/8 : WORKDIR /usr/src/myapp
 ---> Running in 1145e3882420
Removing intermediate container 1145e3882420
 ---> 5f16de8216fb
Step 4/8 : RUN javac app1.java
 ---> Running in 98375300d10a
Removing intermediate container 98375300d10a
 ---> f632a0c6f49e
Step 5/8 : FROM  mcr.microsoft.com/java/jre:8-zulu-alpine
8-zulu-alpine: Pulling from java/jre
df20fa9351a1: Already exists
b391ad10af71: Pull complete
Digest: sha256:bb7135444a7e78448b0038d26079e6bef78c1c7839333bf9806d6c12e65a1eff
Status: Downloaded newer image for mcr.microsoft.com/java/jre:8-zulu-alpine
 ---> 36c60fc08a2d
Step 6/8 : WORKDIR /usr/src/myapp
 ---> Running in 25809e0fd983
Removing intermediate container 25809e0fd983
 ---> 5b580490d819
Step 7/8 : COPY --from=builder /usr/src/myapp .
 ---> e357def56d05
Step 8/8 : CMD ["java", "app1"]
 ---> Running in 00585394dbfb
Removing intermediate container 00585394dbfb
 ---> 7b7c6b3a7f6a
Successfully built 7b7c6b3a7f6a
Successfully tagged ozgurozturknet/finaljava:latest
Final image has been built. It's much smaller than the first one. Also only artifacts that we need are included.
5: Php contacts app
Click to expand!
This time, we're gonna combine what have we learned so far. We will build 2 images. First one is a simple php application. The other one is famous mysql database. After building images, we will run these and try couple of tricks that we have learned so far. First, let's check and see what we're gonna build. All files are located at /trainingdays/day6/apps/php folder. cd to that folder and list all the files.
Type:
$ cd /trainingdays/day6/apps/php
$ ls -l
Output will be something like:
total 24
-rw-r--r-- 1 ozozturk ozozturk  333 Aug 13 11:54 Dockerfile
-rw-r--r-- 1 ozozturk ozozturk   64 Aug 13 11:36 Dockerfile.mysql
-rw-r--r-- 1 ozozturk ozozturk  112 Aug 13 11:36 createtable.sql
-rw-r--r-- 1 ozozturk ozozturk   81 Aug 13 11:36 env.list
-rw-r--r-- 1 ozozturk ozozturk  107 Aug 13 11:36 envmysql.list
drwxr-xr-x 2 ozozturk ozozturk 4096 Aug 13 11:35 php
It's a little bit crowded folder. There are 2 Dockerfiles. First one is the Dockerfile that we'll be used to build web app image. Second one will be used to build myqsql database image.
There are 2 other files with .list extenison in this folder. These files will be used to define environment variables while creating containers. "env.list" will be passed to php web container. There are couple of environment variables defined in this file and php web application will use these values to connect to the database -username, password etc.-. "envmysql.list" is another environment variable file and has couple of other environment variables defined in it. We'll pass this values to mysql container. mysql container will start and create a database using these parameters. Essentially, we could inject these variables into the Dockerfiles. Yes, it's possible. We can define environment variables with ENV instruction in any Dockerfile and any container created from that image will have these environment variables. But if we do that, these will be hardcoded to image. This means that whoever get this image can access to these values. Especially this isn't a thing that we want for sensitive data like passwords. Therefore, we didn't define them in Dockerfiles. Instead of that, we will pass these values during container creation.
"createtable.sql" is an sql script that will create a table, which will be used by php web app to store its data. We'll copy this script to a special folder in the image. When we create a container from that image, mysql will create a table using that script.
"php" is the folder where our main web app is located. There are 3 files in that folder. It's really a simple web app which allows us to record contact details. Kind of primitive crm.
Let's have a look at Dockerfiles before building images.
Type:
$ cat Dockerfile
Output will be something like:
FROM php:7.3-apache
RUN apt-get update -y && apt-get install curl mariadb-client-10.3 -y
RUN docker-php-ext-install mysqli && docker-php-ext-enable mysqli
RUN mkdir /var/www/html/images
RUN chmod 777 /var/www/html/images
COPY ./php/ /var/www/html/
HEALTHCHECK --interval=30s --timeout=3s CMD curl -f http://localhost/ || exit 1
We use official php image as our base. Then we install couple of binaries that we need and create a folder where we'll store uploaded images. After that we copy our web app into image. So far nothing unknown. But now we have a new instruction, "HEALTHCHECK". "HEALTHCHECK" instruction tells Docker "how to test a container to check if it's still working or not?". This can detect cases such as a web server that is stuck in an infinite loop and unable to handle new connections, even though the server process is still running so the container is up. When we run a container which has a healthcheck defined in its image, this container has a "health" status in addition to its "lifecycle" status. This allows us to monitor container's health status and take action if something goes wrong. In our case, we instructed that each container created from that image should start a healthchecking process and continue to do that every 30 seconds. If container gets a response from http://localhost/, Docker will mark the container as healthy, otherwise unhealthy.
All good so far but there's something strange in this Dockerfile. We don't have any CMD instruction in this file. So, which application will be started when a container been created from that image? Is there anything like secret CMD or something else? Answer is really simple. When you build an image, Docker inherits all the settings from base image. If you specify anything on your Dockerfile, it overwrites the same value that is inherited from base image. But if you left it blank, Image uses the inherited value from base image. In our case, we don't have the CMD instruction, so Docker will inherit this from base image. That's enough for the first Dockerfile. Let's take have a look at mysql's Dockerfile too.
Type:
$ cat Dockerfile.mysql
Output will be something like:
FROM mysql:5.7
COPY createtable.sql /docker-entrypoint-initdb.d
This is really short. We're gonna use mysql:5.7 as our base and copy createtable.sql to /docker-entrypoint-initdb.d folder. That's all. When a mysql container is started for the first time, a new database with the specified name will be created and initialized with the provided configuration variables. In addition to that, mysql container executes files with extensions .sh, .sql and .sql.gz that are found in /docker-entrypoint-initdb.d folder. That's the reason why we copy our sql script to this folder. When a container is been created from that image, it'll execute this script and this script will create our database. (See https://hub.docker.com/_/mysql for details)
It's time to build 2 images.
Type:
$ docker image build -t your_dockerhub_id/php:v1 .
Output will be something like:
Sending build context to Docker daemon  11.26kB
Step 1/7 : FROM php:7.3-apache
Step 2/7 : RUN apt-get update -y && apt-get install curl mariadb-client-10.3 -y
 ---> Running in dca6dcd061df
[…]
[…]
[…]
Step 6/7 : HEALTHCHECK --interval=30s --timeout=3s CMD curl -f http://localhost/ || exit 1
 ---> Running in d6dc02b8ca50
Removing intermediate container d6dc02b8ca50
 ---> bf3e03646cc0
Step 7/7 : COPY ./php/ /var/www/html/
 ---> 53959f571f38
Successfully built 53959f571f38
Successfully tagged ozgurozturknetphp:v1
Php image is ready. Let's build mysql image now.
Type:
$ docker image build -f Dockerfile.mysql -t your_dockerhub_id/mysql:v1 .
Output will be something like:
Sending build context to Docker daemon  11.26kB
Step 1/2 : FROM mysql:5.7
Status: Downloaded newer image for mysql:5.7
 ---> 718a6da099d8
Step 2/2 : COPY createtable.sql /docker-entrypoint-initdb.d
 ---> 2dfc8038fc98
Successfully built 2dfc8038fc98
Successfully tagged ozgurozturknetmysql:v1
Done. Images are ready. It's time to run our fancy crm application but first let's create a new bridge network. Web contaier should access to mysql database container via its name. Therefore, these containers must be able to resolve each others name.
Type:
$ docker network create php-mysql-net
Output will be something like:
f3b75a829c3f7a8d5268dbf9dcb884071b3affaed642b3fe6354e78193d054c6
Images are ready. Bridge network has been created. We're ready to create containers.
Type:
$ docker container run -d --name phpapp --network php-mysql-net -p 80:80 --env-file env.list your_dockerhub_id/php:v1
Output will be something like:
c580f355ad836c1021ee5959970bdf53c93de088c701af4110e1dfd8e976a80b
Type:
$ docker container run -d --name mysqldb --network php-mysql-net --env-file envmysql.list your_dockerhub_id/mysql:v1
Output will be something like:
02d51c5ad53c0f1fd0679a5b0f4b60a742a07eecd9eb2f7eebbb8eb800bed73e
Type:
$ docker ps
Output will be something like:
CONTAINER ID        IMAGE                    COMMAND                  CREATED              STATUS                        PORTS                 NAMES
02d51c5ad53c        ozgurozturknetmysql:v1   "docker-entrypoint.s…"   53 seconds ago       Up 52 seconds                 3306/tcp, 33060/tcp   mysqldb
c580f355ad83        ozgurozturknetphp:v1     "docker-php-entrypoi…"   About a minute ago   Up About a minute (healthy)   0.0.0.0:80->80/tcp    phpapp
Containers are up and running and also phpapp's status is healthy. Let's open a browser and see if php application is also working and can connect to mysql database or not. Visit http://127.0.0.1
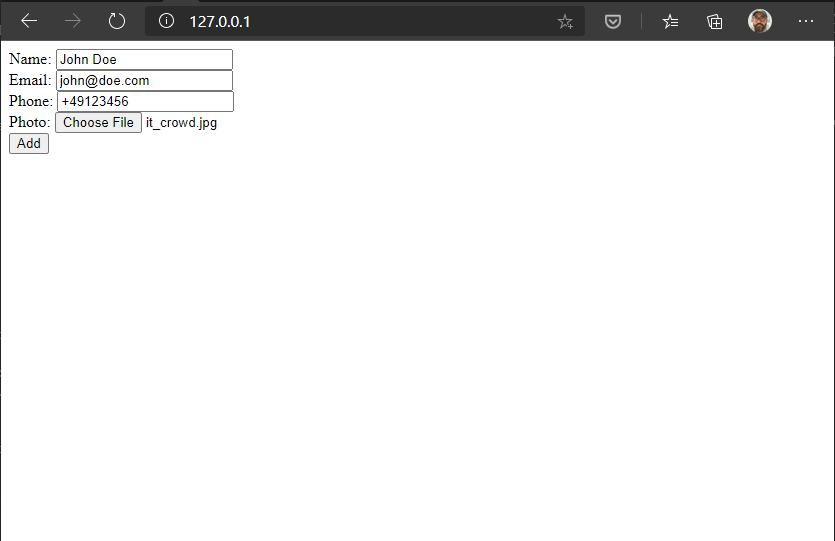
Fill the form and click add.
If you saw this message, everything is fine. Click View and check your records.
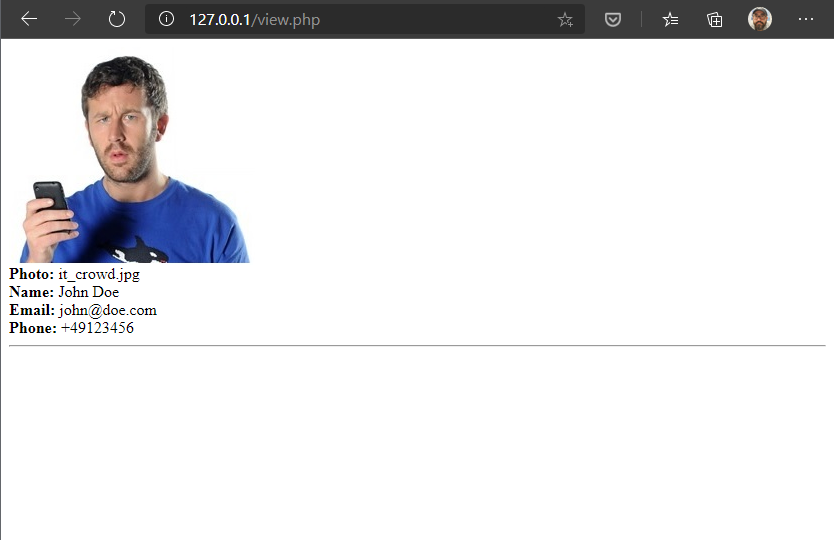
Congratulations! You have successfully built a 2-tier web app and run that locally.
Now we can stop and delete the containers. Please don't delete these images for now. We will use these at Challange 5. Type:
$ docker container rm -f mysqldb phpapp
6: Docker commit
Click to expand!
Dockerfile isn't the only way to create an image. We can convert a container to an image too. It can be useful to commit a container’s file changes or settings into a new image. This allows us to debug a container by running an interactive shell, or to export a working dataset to another server. Generally, it is better to use Dockerfiles to manage your images in a documented and maintainable way, but sometimes this type of commit method is also needed. Let's try this. First let's create a container and create a file in it.
Type:
$ docker container run -it --name commit_test busybox sh
Output will be something like:
/ # mkdir /test
/ # cd /test
/test # touch test.txt
/test # echo "hello world" > test.txt
/test # exit
Let's assume that we have an important container. We have connected to it and made lots of changes. Created folders and files, installed something etc. We don't want to loose our efforts and keep this container as an image. So we can move it anywhere. Let's commit this container and convert it to an image.
Type:
$ docker commit commit_test your_dockerhub_id/commit:latest
Output will be something like:
sha256:8f5d8a8e42bd9419f6a932c0e70b0700f0618096d6c3f4a06753520fac236ed7
Our image is ready. Now if we want, we can push it to our repository and move it to anywhere we want.
# Wrap up
Congratulations you have completed the Image and Registry challenge and learned how to create Docker images and play with them.
*** Reference: https://docs.docker.com