# Challenge 3: Docker Objects
# Here is what you'll learn
- Creating Volumes
- Inspecting Volumes
- Creating Networks
- Checking connection differences between different networks
In this challenge, we're gonna play with Volume and Network objects which are the most important Docker objects after Images and Containers.
# Exercises
1: Creating the first volume
Click to expand!
Docker volumes are docker objects, just like containers and images. We create them just like creating images or containers. By default, we create them on the host where Docker daemon is running. But if we want, they can be created using various volume plug-ins and these plug-ins allow us to store the data, for example on a nfs drive or on the cloud. After the volume is created, we can mount that volume to any folder inside the container. From that moment, any files written to that folder will be physically stored in the volume. This way, we can keep these files longer than the container's lifetime. Any file in the container is deleted and lost, when container is deleted. Volumes allow us to keep files independent of containers' lifetime. Let's create our first volume and see that in action.
First let's check if there is any volume has been created on the host before.
Type:
$ docker volume ls
Output will be something like:
DRIVER VOLUME NAME
We don't have any volume at the moment. Let's create the first one. For that, we're gonna use docker volume create command without any option. If we want to use any specific volume driver, we would use -d option but we want to create a local volume so we don't have to specify a driver.
Type:
$ docker volume create first_volume
Output will be something like:
first_volume
We've just created our first volume. Now it's time to inspect it and see the details.
Type:
$ docker volume inspect first_volume
Output will be something like:
[
    {
        "CreatedAt": "2020-06-04T13:33:47Z",
        "Driver": "local",
        "Labels": {},
        "Mountpoint": "/var/lib/docker/volumes/first_volume/_data",
        "Name": "first_volume",
        "Options": {},
        "Scope": "local"
    }
]
I want you to pay attention to "Mountpoint": section of this output. This is literally the path where this volume is located. Any file in this volume is actually stored in this path. Docker Desktop for Windows and Docker Desktop for Mac spin up a lightweight vm and run Docker daemon inside that. Therefore we can't access to this path but if you run Docker daemon on any Linux VM, cd to that path and you can see the files stored in it. Ok, now we have an empty volume. We can mount that volume to a container. It's really easy. The option that we'll use is -v and the rule is always volume-name : container-path. Let's say we want to mount the volume called first_volume to the folder /test. Our option would be -v first_volume:/test. If this folder doesn't exist in the image, the folder will be created when container is created.
Now it's time to create a container and mount that volume. We're gonna create a new interactive container from ubuntu image and connect to its bash shell. first_volume will be mounted to container's /test folder. After it's created, we'll switch to /test directory and create a file called test.txt and exit.
(We will use another useful option too, which is --rm. If you create a Docker container with --rm, the container will be automatically deleted when it's exited. Therefore you don't need to manually clean later. Please use with caution.)
Type:
$ docker container run -it --rm -v first_volume:/test ubuntu bash
Output will be something like:
root@666540d6384b:/#
Now we're connected to the container. Let's jump to the /test folder and create a file in it.
root@666540d6384b:/# cd /test
root@666540d6384b:/test# echo "this is a test line" > test.txt
root@666540d6384b:/test# ls
test.txt
root@666540d6384b:/test# exit
exit
When we exited, the container stopped working. We created that container with --rm therefore container is deleted too. You can check this by typing docker ps -a. There shouldn't be any running or stopped container at the moment. first_volume has been mounted to this container's /test folder. Therefore anything was written to that folder actually was written to the volume. Container was deleted but volume still remains. So our data too. Let's create another container and see that. This time we're gonna create another container from alpine image to see that it doesn't matter which image we use.
Type:
$ docker container run -it --rm -v first_volume:/test2 alpine sh
Output will be something like:
Unable to find image 'alpine:latest' locally
latest: Pulling from library/alpine
df20fa9351a1: Pull complete
Digest: sha256:185518070891758909c9f839cf4ca393ee977ac378609f700f60a771a2dfe321
Status: Downloaded newer image for alpine:latest
/ #
We're connected to the container. Let's jump to the /test2 folder and check if file is there.
/ # cd /test2
/test2 # ls
test.txt
/test2 # cat test.txt
this is a test line
/test2 # exit
Yes! The file is there. As you can see, we kept our data longer than the container's lifetime. Don't forget, containers are disposable and can be deleted but your data doesn't need to be.
2: Other volume options
Click to expand!
Another use case of the volumes is that you can mount the same volume to multiple containers at the same time. Let's try that.
Type:
$ docker container run -it --rm --name con1 -v first_volume:/test ubuntu bash
Output will be something like:
root@70fd46786a11:/#
We've created a new container and connected to its bash shell. Also first_volume is mounted to the /test folder. While this is running let's open a 2nd terminal window and create another container and mount the same volume too.
Type:
$ docker container run -it --rm --name con2 -v first_volume:/test2 ubuntu bash
Output will be something like:
root@7c697541e9ed:/#
Now we have 2 containers. con1 and con2. first_volume is mounted to con1's /test folder and also it's mounted to con2's /test2 folder. Let's create a file in the /test2 folder at con2.
root@7c697541e9ed:/# cd /test2
root@7c697541e9ed:/test2# touch from-con2.txt
root@7c697541e9ed:/test2# ls
from-con2.txt  test.txt
root@7c697541e9ed:/test2#
After that just turn back to 1st terminal window. It's connected to con1's bash shell. Jump to the /test folder and see that file is seen from there too.
root@70fd46786a11:/# cd /test
root@70fd46786a11:/test# ls
from-con2.txt  test.txt
root@70fd46786a11:/test#
This time, we'll create another container and mount first_volume to /test3 folder but this time the volume will be mounted read only. For that, we're gonna use :ro option. Open another terminal window and;
Type:
$ docker container run -it --rm --name con3 -v first_volume:/test3:ro ubuntu bash
Output will be something like:
root@0f00f388b5e8:/#
cd to /test3 and try to create or delete any file. You're gonna get an error message because volume is mounted as read-only.
root@0f00f388b5e8:/# cd /test3
root@0f00f388b5e8:/test3# ls
from-con2.txt  test.txt
root@0f00f388b5e8:/test3# rm test.txt
rm: cannot remove 'test.txt': Read-only file system
root@0f00f388b5e8:/test3# touch newfile.txt
touch: cannot touch 'newfile.txt': Read-only file system
root@0f00f388b5e8:/test3#
Type exit in all 3 terminals. This will close the containers and they'll be automatically deleted. But volume will not be deleted. Therefore we're gonna keep the files that we need. But now, we're done our exercise so we can delete this volume too.
Type:
$ docker volume rm first_volume
Output will be something like:
first_volume
3: Default networks - Bridge
Click to expand!
Let's get started. First we're gonna list current network objects.
Type:
$ docker network ls
Output will be something like:
NETWORK ID          NAME                DRIVER              SCOPE
0a63e660c39f        bridge              bridge              local
a4c8780d68f4        host                host                local
3f2520a5781c        none                null                local
When Docker engine is installed, a default bridge network (also called bridge) is created automatically and newly-started containers connect to it unless otherwise specified. In addition to that, two other networks are created too. Which are host and none.
All containers without a --network option specified are attached to the default bridge network. Containers on the default bridge network can access each other by their IP addresses. You can also create user-defined custom bridge networks. But we'll come to that later. For now, let's inspect the default bridge network.
Type:
$ docker network inspect bridge
Output will be something like:
[
    {
        "Name": "bridge",
        "Id": "0a63e660c39f21b42b1c7722edf80667036af813820a743e900b65cf4d245314",
        "Created": "2020-07-29T18:01:01.192938Z",
        "Scope": "local",
        "Driver": "bridge",
        "EnableIPv6": false,
        "IPAM": {
            "Driver": "default",
            "Options": null,
            "Config": [
                {
                    "Subnet": "172.17.0.0/16",
                    "Gateway": "172.17.0.1"
                }
            ]
        },
        "Internal": false,
        "Attachable": false,
        "Ingress": false,
        "ConfigFrom": {
            "Network": ""
        },
        "ConfigOnly": false,
        "Containers": {},
        "Options": {
            "com.docker.network.bridge.default_bridge": "true",
            "com.docker.network.bridge.enable_icc": "true",
            "com.docker.network.bridge.enable_ip_masquerade": "true",
            "com.docker.network.bridge.host_binding_ipv4": "0.0.0.0",
            "com.docker.network.bridge.name": "docker0",
            "com.docker.network.driver.mtu": "1500"
        },
        "Labels": {}
    }
]
"Subnet" is "172.17.0.0/16" and "Gateway" is "172.17.0.1". This means that all containers without a --network specified will be attached to this bridge network and get an ip address from that subnet. Also each container that are connected to this network can communicate with each other. It's time to try that. First we're gonna create 2 containers with -d and -it options, in short -dit. This allows us to create a container interactive and connected "-it" but also detached "-d". So connection will be opened to this container but we'll get our terminal back. In this way, we can continue to work.
Type:
$ docker container run -dit --rm --name con1 ubuntu bash
Output will be something like:
bb1dcc608811c3d7d5dd63f09fc23424bb188c2053df618861887321c8043cee
Type:
$ docker container run -dit --rm --name con2 ubuntu bash
Output will be something like:
f89a73c7d38d6bad0d14b68cc629e8e4fd2f32e8f274ce20cbbb8f116efe5887
In the mean time we're gonna learn another docker command which is docker attach. This command allows us to attach our terminal’s standard input, output, and error (or any combination of the three) to a running container using the container’s ID or name. This allows us to see its ongoing output or control it interactively, as though the commands were running directly in your terminal. This is how we will attach to running connection on these containers. But before that let's inspect the bridge network object one more time.
Type:
$ docker network inspect bridge
Output will be something like:
[
    {
        "Name": "bridge",
        "Id": "0a63e660c39f21b42b1c7722edf80667036af813820a743e900b65cf4d245314",
        "Created": "2020-07-29T18:01:01.192938Z",
        "Scope": "local",
        "Driver": "bridge",
        "EnableIPv6": false,
        "IPAM": {
            "Driver": "default",
            "Options": null,
            "Config": [
                {
                    "Subnet": "172.17.0.0/16",
                    "Gateway": "172.17.0.1"
                }
            ]
        },
        "Internal": false,
        "Attachable": false,
        "Ingress": false,
        "ConfigFrom": {
            "Network": ""
        },
        "ConfigOnly": false,
        "Containers": {
            "bb1dcc608811c3d7d5dd63f09fc23424bb188c2053df618861887321c8043cee": {
                "Name": "con1",
                "EndpointID": "76ca82059a18dad551283a9a8804791bea97138065d1ec8f104381a9d79a6454",
                "MacAddress": "02:42:ac:11:00:02",
                "IPv4Address": "172.17.0.2/16",
                "IPv6Address": ""
            },
            "f89a73c7d38d6bad0d14b68cc629e8e4fd2f32e8f274ce20cbbb8f116efe5887": {
                "Name": "con2",
                "EndpointID": "844f3d3c8f07e29170c8742ed59ea47b0bb01bb80c25e36122eaa981a2c1322e",
                "MacAddress": "02:42:ac:11:00:03",
                "IPv4Address": "172.17.0.3/16",
                "IPv6Address": ""
            }
        },
        "Options": {
            "com.docker.network.bridge.default_bridge": "true",
            "com.docker.network.bridge.enable_icc": "true",
            "com.docker.network.bridge.enable_ip_masquerade": "true",
            "com.docker.network.bridge.host_binding_ipv4": "0.0.0.0",
            "com.docker.network.bridge.name": "docker0",
            "com.docker.network.driver.mtu": "1500"
        },
        "Labels": {}
    }
]
This time, container section of the output is not empty. We have created two containers. They're still running. And we didn't use --network when we created them so they both are connected to default bridge network. You can see their names, ids and ip addresses above. Let's attach to con1 and check the network details.
Type:
$ docker attach con1
Output will be something like:
root@bb1dcc608811:/#
We are in con1. First we're gonna check network details by typing ifconfig but when you do that, you will get an error "bash: ifconfig: command not found". Another important thing you have to know about container images is that most of them are minimal builds and don't have even most used basic tools like ifconfig and ping. We need to install that first.
Type:
root@bb1dcc608811:/# apt update -y && apt install -y net-tools iputils-ping
Output will be something like:
root@bb1dcc608811:/#
We've installed ifconfig and ping utilities. Now we can check the container's ip address.
Type:
root@bb1dcc608811:/# ifconfig
Output will be something like:
eth0: flags=4163<UP,BROADCAST,RUNNING,MULTICAST>  mtu 1500
        inet 172.17.0.2  netmask 255.255.0.0  broadcast 172.17.255.255
        ether 02:42:ac:11:00:02  txqueuelen 0  (Ethernet)
        RX packets 10482  bytes 15220468 (15.2 MB)
        RX errors 0  dropped 0  overruns 0  frame 0
        TX packets 4994  bytes 274694 (274.6 KB)
        TX errors 0  dropped 0 overruns 0  carrier 0  collisions 0

lo: flags=73<UP,LOOPBACK,RUNNING>  mtu 65536
        inet 127.0.0.1  netmask 255.0.0.0
        loop  txqueuelen 1000  (Local Loopback)
        RX packets 0  bytes 0 (0.0 B)
        RX errors 0  dropped 0  overruns 0  frame 0
        TX packets 0  bytes 0 (0.0 B)
        TX errors 0  dropped 0 overruns 0  carrier 0  collisions 0
As you can see, con1 got an ip address "172.17.0.2". Let's try to ping con2. Ip address of con2 is 172.17.0.3.
Type:
root@bb1dcc608811:/# ping -c 4 172.17.0.3
Output will be something like:
PING 172.17.0.3 (172.17.0.3) 56(84) bytes of data.
64 bytes from 172.17.0.3: icmp_seq=1 ttl=64 time=4.85 ms
64 bytes from 172.17.0.3: icmp_seq=2 ttl=64 time=0.105 ms
64 bytes from 172.17.0.3: icmp_seq=3 ttl=64 time=0.090 ms
64 bytes from 172.17.0.3: icmp_seq=4 ttl=64 time=0.156 ms

--- 172.17.0.3 ping statistics ---
4 packets transmitted, 4 received, 0% packet loss, time 3086ms
rtt min/avg/max/mdev = 0.090/1.299/4.848/2.048 ms
It seems that connection between con1 and con2 is possible. Because they're connected to the same default bridge network. They can communicate directly without exposing their ports. They're on the same network and there isn't any rule that blocks this communication. But I wonder if they can solve each other's name too? Is there any dns mechanism running behind the scenes? Let's try that. First we're gonna try to ping www.bing.com and see if container can solve public domain names.
Type:
root@bb1dcc608811:/# ping -c 2 www.bing.com
Output will be something like:
PING dual-a-0001.a-msedge.net (13.107.21.200) 56(84) bytes of data.
64 bytes from 13.107.21.200 (13.107.21.200): icmp_seq=1 ttl=37 time=11.4 ms
64 bytes from 13.107.21.200 (13.107.21.200): icmp_seq=2 ttl=37 time=15.1 ms

--- dual-a-0001.a-msedge.net ping statistics ---
2 packets transmitted, 2 received, 0% packet loss, time 1002ms
rtt min/avg/max/mdev = 11.420/13.259/15.099/1.839 ms
Yes it's working. Now let's try to ping con2.
Type:
root@bb1dcc608811:/# ping -c 2 con2
Output will be something like:
ping: con2: Name or service not known
Containers on the default bridge network can only access each other by their IP addresses, unless you use the --link option, which is considered legacy. On a user-defined bridge network, containers can resolve each other by name or alias. That's the main benefit of user defined bridge networks. In addition to that using a user-defined network provides a scoped network in which only containers attached to that network are able to communicate. We'll come to that later.
You can detach from a container and leave it running using the CTRL-p CTRL-q key sequence. Let's type that and detach from the container.
You can connect to and disconnect from networks any time you wish. Let's try this and disconnect "con1" from bridge network.
Type:
$ docker network disconnect bridge con1
Now the con1 is disconnected from bridge network. Attach again to container's shell and check that it's disconnected.
Type:
$ docker attach con1
Output will be something like:
root@bb1dcc608811:/# ifconfig
lo: flags=73<UP,LOOPBACK,RUNNING>  mtu 65536
        inet 127.0.0.1  netmask 255.0.0.0
        loop  txqueuelen 1000  (Local Loopback)
        RX packets 0  bytes 0 (0.0 B)
        RX errors 0  dropped 0  overruns 0  frame 0
        TX packets 0  bytes 0 (0.0 B)
        TX errors 0  dropped 0 overruns 0  carrier 0  collisions 0
As you can see, only the loopback adapter remains. Let's type CTRL-p CTRL-q and detach from the container again. Delete the containers by typing docker container rm -f con1 con2
4: Default networks - Host
Click to expand!
Another network that has been created when Docker starts is "host" network. If you attach a container to the "host" network, that container’s network stack is not isolated from Docker host's network stack (container shares the host’s networking namespace), and the container does not get its own IP-address allocated. Let's create another container and connect it to the host network.
Type:
$ docker container run --rm --network host --name con3 -it ubuntu bash
Output will be something like:
root@docker-desktop:/#
Again we're gonna install ifconfig and ping by typing apt update -y && apt install -y net-tools iputils-ping . When this is done, type ifconfig
Type:
root@docker-desktop:/# ifconfig
Output will be something like:
docker0: flags=4163<UP,BROADCAST,RUNNING,MULTICAST>  mtu 1500
        inet 172.17.0.1  netmask 255.255.0.0  broadcast 172.17.255.255
        inet6 fe80::42:b5ff:fe4d:9a9  prefixlen 64  scopeid 0x20<link>
        ether 02:42:b5:4d:09:a9  txqueuelen 0  (Ethernet)
        RX packets 12681  bytes 525430 (525.4 KB)
        RX errors 0  dropped 0  overruns 0  frame 0
        TX packets 27654  bytes 39770860 (39.7 MB)
        TX errors 0  dropped 0 overruns 0  carrier 0  collisions 0

eth0: flags=4163<UP,BROADCAST,RUNNING,MULTICAST>  mtu 1500
        inet 192.168.65.3  netmask 255.255.255.240  broadcast 192.168.65.15
        inet6 fe80::50:ff:fe00:1  prefixlen 64  scopeid 0x20<link>
        ether 02:50:00:00:00:01  txqueuelen 1000  (Ethernet)
        RX packets 229369  bytes 337542126 (337.5 MB)
        RX errors 0  dropped 0  overruns 0  frame 0
        TX packets 65774  bytes 3733334 (3.7 MB)
        TX errors 0  dropped 0 overruns 0  carrier 0  collisions 0

lo: flags=73<UP,LOOPBACK,RUNNING>  mtu 65536
        inet 127.0.0.1  netmask 255.0.0.0
        inet6 ::1  prefixlen 128  scopeid 0x10<host>
        loop  txqueuelen 1000  (Local Loopback)
        RX packets 1251  bytes 75612 (75.6 KB)
        RX errors 0  dropped 0  overruns 0  frame 0
        TX packets 1251  bytes 75612 (75.6 KB)
        TX errors 0  dropped 0 overruns 0  carrier 0  collisions 0

veth9f4c8b5: flags=4163<UP,BROADCAST,RUNNING,MULTICAST>  mtu 1500
        inet6 fe80::40f7:4eff:feb1:3cc1  prefixlen 64  scopeid 0x20<link>
        ether 42:f7:4e:b1:3c:c1  txqueuelen 0  (Ethernet)
        RX packets 5290  bytes 291759 (291.7 KB)
        RX errors 0  dropped 0  overruns 0  frame 0
        TX packets 10508  bytes 15222922 (15.2 MB)
        TX errors 0  dropped 0 overruns 0  carrier 0  collisions 0
Check the eth0 adapter. It's exactly the same adapter that the host has. So there isn't any network isolation. Container is running like a process on the host and uses network infrastructure of the host without any bridge or something like that in the middle. Type exit and close the connection. Container will be automatically deleted.
5: Default networks - None
Click to expand!
If you want to disable networking stack completely on a container, you can use --network none flag. Within the container, only the loopback device will be created. Let's try that.
Type:
$ docker container run --rm -it --network none alpine ash
Output will be something like:
/ #
Type:
/ # ip link show
Output will be something like:
1: lo: <LOOPBACK,UP,LOWER_UP> mtu 65536 qdisc noqueue state UNKNOWN qlen 1000
    link/loopback 00:00:00:00:00:00 brd 00:00:00:00:00:00
2: sit0@NONE: <NOARP> mtu 1480 qdisc noop state DOWN qlen 1000
    link/sit 0.0.0.0 brd 0.0.0.0
As you can see, there isn't any eth device that has been created. This container can't communicate with any endpoint. Type exit, the container will be automatically deleted.
6: User-defined bridge network
Click to expand!
All containers without a --network specified are connected to the default bridge network. This can be a risk, as unrelated stacks/services/containers are then able to communicate. Using a user-defined network provides a scoped network in which only containers attached to that network are able to communicate.
If your containers use the default bridge network, you can configure it, but all the containers use the same settings, such as MTU and iptables rules. In addition, configuring the default bridge network happens outside of Docker itself, and requires a restart of Docker. User-defined bridge networks are created by using docker network create command. If different groups of applications have different network requirements, you can configure each user-defined bridge network separately while creating them. Containers connected to the same user-defined bridge network effectively expose all ports to each other. For a port to be accessible to containers or non-Docker hosts on different networks, that port must be published using the -p or --publish flag which we will come later. For now let's create our first user-defined bridge network.
Type:
$ docker network create first_network
Output will be something like:
6bb87b6c22ea7dceee3cf87367aee2bd9045c1f255d98c4c01cac00ab6478d13
It has been created. Now it's time to check and see its details.
Type:
$ docker network ls
Output will be something like:
NETWORK ID          NAME                DRIVER              SCOPE
0a63e660c39f        bridge              bridge              local
6bb87b6c22ea        first_network       bridge              local
a4c8780d68f4        host                host                local
3f2520a5781c        none                null                local
Type:
$ docker network inspect first_network
Output will be something like:
[
    {
        "Name": "first_network",
        "Id": "6bb87b6c22ea7dceee3cf87367aee2bd9045c1f255d98c4c01cac00ab6478d13",
        "Created": "2020-08-05T12:12:44.2681958Z",
        "Scope": "local",
        "Driver": "bridge",
        "EnableIPv6": false,
        "IPAM": {
            "Driver": "default",
            "Options": {},
            "Config": [
                {
                    "Subnet": "172.18.0.0/16",
                    "Gateway": "172.18.0.1"
                }
            ]
        },
        "Internal": false,
        "Attachable": false,
        "Ingress": false,
        "ConfigFrom": {
            "Network": ""
        },
        "ConfigOnly": false,
        "Containers": {},
        "Options": {},
        "Labels": {}
    }
]
Again, I want you to notice the Gateway and Subnet section of this output. We've created a user-defined bridge network. We didn't specify any subnet option. That is why it got the next ip block after default bridge network. So subnet is "172.18.0.0/16". If we create another one, it will get "172.19.0.0/16" and this goes on like that. Let's create 2 containers again and connect them to this newly created network.
Type:
$ docker container run -dit --rm --name web --network first_network busybox sh
Output will be something like:
ad1a7086a97b8ea6acbf203a7df2b17c1d276ffb46464a79b439208a527380e7
Type:
$ docker container run -dit --rm --name database --network first_network busybox sh
Output will be something like:
2e93b1d08ac6f35043e417e3e15116ca7100f85020d59b24107805580417ef3b
2 containers have been created and connected to the first_network. As said before, user-defined bridge networks allow containers to resolve each other's name. We're gonna do that now.
Type:
$ docker attach web
Output will be something like:
/ #
We're connected to "web" container. Let's try to ping "database" container by its name.
Type:
$ ping -c 4 database
Output will be something like:
PING database (172.18.0.3): 56 data bytes
64 bytes from 172.18.0.3: seq=0 ttl=64 time=0.104 ms
64 bytes from 172.18.0.3: seq=1 ttl=64 time=0.117 ms
64 bytes from 172.18.0.3: seq=2 ttl=64 time=0.158 ms
64 bytes from 172.18.0.3: seq=3 ttl=64 time=0.069 ms

--- database ping statistics ---
4 packets transmitted, 4 packets received, 0% packet loss
round-trip min/avg/max = 0.069/0.112/0.158 ms
As you can see, containers that are connected to the same user-defined bridge network can communicate with each other and resolve each other's name. But let's try to create another container on the default bridge network and try to access this container.
Open a second terminal window. Type:
$ docker container run -it --rm --name test busybox sh
Output will be something like:
/ #
"test" container has been created and you're connected to its shell. Try to ping "database" container by its name and ip address.
/ # ping database
ping: bad address 'database'
/ # ping -c 4 172.18.0.3
PING 172.18.0.3 (172.18.0.3): 56 data bytes

--- 172.18.0.3 ping statistics ---
4 packets transmitted, 0 packets received, 100% packet loss
/ #
You shouldn't have been able to neither resolve its name nor access to this container by its ip address. Containers that are running on different networks can't communicate with each other without exposed ports. Only the containers that are running on the same network can communicate with each other and if they are running on the same user-defined bridge network, they can resolve each other's name too. Close this connection by typing exit and delete other containers too by typing docker container rm -f web database
As the last part of this exercise, let's create a second bridge network but this time we're gonna specify the subnet and ip ranges.
Type:
$ docker network create --driver=bridge --subnet=10.10.0.0/16 --ip-range=10.10.10.0/24 --gateway=10.10.10.10 second_network
Output will be something like:
34d051989f2a578ba704d5b8019db59fd195a6ba96d53bfd6ceaa7195a854f5b
Type:
$ docker network ls
Output will be something like:
NETWORK ID          NAME                DRIVER              SCOPE
0a63e660c39f        bridge              bridge              local
6bb87b6c22ea        first_network       bridge              local
a4c8780d68f4        host                host                local
3f2520a5781c        none                null                local
34d051989f2a        second_network      bridge              local
7: Port publishing
Click to expand!
By default, when you create a container, it does not publish any of its ports to outside world. To make a port available to clients outside the Docker, or to Docker containers which are not connected to the same network, we use --publish or -p flags. This creates a firewall rule which maps a container port to a port on the Docker host. Any package that reaches to that port on the host will be forwarded to the port that listens on the container. So you can access to services inside the container from outside. Also containers which are not connected to the container’s network can reach this container via that published port. Let's try this. We're gonna create 2 containers connected to 2 different networks. First one will be "web" and will be published TCP Port 80. Other one is just a busybox container that we'll try to connect to "web" container.
Type:
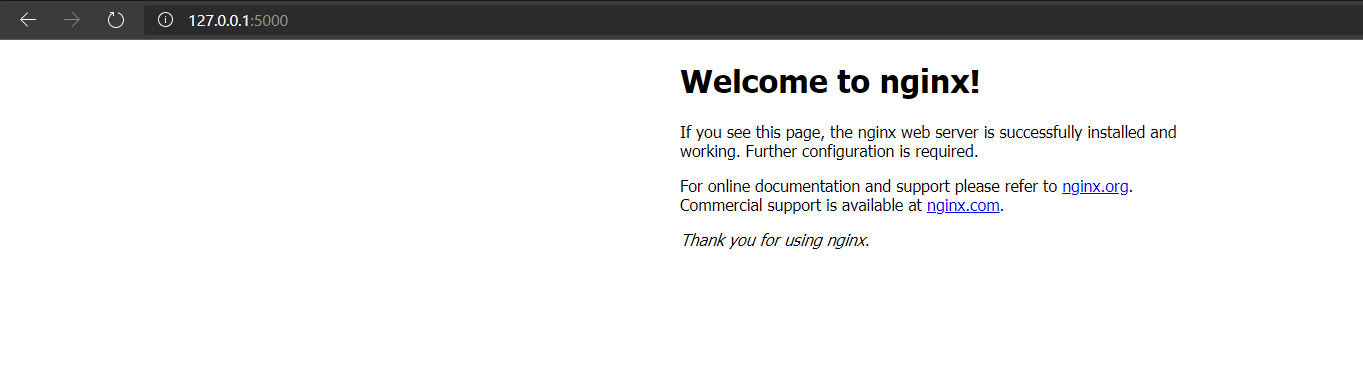
$ docker container run -d --name webserver --network first_network -p 5000:80 nginx
Output will be something like:
d20a67de0c86993f07dbc0774a883e5d6414693b5fdd9f2b183426bf4a5835c3
If you open a browser on your computer and visit 127.0.0.1:5000, you will reach to the web daemon which is running inside the container. Somehow, we mapped host's TCP 5000 to containers TCP 80.
Now, let's create a second container and connect that to the second_network and try to reach webserver. But first let's get webserver's ip address. Type docker container inspect webserver and check Ip address section. In my case it's "IPAddress": "172.18.0.4". Ok, we are now ready to create the second container.
Type:
$ docker container run --rm -it --name test_container --network second_network centos sh
Output will be something like:
sh-4.4#
Let's try to reach webserver. We're gonna use curl and try to access 172.18.0.4:80.
Type:
$ sh-4.4# curl 172.18.0.4:80
Output will be something like:
curl: (7) Failed to connect to 172.18.0.4 port 80: Connection timed out
We got a "connection time-out" message. Because we were trying to reach a container which is connected to another network. Remember that, containers that are running on different networks can't communicate with each other. Instead of that, if we try to reach 172.18.0.1 "which is the gateway of the first_network" on port 5000 we can reach to the container. Because, we have exposed that port.
Type:
$ sh-4.4# curl 172.18.0.1:5000
Output will be something like:
<!DOCTYPE html>
<html>
<head>
<title>Welcome to nginx!</title>
<style>
    body {
        width: 35em;
        margin: 0 auto;
        font-family: Tahoma, Verdana, Arial, sans-serif;
    }
</style>
</head>
<body>
<h1>Welcome to nginx!</h1>
<p>If you see this page, the nginx web server is successfully installed and
working. Further configuration is required.</p>

<p>For online documentation and support please refer to
<a href="http://nginx.org/">nginx.org</a>.<br/>
Commercial support is available at
<a href="http://nginx.com/">nginx.com</a>.</p>

<p><em>Thank you for using nginx.</em></p>
</body>
</html>
Type exit and container will be automatically deleted.
P.S. -p 8080:80/udp you can also expose udp ports like that.
Let's delete other containers and networks that we've created so far.
Type:
$ docker container rm -f webserver database
Type:
$ docker network rm first_network second_network
# Wrap up
Congratulations you have completed the Docker Objects challenge and learned how to create and manage Docker Volume and Network objects.
*** Reference: https://docs.docker.com