# Challenge 2: Container 101
# Here is what you'll learn
- Checking container logs
- Listing running processes inside container
- Checking container's resource usage
- Limiting container's cpu and memory usage
- Setting environment variables
In this challenge, we're gonna go a little bit deeper and learn how to use native Docker commands to play with containers without connecting them.
# Exercises
1: First let's create a couple of containers
Click to expand!
Open your terminal and type:
$ docker container run -d --name con1 -p 80:80 nginx
Output will be something like:
501ff8e64847a6ac9510761f42a3c1ebe2aee20f0e3e78752d04056eb941a8c1
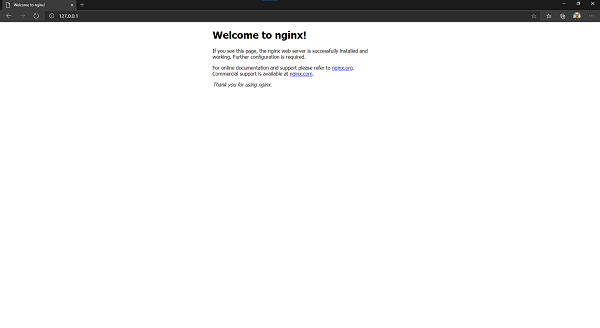
We have created a container called con1 with -d option from the image nginx:latest. As you remember, -d means run it in background. Nginx is an open source reverse proxy-webserver daemon. When you create a container from that image, nginx webserver daemon runs and starts to listen on tcp port 80. Nginx is a service, not one time application, so when it starts, it continues to run. Hence, the container is up and running too. With -p 80:80 option, we instructed to Docker that we want to forward host's TCP 80 port to container's TCP 80 port. Any request that reaches to host's 80 port will be forwarded to the container. If you open a web browser on the host and type http://127.0.0.1, you'll access the website running inside this container. We'll come to network details later.
Now let's keep this container as is and create another one. This time we're gonna create a task container. One time application will start when container will start, it will do its own thing and close, so the container will close too. We're gonna run this container detached too.
Type:
$ docker run -d --name con2 chuanwen/cowsay
Output will be something like:
Unable to find image 'chuanwen/cowsay:latest' locally
latest: Pulling from chuanwen/cowsay
99ad4e3ced4d: Pull complete
ec5a723f4e2a: Pull complete
2a175e11567c: Pull complete
8d26426e95e0: Pull complete
46e451596b7c: Pull complete
c337767f8c73: Pull complete
Digest: sha256:1f7a652a47fe7311c7e201644d44682e11e7ae4d3d7b03c1ce5c0df164de205c
Status: Downloaded newer image for chuanwen/cowsay:latest
385b768034d531ca050b0334f359cc29cfa3077d479a143634fe23b1acf4c55e
We've created 2 containers named con1 and con2. Con1 is still running but con2 is exited because the running process inside the container has done its job and exited. Let's check them.
Type:
$ docker ps -a
Output will be something like:
CONTAINER ID        IMAGE               COMMAND                  CREATED             STATUS                    PORTS                NAMES
385b768034d5        chuanwen/cowsay     "/bin/sh -c '/usr/ga…"   11 hours ago        Exited (0) 1 hour ago                        con2
501ff8e64847        nginx               "/docker-entrypoint.…"   11 hours ago        Up 1 hour               0.0.0.0:80->80/tcp   con1
Don't delete these containers now, we need them on the next exercise.
2: Docker logs
Click to expand!
We've created 2 containers a few minutes ago. We've created them with -d option which allowed us to run them in the background. But therefore, we couldn't see any messages or logs generated by these containers. Now it's time to see what's going on. Let start with con2 and the command that we will use is docker logs
Type:
$ docker logs con2
Output will be something like:
 ________________________________________
/ No one so thoroughly appreciates the   \
| value of constructive criticism as the |
| one who's giving it.                   |
|                                        |
\ -- Hal Chadwick                        /
 ----------------------------------------
        \   ^__^
         \  (oo)\_______
            (__)\       )\/\
                ||----w |
                ||     ||
The cow said some wise things 😃 But, when did it say these? To learn that, we can use -t option, which also adds timestamps to each generated log line.
Type:
$ docker logs -t con2
Output will be something like:
2020-06-03T00:46:16.592712600Z  ________________________________________
2020-06-03T00:46:16.592752800Z / No one so thoroughly appreciates the   \
2020-06-03T00:46:16.592755800Z | value of constructive criticism as the |
2020-06-03T00:46:16.592757700Z | one who's giving it.                   |
2020-06-03T00:46:16.592759500Z |                                        |
2020-06-03T00:46:16.592761300Z \ -- Hal Chadwick                        /
2020-06-03T00:46:16.592763200Z  ----------------------------------------
2020-06-03T00:46:16.592765200Z         \   ^__^
2020-06-03T00:46:16.592767200Z          \  (oo)\_______
2020-06-03T00:46:16.592769100Z             (__)\       )\/\
2020-06-03T00:46:16.592771100Z                 ||----w |
2020-06-03T00:46:16.592773000Z                 ||     ||
What if this was a long log and we just wanted to see the last couple of lines instead of the whole log output? We can use --tail option for that.
Type:
$ docker logs --tail 5 con2
Output will be something like:
        \   ^__^
         \  (oo)\_______
            (__)\       )\/\
                ||----w |
                ||     ||
Let's start playing with con1. Con1 is a nginx web daemon and it's running at the moment. Sometimes you want to check the logs live, while things are happening. To be able to do that, we can use -f option. This allows us to attach to the log and follow it in real time. First;
Type:
$ docker logs -f con1
Output will be something like:
/docker-entrypoint.sh: /docker-entrypoint.d/ is not empty, will attempt to perform configuration
/docker-entrypoint.sh: Looking for shell scripts in /docker-entrypoint.d/
/docker-entrypoint.sh: Launching /docker-entrypoint.d/10-listen-on-ipv6-by-default.sh
10-listen-on-ipv6-by-default.sh: Getting the checksum of /etc/nginx/conf.d/default.conf
10-listen-on-ipv6-by-default.sh: Enabled listen on IPv6 in /etc/nginx/conf.d/default.conf
/docker-entrypoint.sh: Launching /docker-entrypoint.d/20-envsubst-on-templates.sh
/docker-entrypoint.sh: Configuration complete; ready for start up
172.17.0.1 - - [03/Aug/2020:00:54:51 +0000] "GET / HTTP/1.1" 200 612 "-" "Mozilla/5.0 (Windows NT 10.0; Win64; x64) AppleWebKit/537.36 (KHTML, like Gecko) Chrome/84.0.4147.105 Safari/537.36 Edg/84.0.522.50" "-"
2020/06/03 00:54:51 [error] 28#28: *1 open() "/usr/share/nginx/html/favicon.ico" failed (2: No such file or directory), client: 172.17.0.1, server: localhost, request: "GET /favicon.ico HTTP/1.1", host: "127.0.0.1", referrer: "http://127.0.0.1/"
172.17.0.1 - - [03/Jun/2020:00:54:51 +0000] "GET /favicon.ico HTTP/1.1" 404 555 "http://127.0.0.1/" "Mozilla/5.0 (Windows NT 10.0; Win64; x64) AppleWebKit/537.36 (KHTML, like Gecko) Chrome/84.0.4147.105 Safari/537.36 Edg/84.0.522.50" "-"
172.17.0.1 - - [03/Jun/2020:10:45:47 +0000] "GET / HTTP/1.1" 304 0 "-" "Mozilla/5.0 (Windows NT 10.0; Win64; x64) AppleWebKit/537.36 (KHTML, like Gecko) Chrome/84.0.4147.105 Safari/537.36 Edg/84.0.522.50" "-"
Now we're attached to the log. Open a browser and visit http://127.0.0.1 and refresh the page a couple of times. Then turn back to terminal and you'll see new logs generated. You can follow them in real time. You can cut the connection to the log by typing CTRL + C when you're done.
3: Docker top and stats
Click to expand!
In this exercise, we'll take a look at docker stats and docker top commands. First let's get started with docker top. This command allows us to check which processes are running in a container. It's equivilant of ps Linux command but you don't need connect to execute this. Instead of that you can get the same result with docker top. Let's try it on con1, which is still running.
Type:
$ docker top con1
Output will be something like:
PID                 USER                TIME                COMMAND
2345                root                0:00                nginx: master process nginx -g daemon off;
2404                101                 0:00                nginx: worker process
But if you execute the same command for con2 you're gonna get an error because con2 is not up and running at the moment.
Type:
$ docker top con2
Output will be something like:
Error response from daemon: Container 385b768034d531ca050b0334f359cc29cfa3077d479a143634fe23b1acf4c55e is not running
That was how we can see running processes in the container. Now it's time to check container's resource usage. For that, we're gonna use docker stats command. If you type docker stats without any option, it'll start showing all the running containers' resource usage stats. But you can also just check single container's resource usage by adding container name or id to the command, something like docker stats con1. Let's try that.
Type:
$ docker stats con1
Output will be something like:
CONTAINER ID        NAME                CPU %               MEM USAGE / LIMIT     MEM %               NET I/O             BLOCK I/O           PIDS
501ff8e64847        con1                0.00%               3.918MiB / 7.574GiB   0.05%               8.9kB / 5.27kB      0B / 0B             2
CTRL + C will allow you to turn back to terminal from this view.
4: CPU and Memory consumption limits
Click to expand!
It isn't wise to run any container on any production system without limiting its cpu and memory usage. If we don't limit container's memory and cpu usage, due to a faulty process or load, the container may start using all the system resources of the host where it's running. This means that all the other containers and processes on that node would crash. Docker allows us to limit any container's memory and cpu usage. Memory part is relatively easy. You can specify maximum amount of ram that container can access. For example --memory=512M option dedicates 512 Megabyte of Ram. Memory option takes a positive integer, followed by a suffix of b, k, m, g, to indicate bytes, kilobytes, megabytes, or gigabytes. Also you can use --memory-swap option to set the amount of memory this container is allowed to swap to disk. Let's try to create a new container with restricted memory.
Type:
$ docker container run -d --memory=512M --name con3 nginx
Output will be something like:
9d9980bc1ba2dcbc72d30a1b62b4c69c9f0ba1c745a6ba7a098a1a9811068742
You may use docker stats con3 command to see that container started with limited memory.

As said, memory is relatively easy. Actually limiting the cpu is also easy but there isn't something like "just access to 200 Mhz of the CPU" 😃. Cpu limits are not the same as memory limits. You can't specify the amount of CPU power. Instead of that, you can only specify which cpu core that container can access or not. If you don't specify that, by default, any container can access to all cpu cores of the host. –cpus option allows us to limit maximum number of cores that container can access. For example, –cpus=“3” means that container can only access 3 cpu cores of the host. There is another option which is --cpuset-cpus=. This allows us to restrict the container to specific cpu cores. For example, --cpuset-cpus=“1,3” means that container can only use core number 1 and core number 3 on that host. Let's try these and create 2 new containers with limited cpu.
Type:
$ docker container run -d --cpus="3" --name con4 nginx
Output will be something like:
fba14e8a88ffa8f85ed904dd72901fd30da80bb9fe47bcac0ff4a4d44f385cfe
Type:
$ docker container run -d --cpuset-cpus="1,3" --name con5 nginx
Output will be something like:
2f1e7477a628c8ae3084166759987ead5456641451a03450cd7fcbcb1004afb9
5: Environment Variables
Click to expand!
An environment variable is a dynamic-named value that can affect the way running processes will behave on a computer. They are part of the environment in which a process runs. For example, a running process can query the value of the TEMP environment variable to discover a suitable location to store temporary files, or the HOME or USERPROFILE variable to find the directory structure owned by the user running the process. *Wikipedia
Docker allows us to set environment variables in containers while creating them. There are 2 ways to set environment variables in a container. First one is --env option. Type --env and after that set the key=value. This creates the key as an environment variable and sets the value as its value. You can use multiple --env options to set multiple environment variables. But if you need to set long list of environment variables, you may create a file and put all the key=value pairs in it and use --env-file option to set all of these environment variables as bulk. It's now time to try that. First, we're gonna create a new container from ubuntu image. While doing that, we'll set couple of enviroment variables. And instead of the default application, we're gonna instruct to run printenv command and this will list all the enviroment variables of this container.
Type:
$ docker container run --name env_test1 --env KEY1=value --env name=test --env database_server=test.contoso.com ubuntu printenv
Output will be something like:
PATH=/usr/local/sbin:/usr/local/bin:/usr/sbin:/usr/bin:/sbin:/bin
HOSTNAME=7d4d2c92c617
KEY1=value
name=test
database_server=test.contoso.com
HOME=/root
We've created a new container named env_test and set 3 new enviroment variables. But instead of setting these one by one, we could create a file and put all the key=value pairs in it and use --env-file option to set all of these environment variables as bulk. Let's try that. First create a file named env.list and put these enviroment variables in it line by line and save the file.
KEY1=value
name=test
database_server=test.contoso.com
Open the terminal and cd to folder where you saved this file.
Type:
$ docker container run --name env_test2 --env-file env.list ubuntu printenv
Output will be something like:
PATH=/usr/local/sbin:/usr/local/bin:/usr/sbin:/usr/bin:/sbin:/bin
HOSTNAME=070f264ef277
KEY1=value
name=test
database_server=test.contoso.com
HOME=/root
Let's delete the containers that have been created so far
Type:
$ docker container rm -f con1 con2 con3 con4 con5 env_test1 env_test2
Output will be something like:
con1
con2
con3
con4
con5
env_test1
env_test2
# Wrap up
Congratulations you have completed the Container 101 challenge and learned a couple of very essential Docker commands.
*** Reference: https://docs.docker.com