# Challenge 0: Request an ID Token from Azure AD
# Here is what you will learn 🎯
- How to register an application in Azure AD
- How to use the OpenIDConnect protocol to authenticate users
- How to receive an id_token with basic profile information of the authenticated user
Here is an high-level overview of the authentication process:
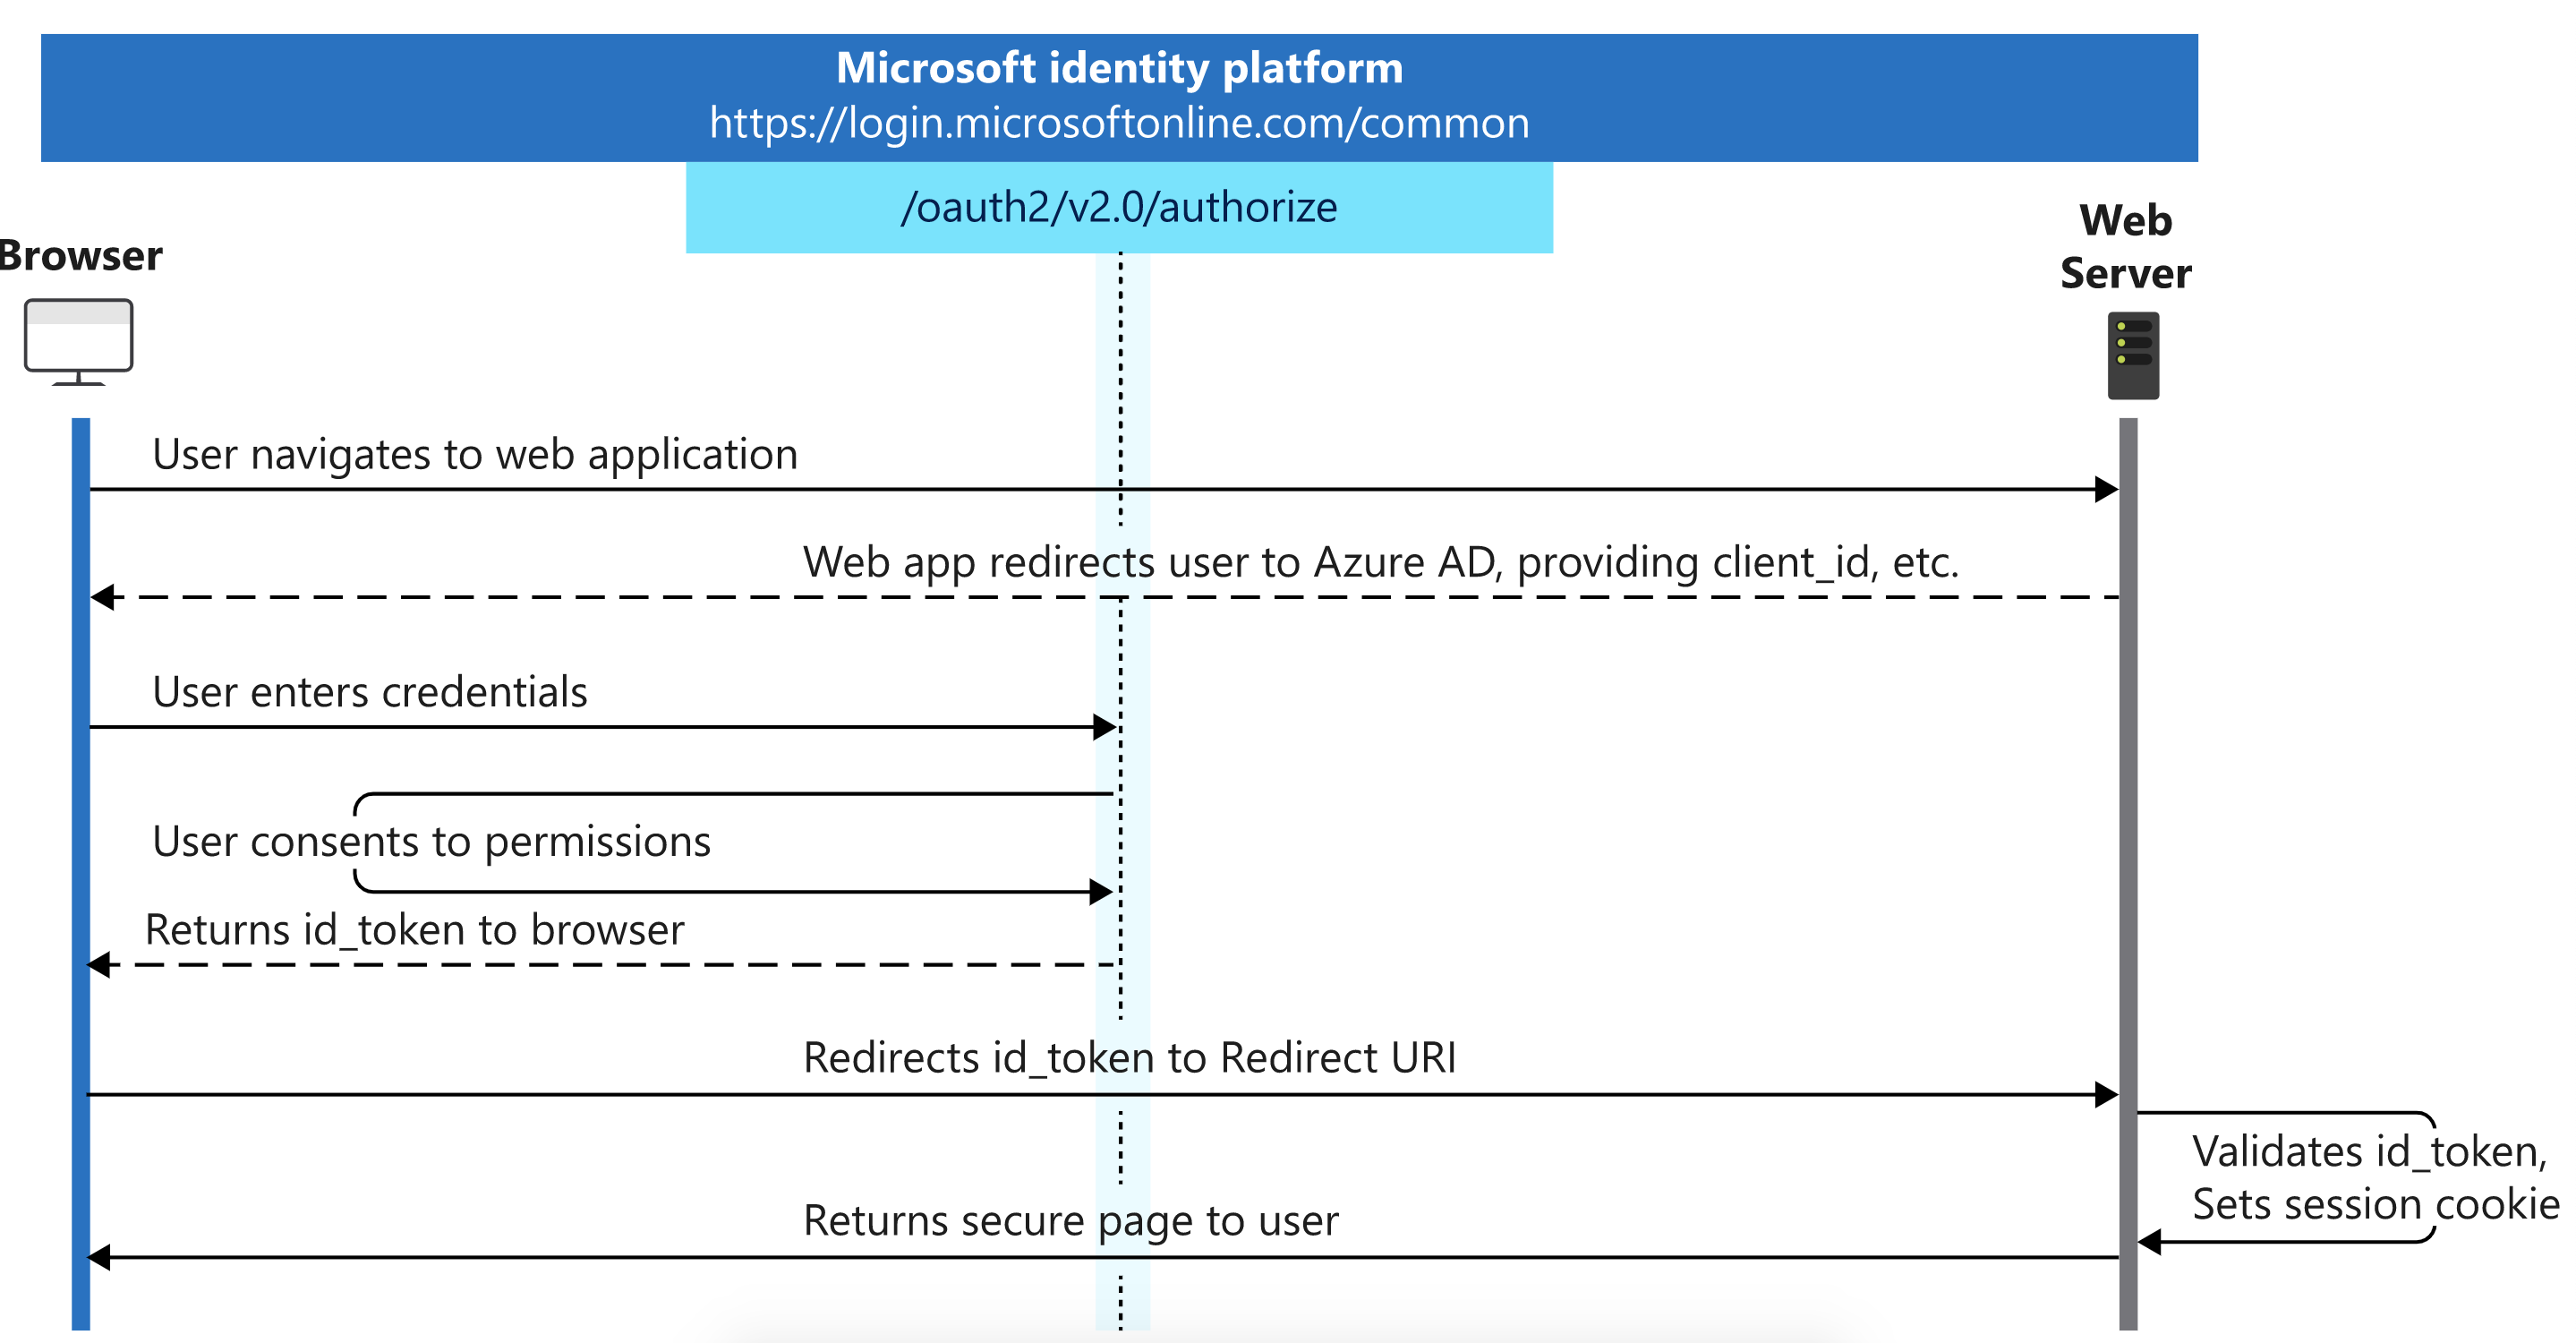
In short:
- We show the user a sign-in button
- The sign-in button forwards to the
.../oauth2/v2.0/authorizeURL, including the ID of our application and the ID of our AAD tenant - The user logs in and consents to letting us access his or her profile
- Our AAD tenants forwards us to the callback URL and includes an
id_token, which contains basic profile information of the user in form of a JWT (JSON Web Token) - Lastly, we could validate the returned
id_tokenusing its signature (not shown here, most libraries do this for us)
# Table Of Contents
- Create an Azure AD Application
- Run the Token Echo Server
- Create an Authentication Request
- Wrap-Up
- Cleanup
# Create an Azure AD Application
Before we can authenticate a user we have to register an application in our Azure AD tenant.
# Azure CLI
az ad app create --display-name challengeidtokencli --reply-urls http://localhost:5001/api/tokenecho --identifier-uris https://challengeidtoken
TIP
📝 The IdentifierUri needs to be unique within an instance of AAD.
Retrieve the ID of your current Azure AD tenant via:
az account show
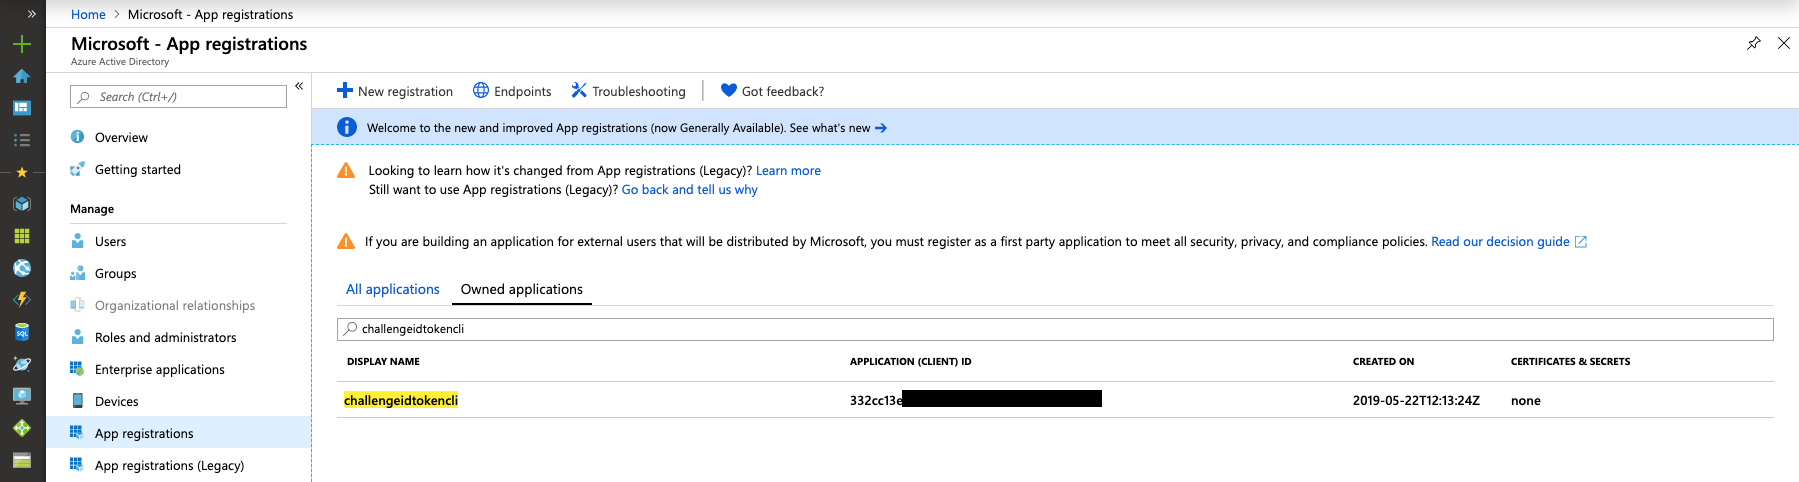
# Viewing your ApplicationId
Note down the appId value in the response - this is the id under which your AAD application has been registered. In the Azure Portal, we can see your new app registration under AAD --> App Registrations --> Owned applications:
# Run the Token Echo Server
Open another shell and run the Token Echo Server from day5/apps/token-echo-server in this repository. This helper ASP.NET Core tool is used to echo the token issued by your AAD and "simulates" our website or server backend that would receive the id_token.
The tool is listening on port 5001 on your local machine. Tokens are accepted on the route http://localhost:5001/api/tokenecho. This is why we initially registered an AAD application with a reply url pointing to http://localhost:5001/api/tokenecho.
dotnet run
# Create an Authentication Request
Replace TENANT_ID with your AAD Tenant Id and APPLICATION_ID with your Application Id. Open a browser and paste the modified request.
https://login.microsoftonline.com/TENANT_ID/oauth2/v2.0/authorize?
client_id=APPLICATION_ID
&response_type=id_token
&redirect_uri=http%3A%2F%2Flocalhost%3A5001%2Fapi%2Ftokenecho
&response_mode=form_post
&scope=openid%20profile
&nonce=1234
For explanation:
openidscope allows the user to sign inprofilescope allows us to read the basic profile information of the user.
Copy the id_token value from your browser output, go to https://jwt.ms (opens new window) and paste the token. Take a minute and have a look at the decoded token.
TIP
📝 If you need further information about the issued claims take a look here (opens new window).
# Wrap-Up
This challenge showed how to create a new application in AAD and how user can be authenticated using the Open ID Connect protocol. The full process is described here (opens new window).
# Cleanup
Remove the created resources via the Azure CLI:
az ad app delete --id <applicationid>