# Challenge 9: Networking - Connect Two Virtual Networks Using Azure VNET Peering
# Here is what you will learn 🎯
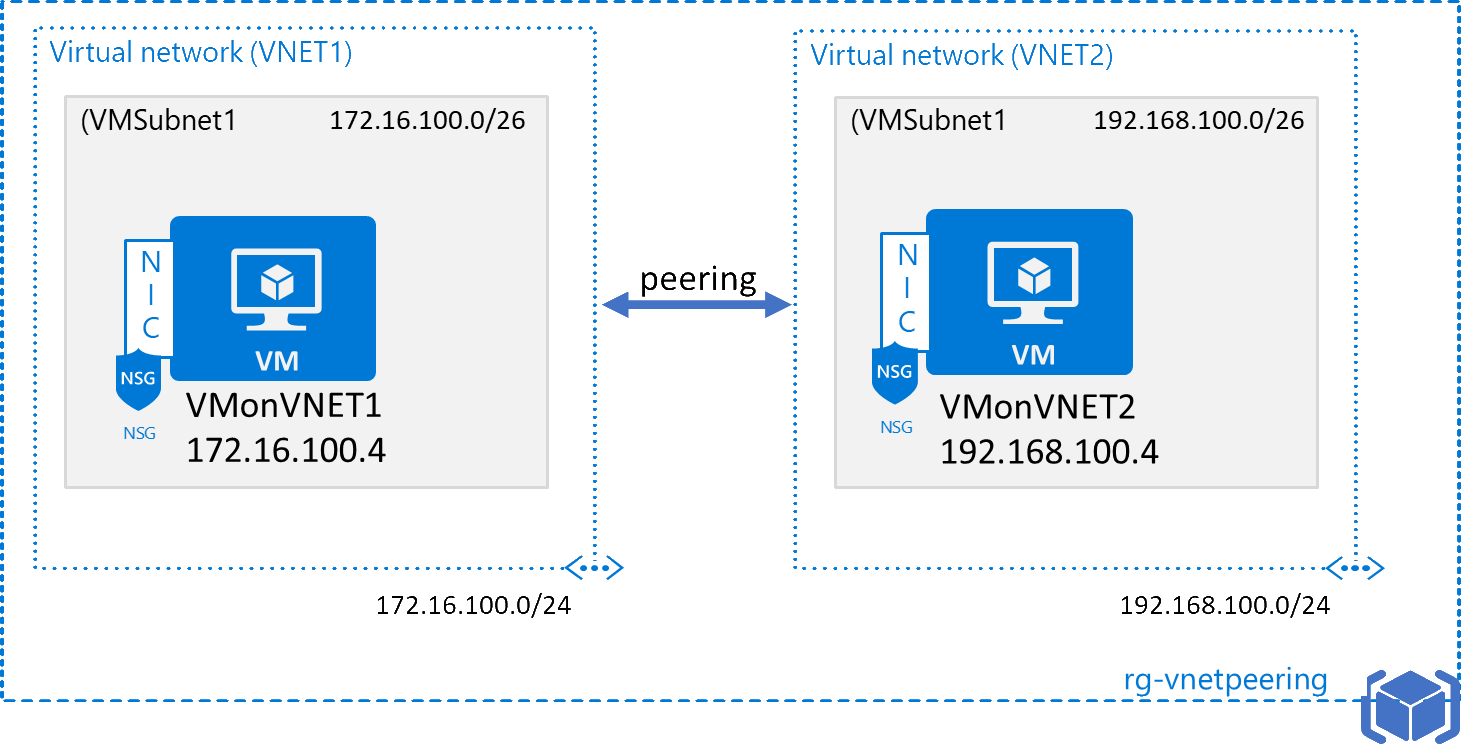
How to connect 2 virtual networks with Azure VNET Peering. Our final architecture should look like this:
At first you will deploy the start environment and then you will implement the peering.
# Table of Contents
# Deploy the Starting Point
In this directory there is an ARM-template which 2 virtual networks and 2 VMs and its requirements (networking, disks,...):
Deploy this scenario into your subscription by clicking on the
 button.
| Name | Value |
|---|---|
| Resource group | (new) rg-VNETPeering |
| Location | West Europe |
| Admin user | demouser |
| Admin password | %some complex value% |
| Vm Size | Standard_B2s or try e.g. Standard_F2s_v2 |
| Disk Sku | StandardSSD_LRS |
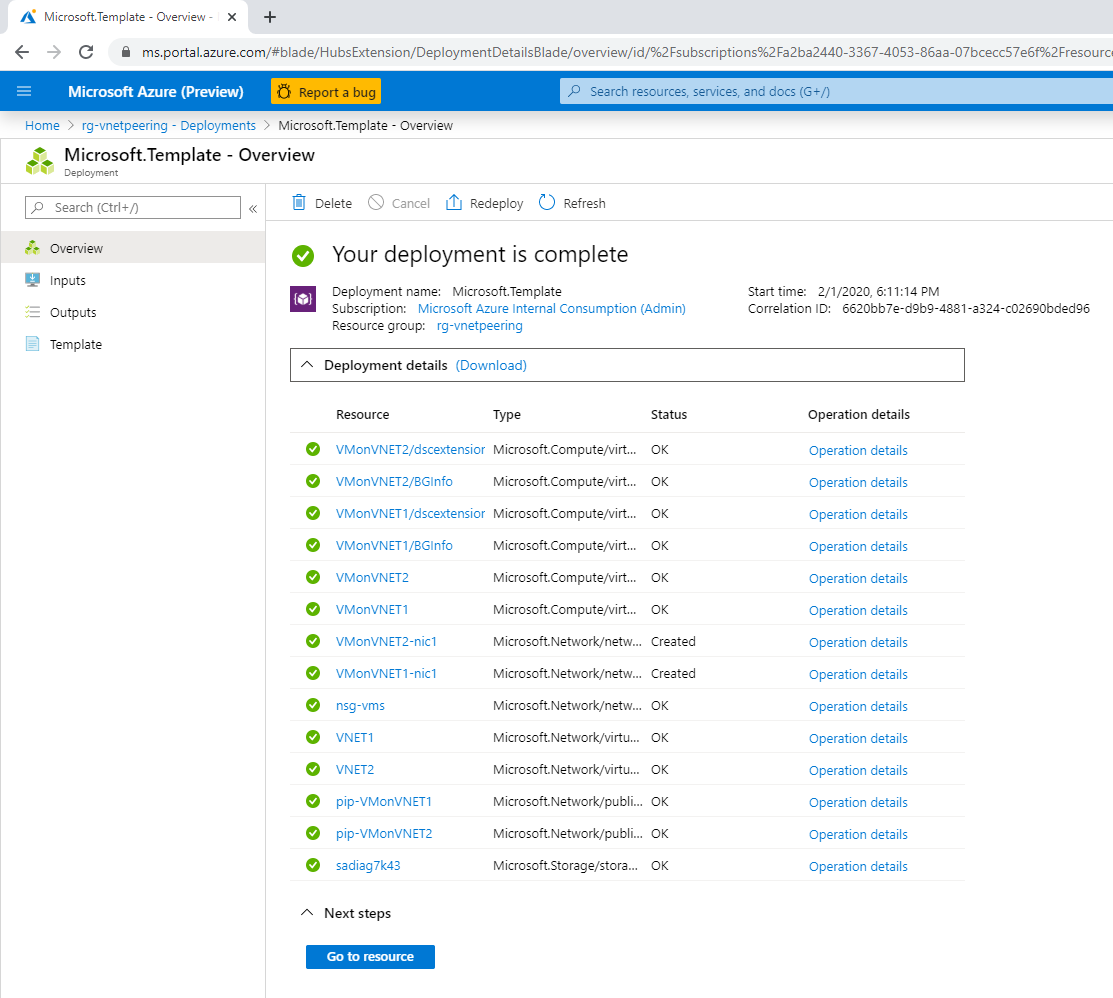
The result should look similar to this:
# Implement the VNET peering
You need to create the peerings on each virtual network:
- VNET1 ---> VNET2
- VNET2 ---> VNET1
The wizard in the portal is smart enough to let create 2 peerings in a single step. Select e.g. VNET1 as starting point:
[Azure Portal]
-> Resource Groups
-> "rg-VNETPeering"
-> "VNET1"
-> Peerings -> Add
| Name | Value |
|---|---|
| This virtual network (Peering link name) | VNET1-to-VNET2 |
| Virtual Network (to peer with) | VNET2 |
| Remote virtual network (Peering link name) | VNET2-to-VNET1 |

# Check if the peering works
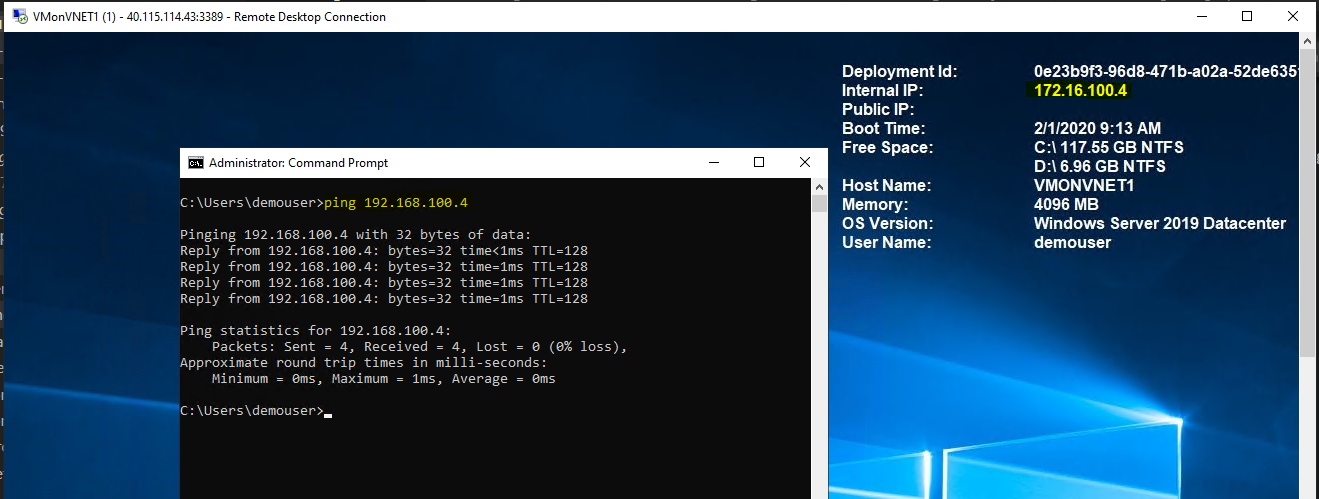
- Connect to one VM through RDP using its public ip address: e.g. VMonVNET1 through
[Azure Portal]
-> Virtual Machines
-> "VMonVNET1"
-> Connect
| User | Password |
|---|---|
| demouser | %your deployment password% |
- Open a command prompt and ping the other VM using its internal IP: In our case VMonVNET2 - should be 192.168.100.4:
# Cleanup
Delete the resource group rg-VNETPeering